This tutorial guides you through connecting ClickFunnels with Outranker AI to enable seamless integration.
Go to www.outranker.com
1. Introduction
"In this video, you’ll learn how to connect ClickFunnels with Outranker AI. We’ll go step by step through the full setup, including creating the ClickFunnels app, adding your credentials in Outranker, and finishing the authorization so both platforms can work together smoothly."
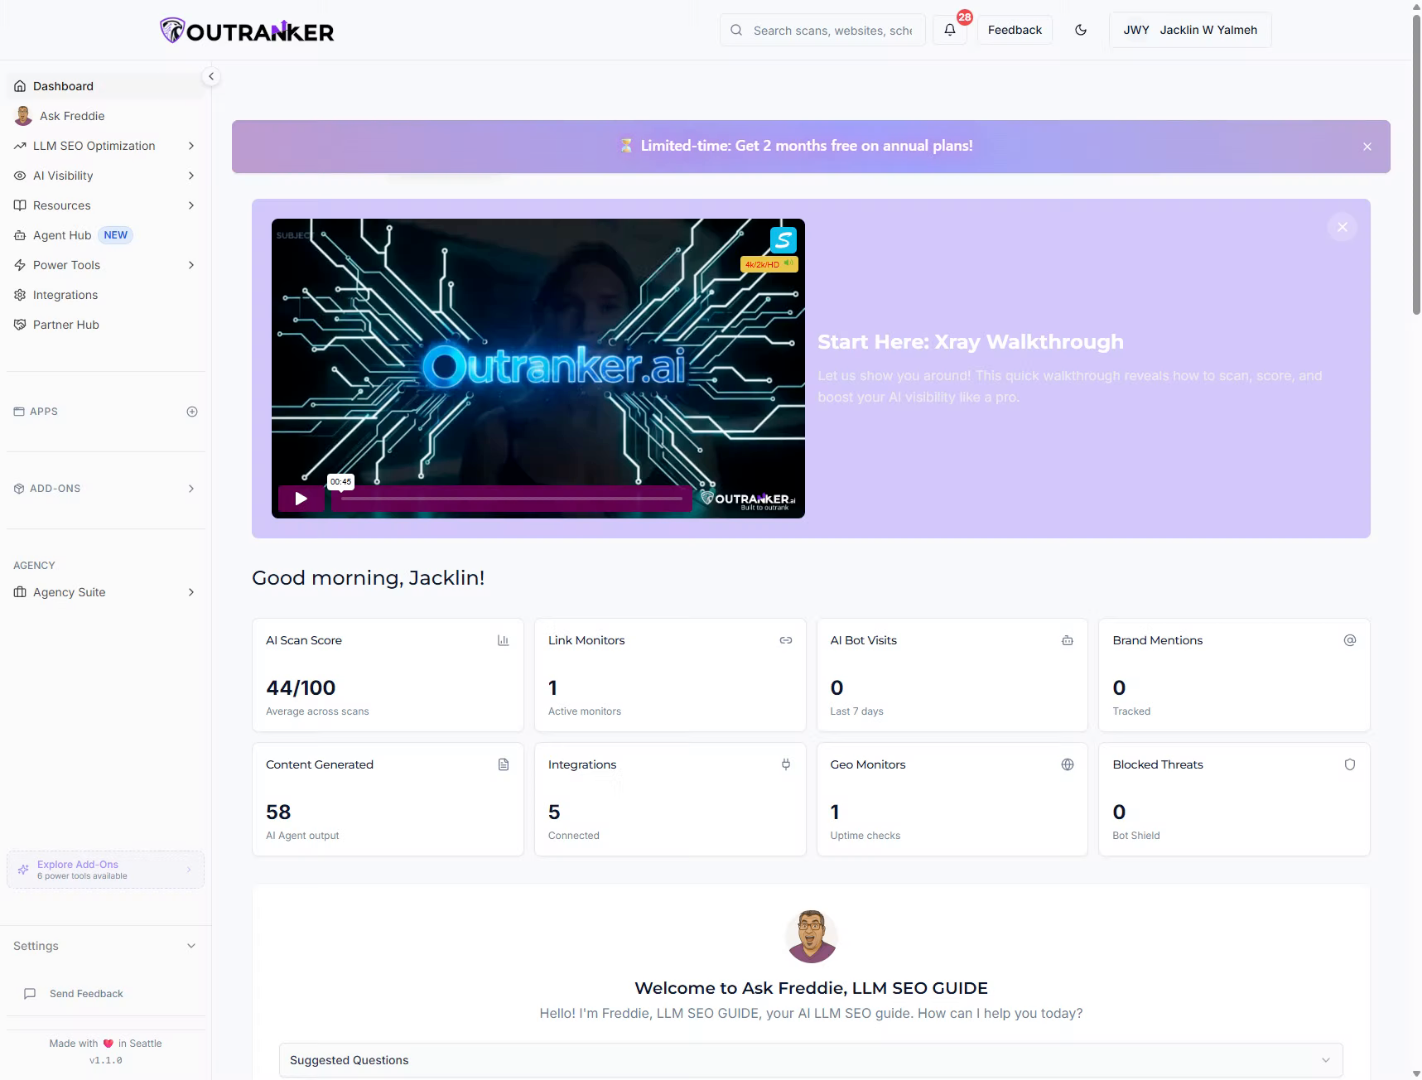
2. Access Integrations Section
"Start by signing in to Outranker AI. From the left-side menu, click Integrations to open your available platform connections."
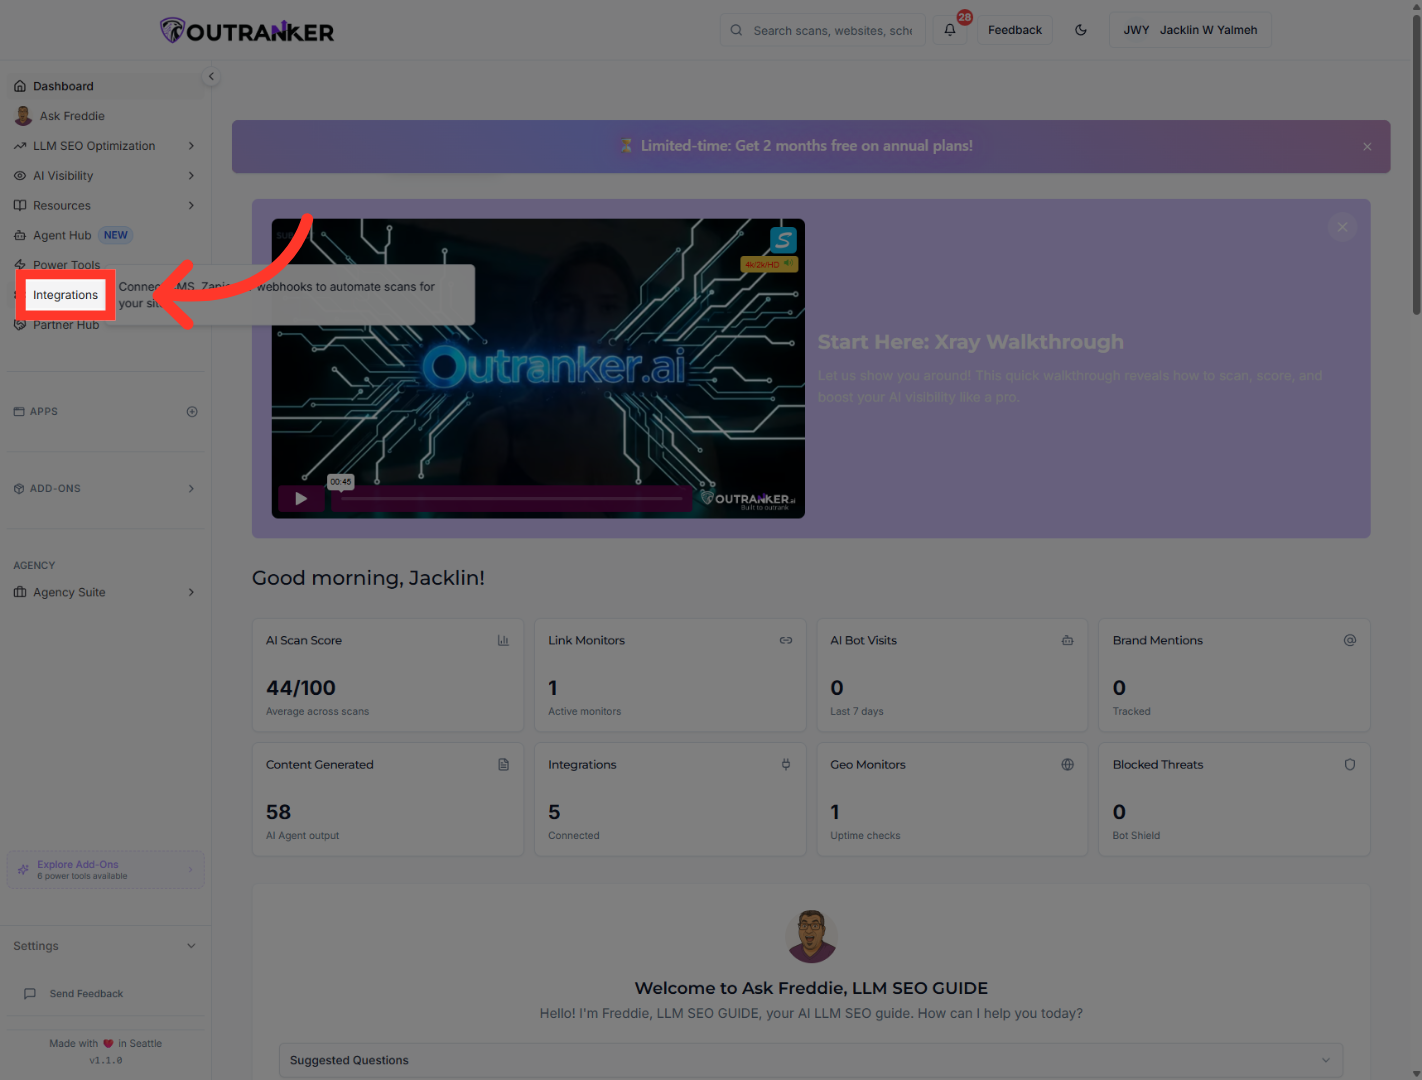
3. Initiate Connection Setup
"Inside the Integrations area, find ClickFunnels and click Connect. This opens the setup window for linking your ClickFunnels account to Outranker."

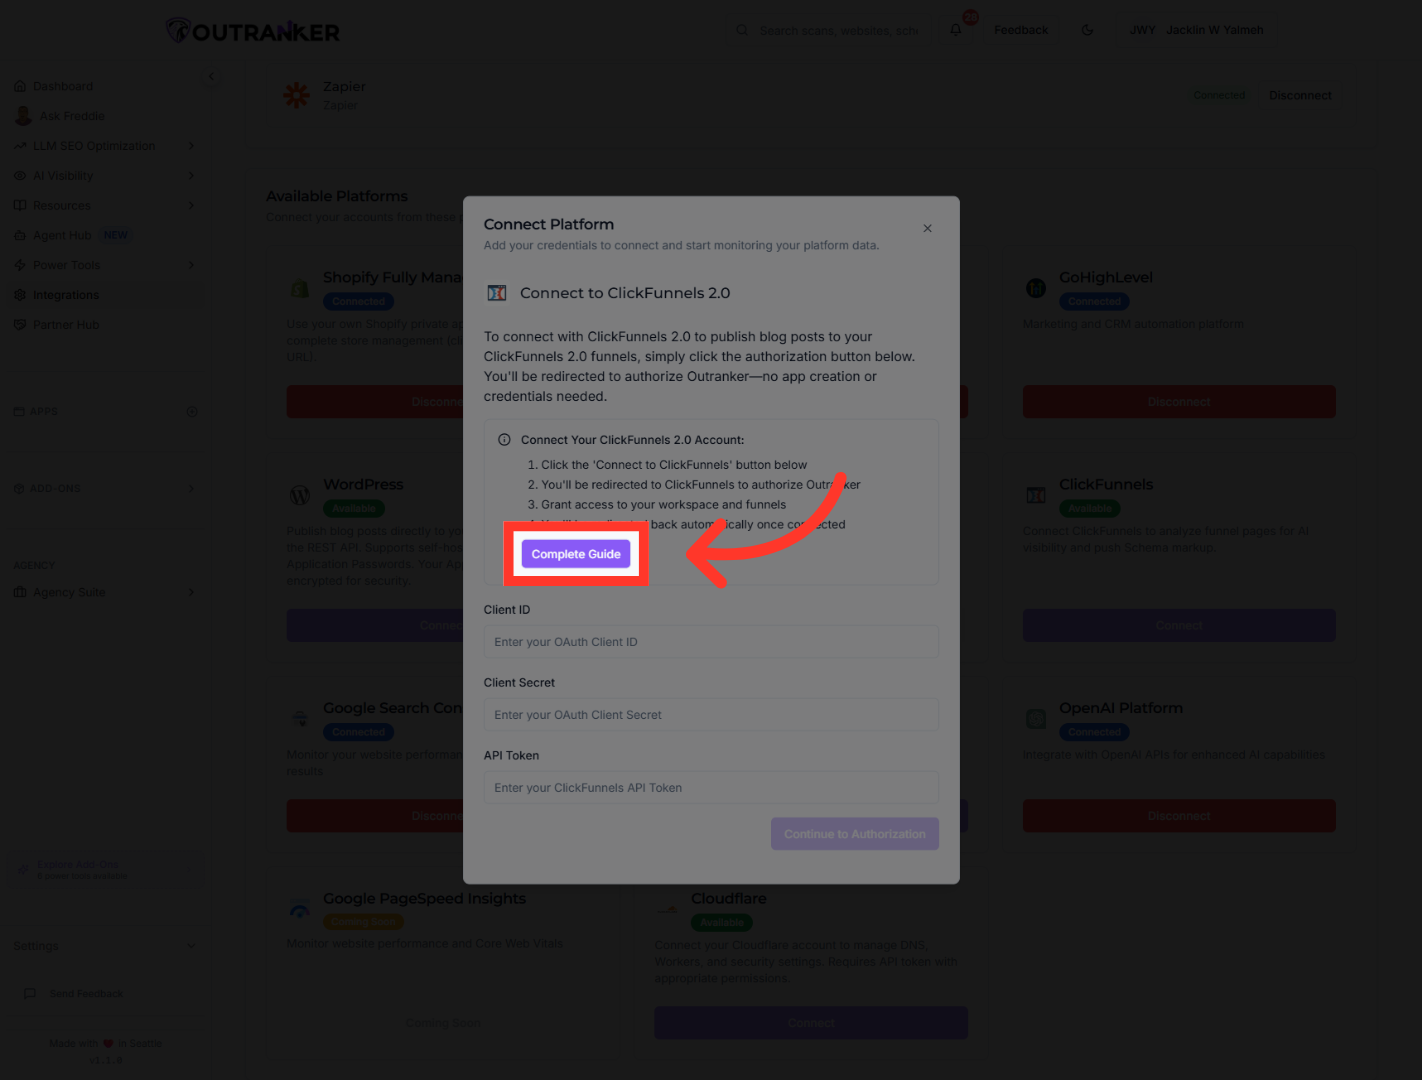
4. Open Complete Integration Guide
"In the ClickFunnels connection window, click Complete Guide. This guide walks you through the information you’ll need to create the connection correctly."
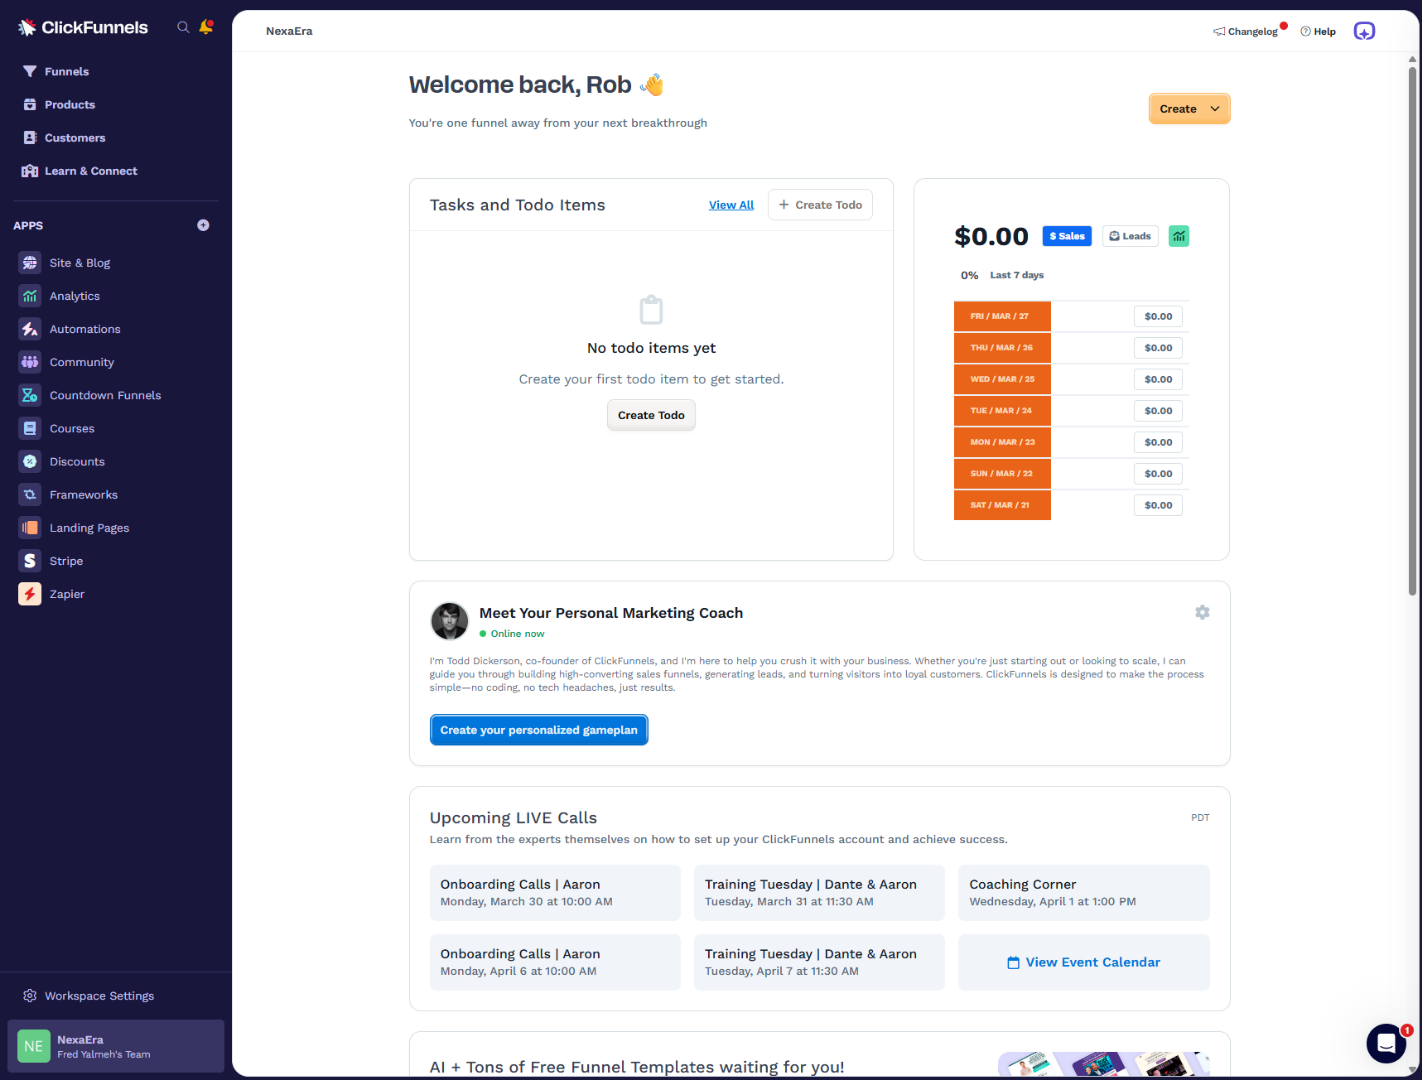
5. Switch to ClickFunnels Workspace
"Next, move over to your ClickFunnels workspace so you can create the app that Outranker will use for authorization."
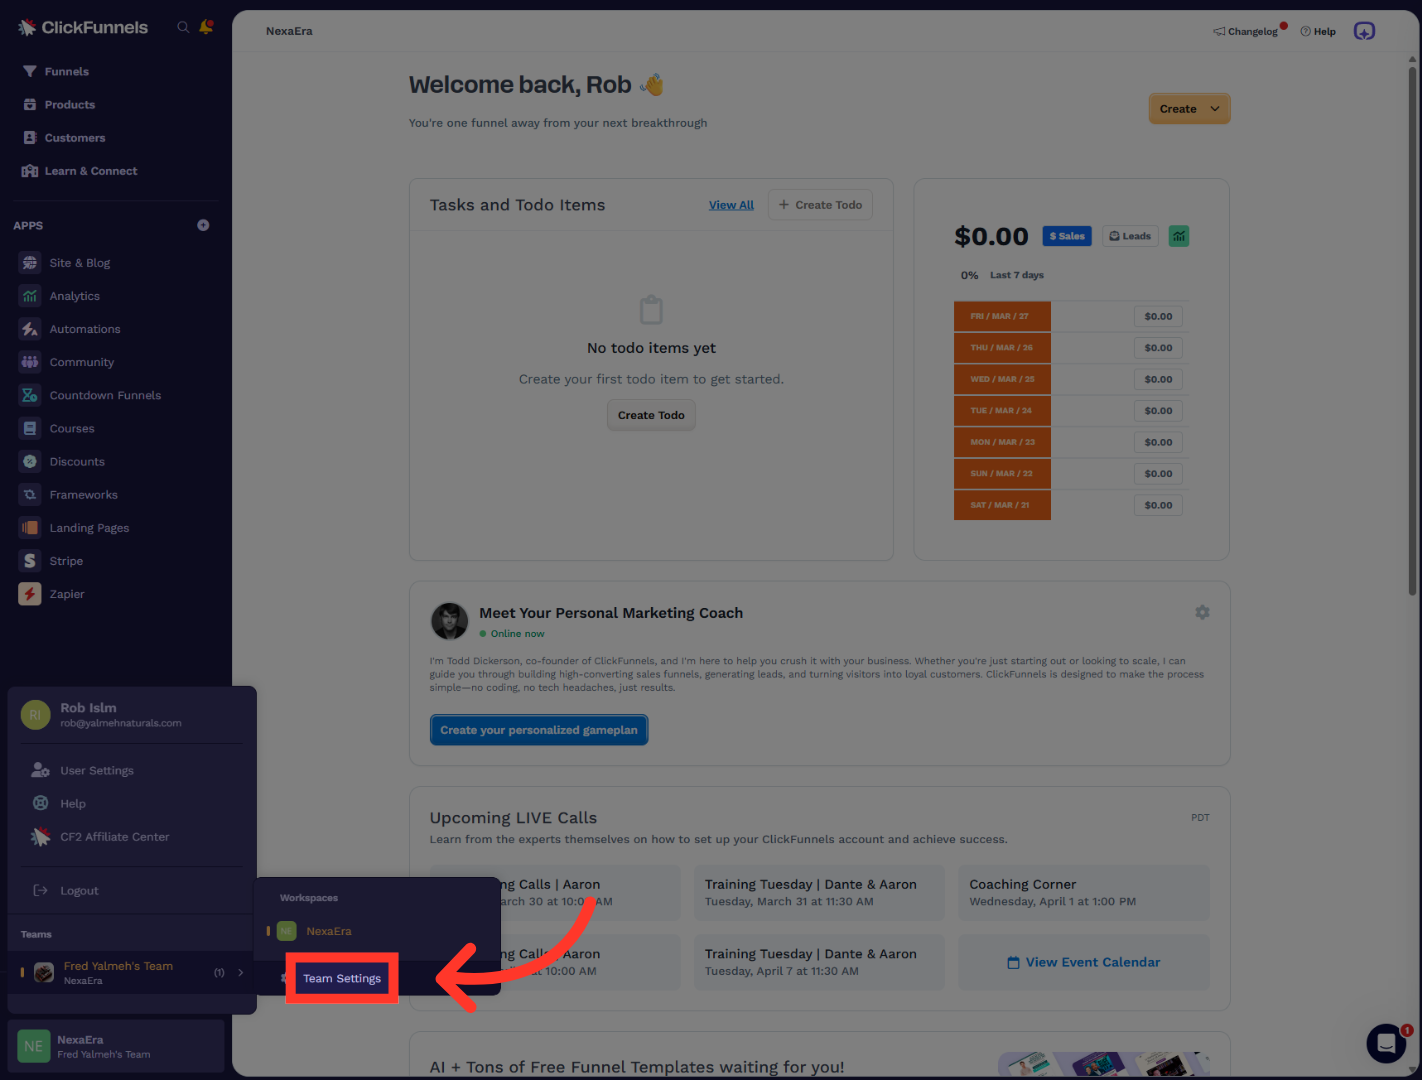
6. Open Team Settings
"Inside ClickFunnels, select your team workspace, then open Team Settings. This is where you’ll manage the app and developer access for the integration."
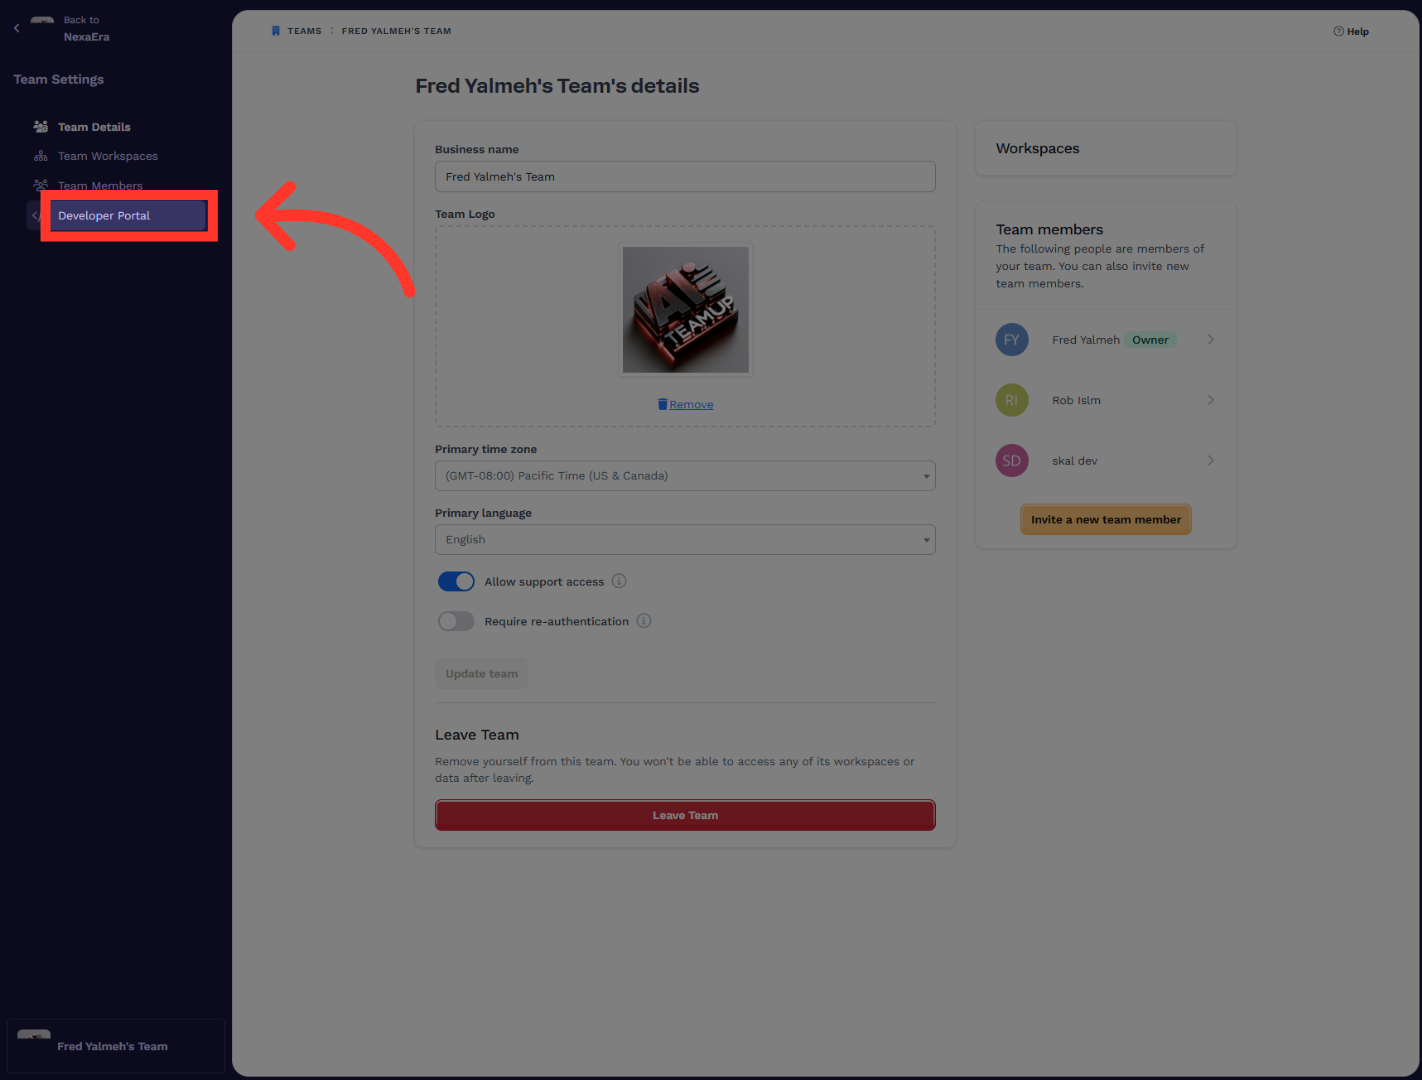
7. Access Developer Portal
"From Team Settings, click Developer Portal. This is where you can create and manage platform applications for external connections like Outranker AI."
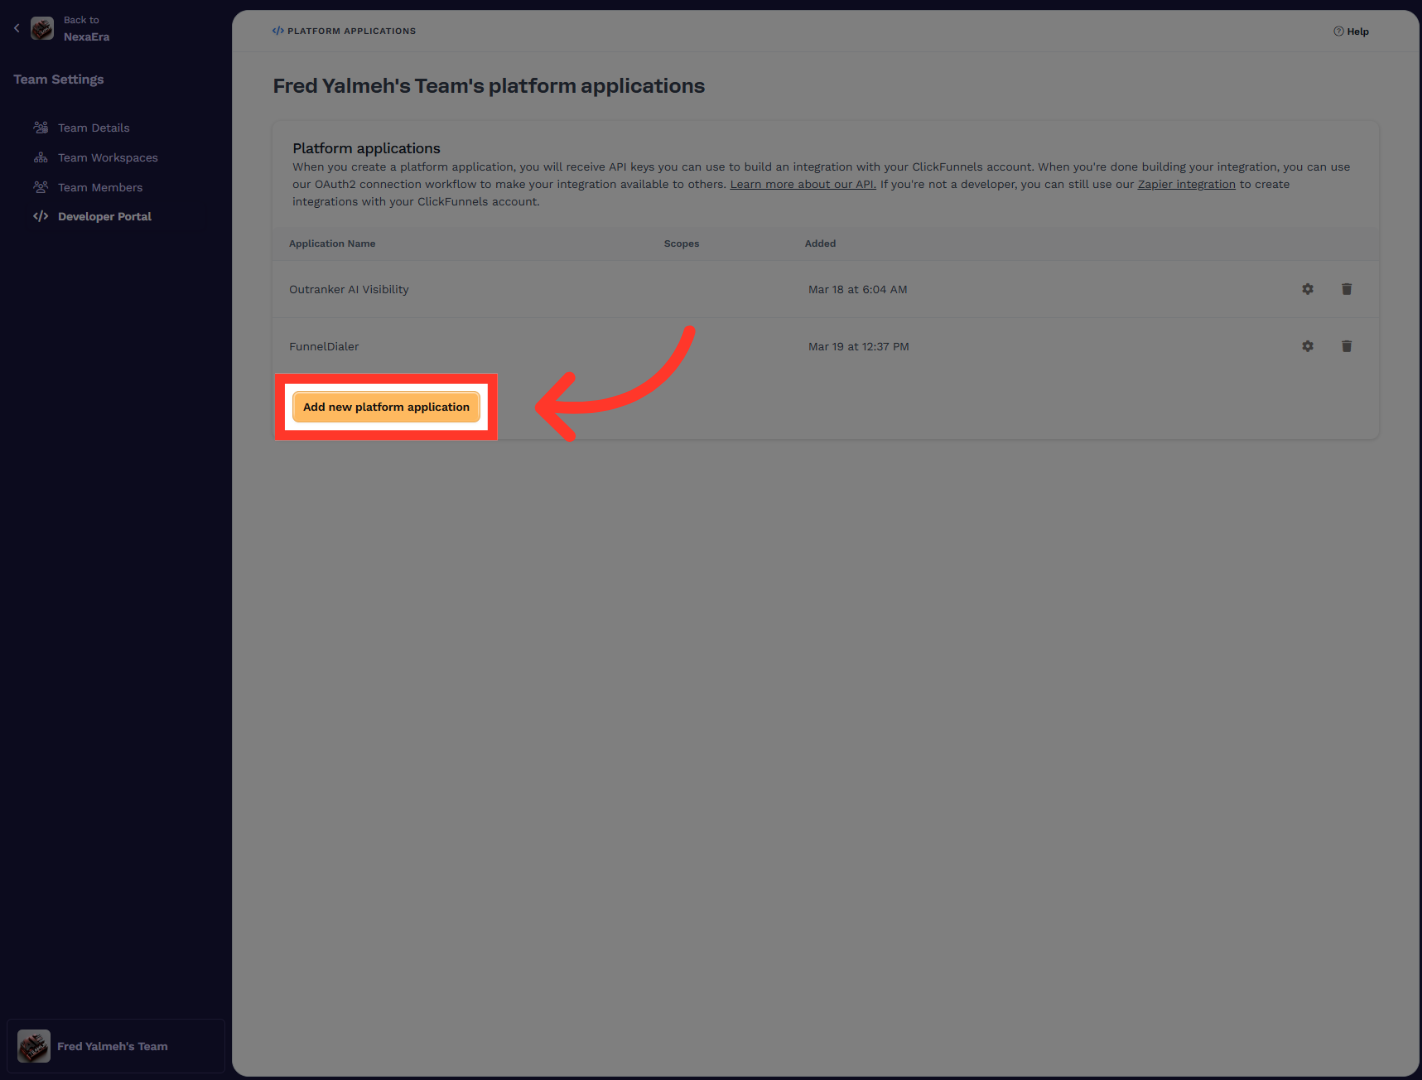
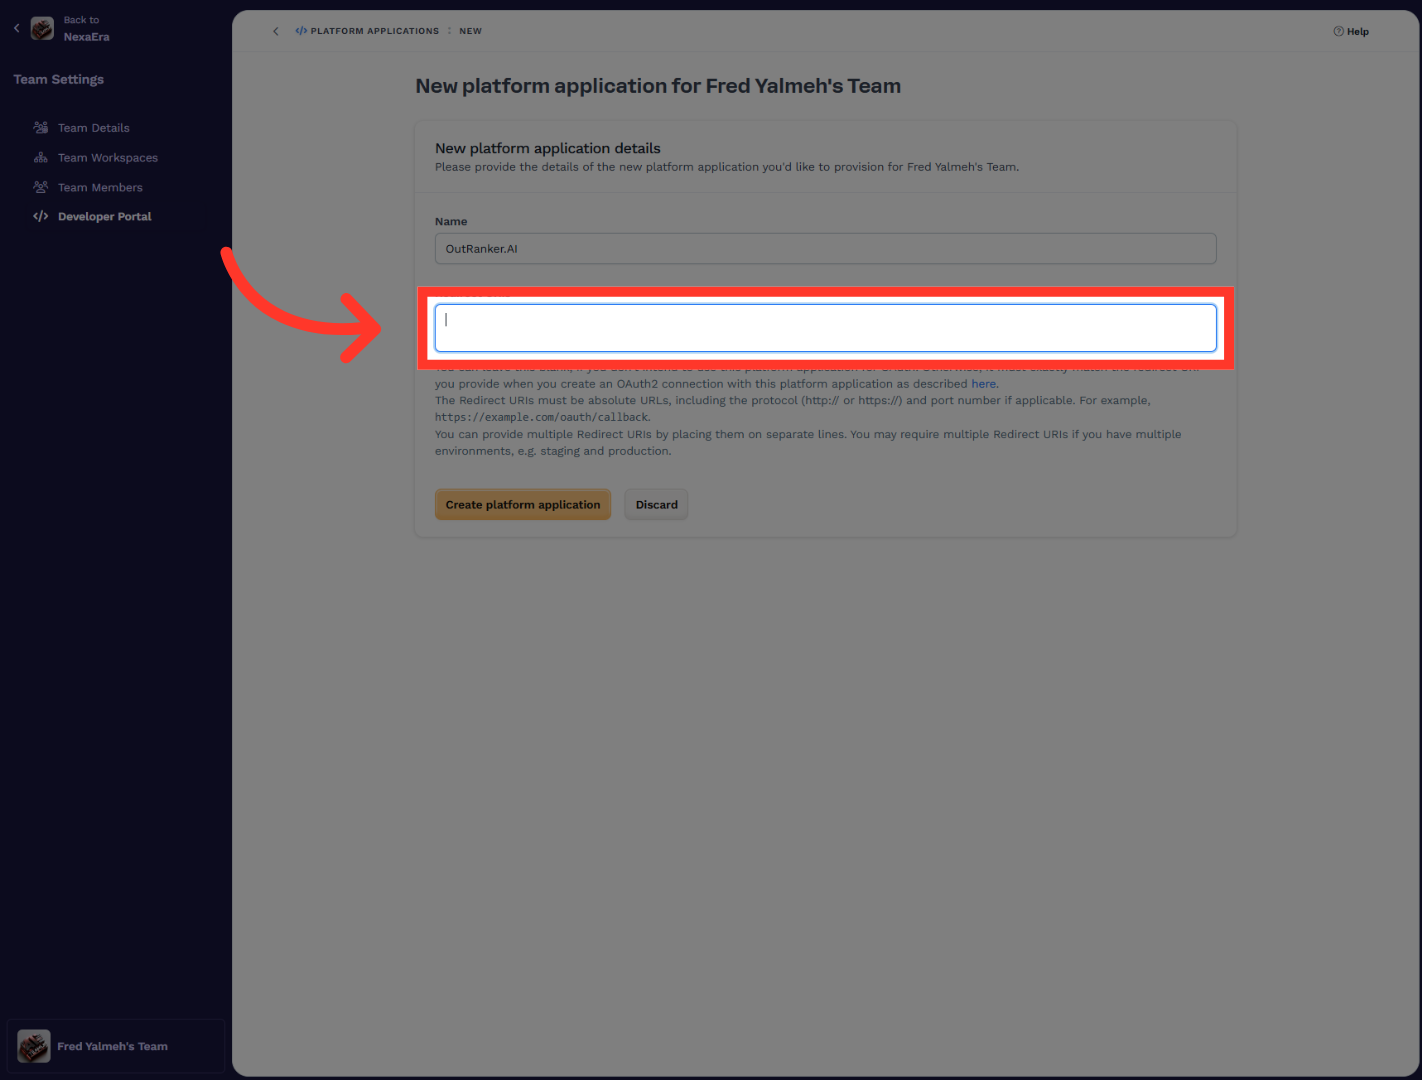
8. Add New Platform Application
"Click Add new platform application to start creating a new integration app."
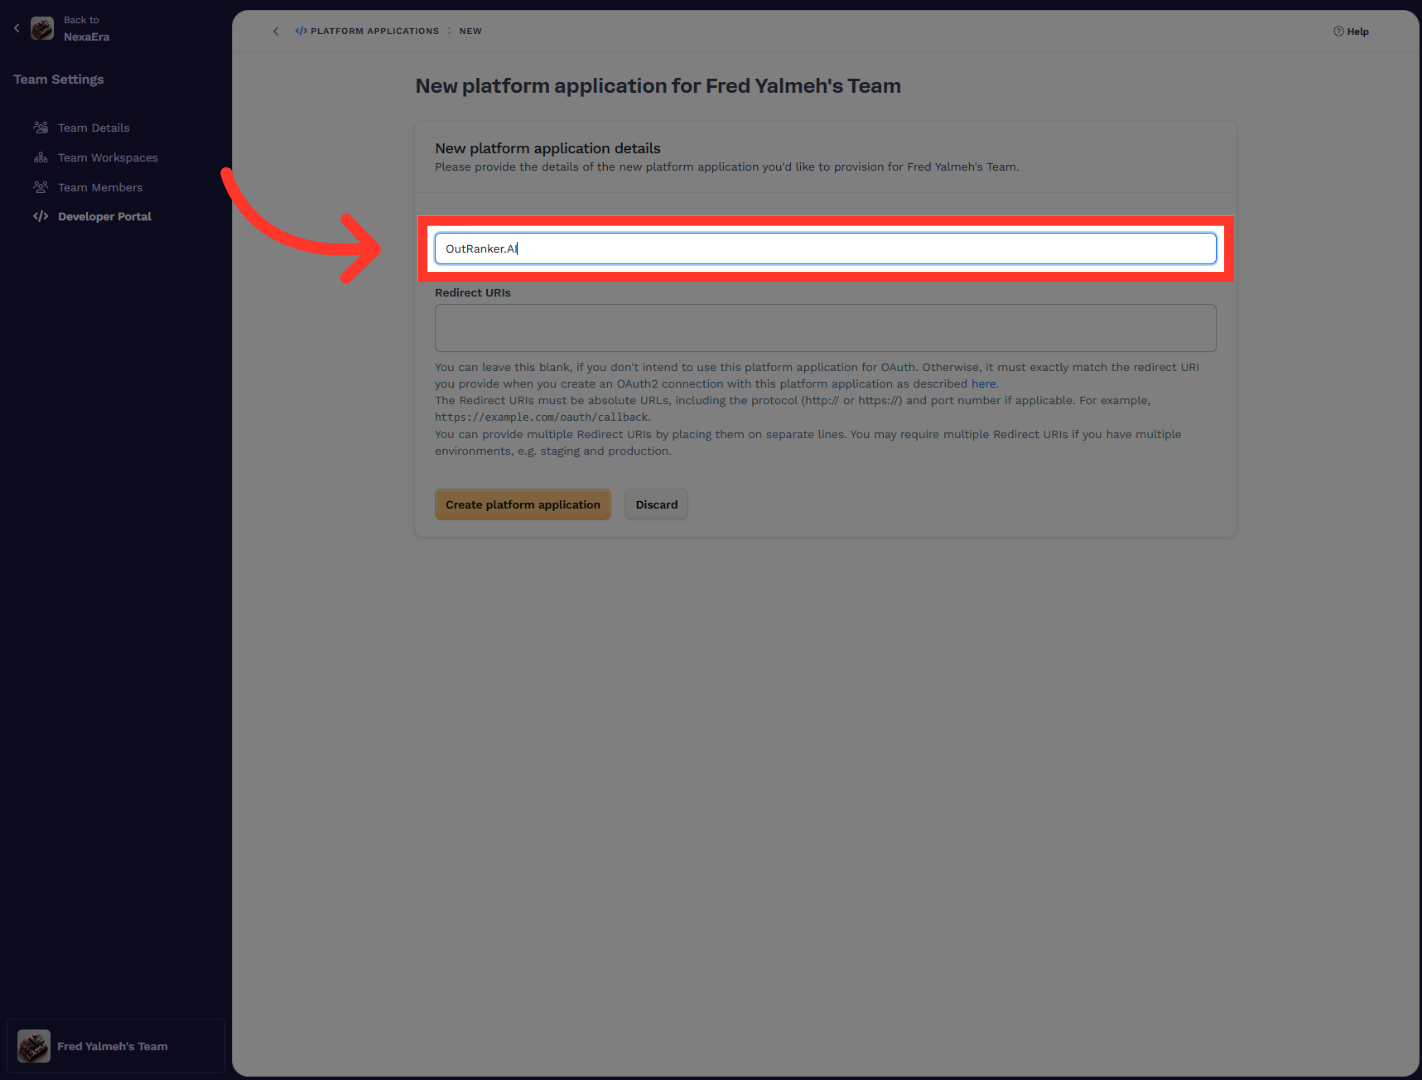
9. Name Platform Application
"For the application name, enter OutRanker.AI. This helps you easily recognize the connection later inside ClickFunnels."
10. Open Redirect URIs Settings
"Now you’ll need to add the authorized redirect URL for this application. Return to the Outranker integration guide, copy the redirect URL shown there, and paste it into the Redirect URIs field in ClickFunnels."
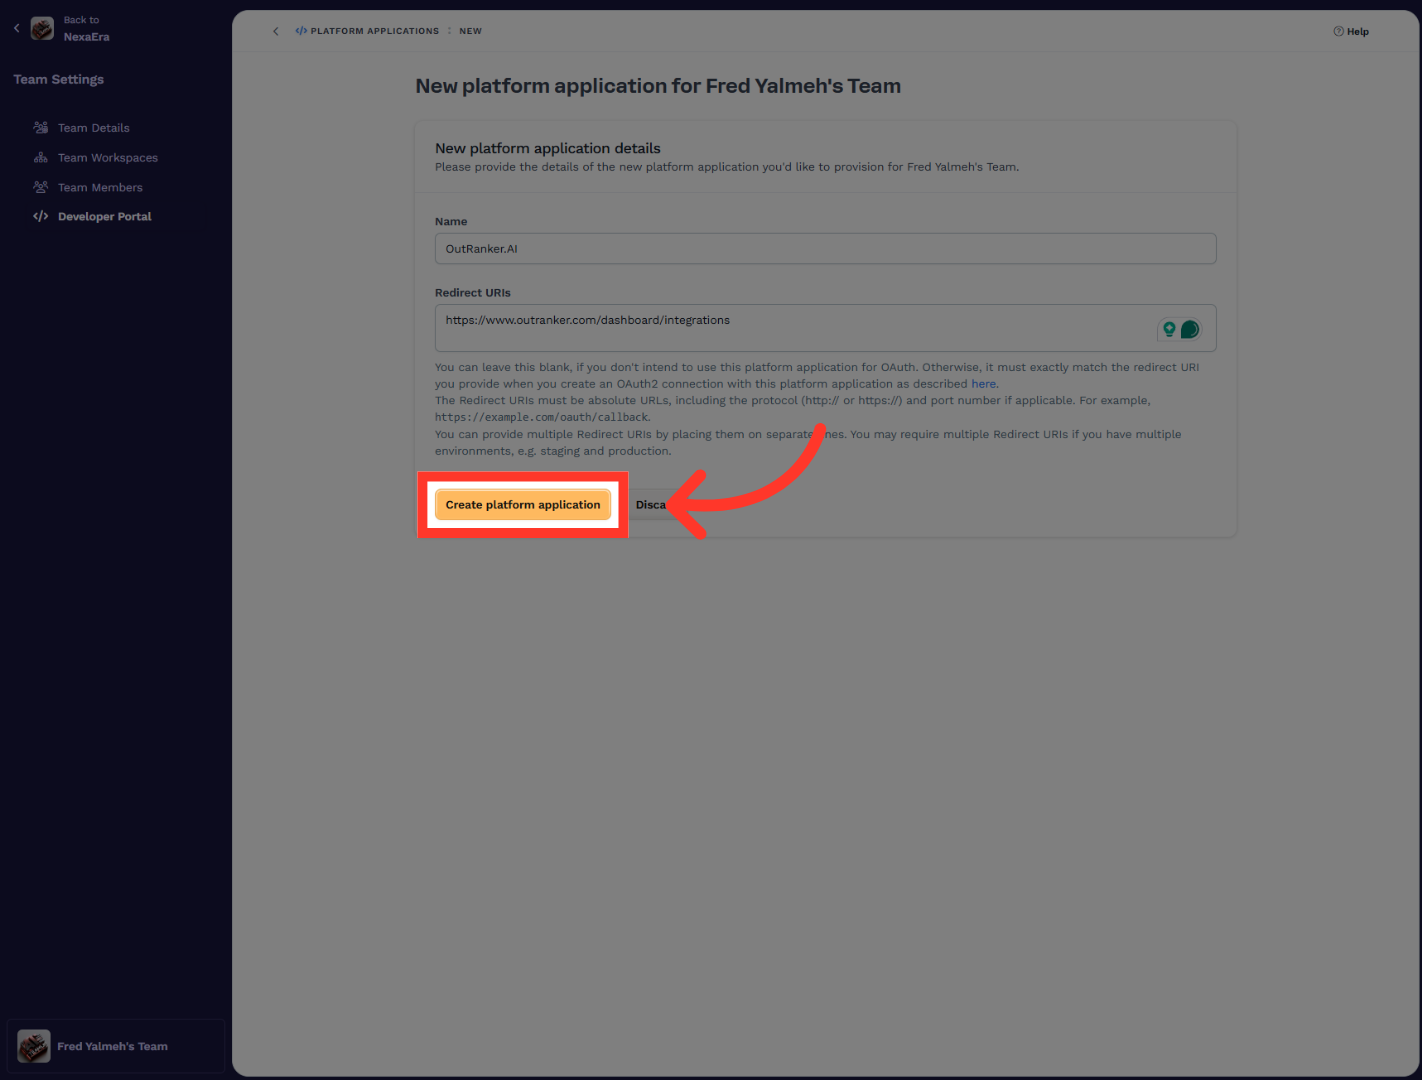
11. Create Platform Application
"Once the name and redirect URL are in place, click Create platform application to save the new app."
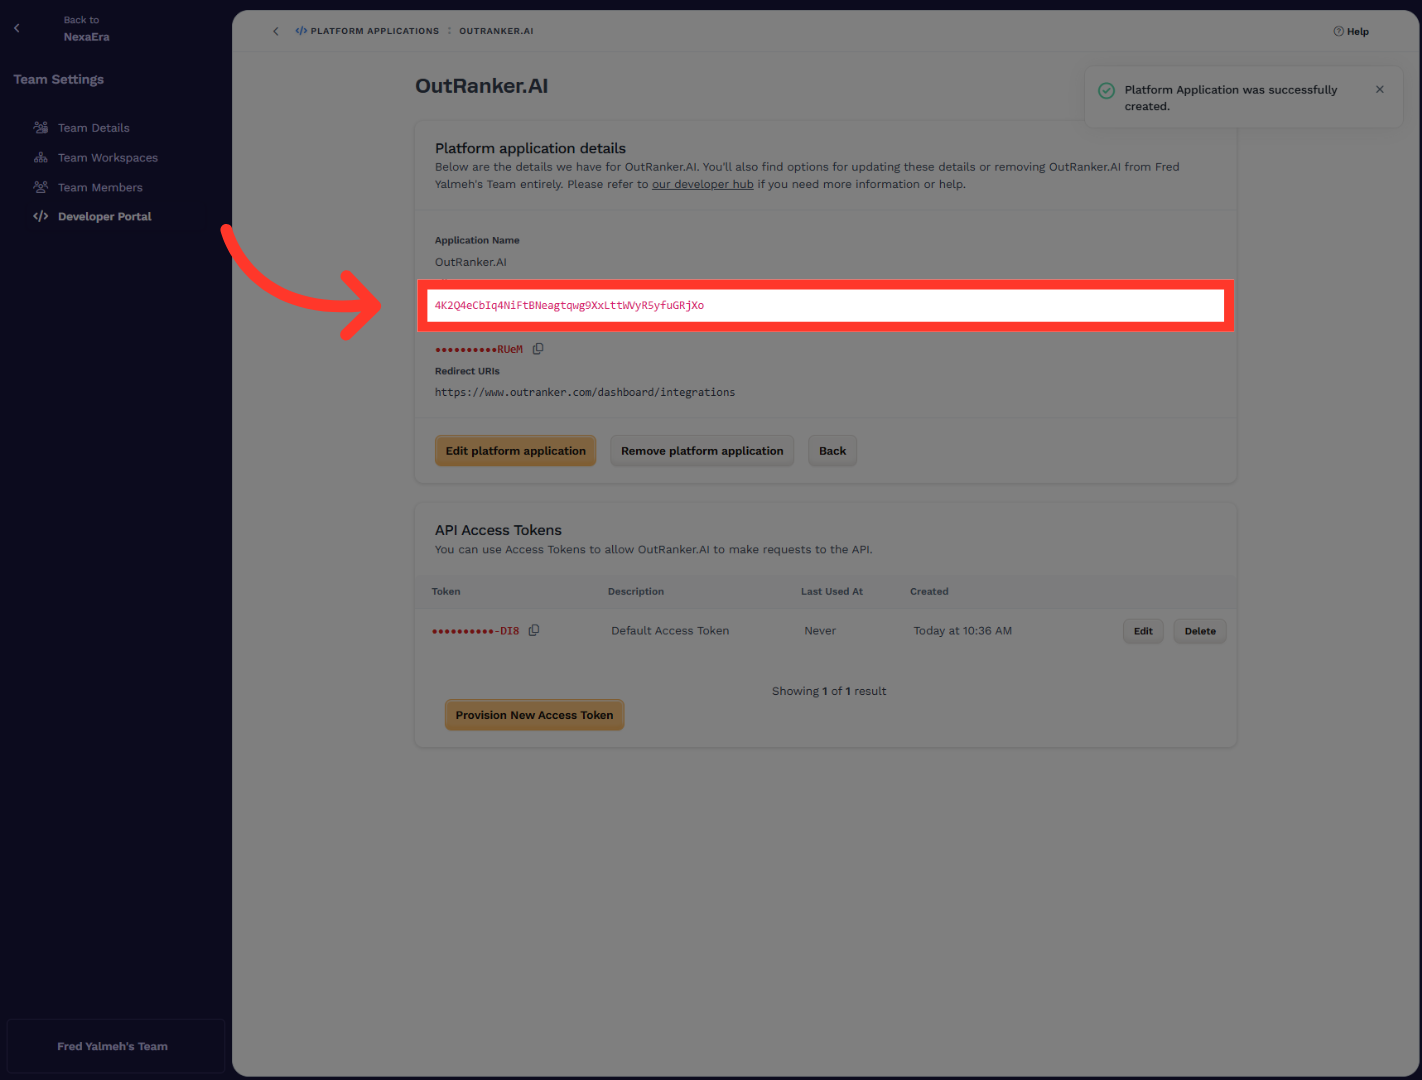
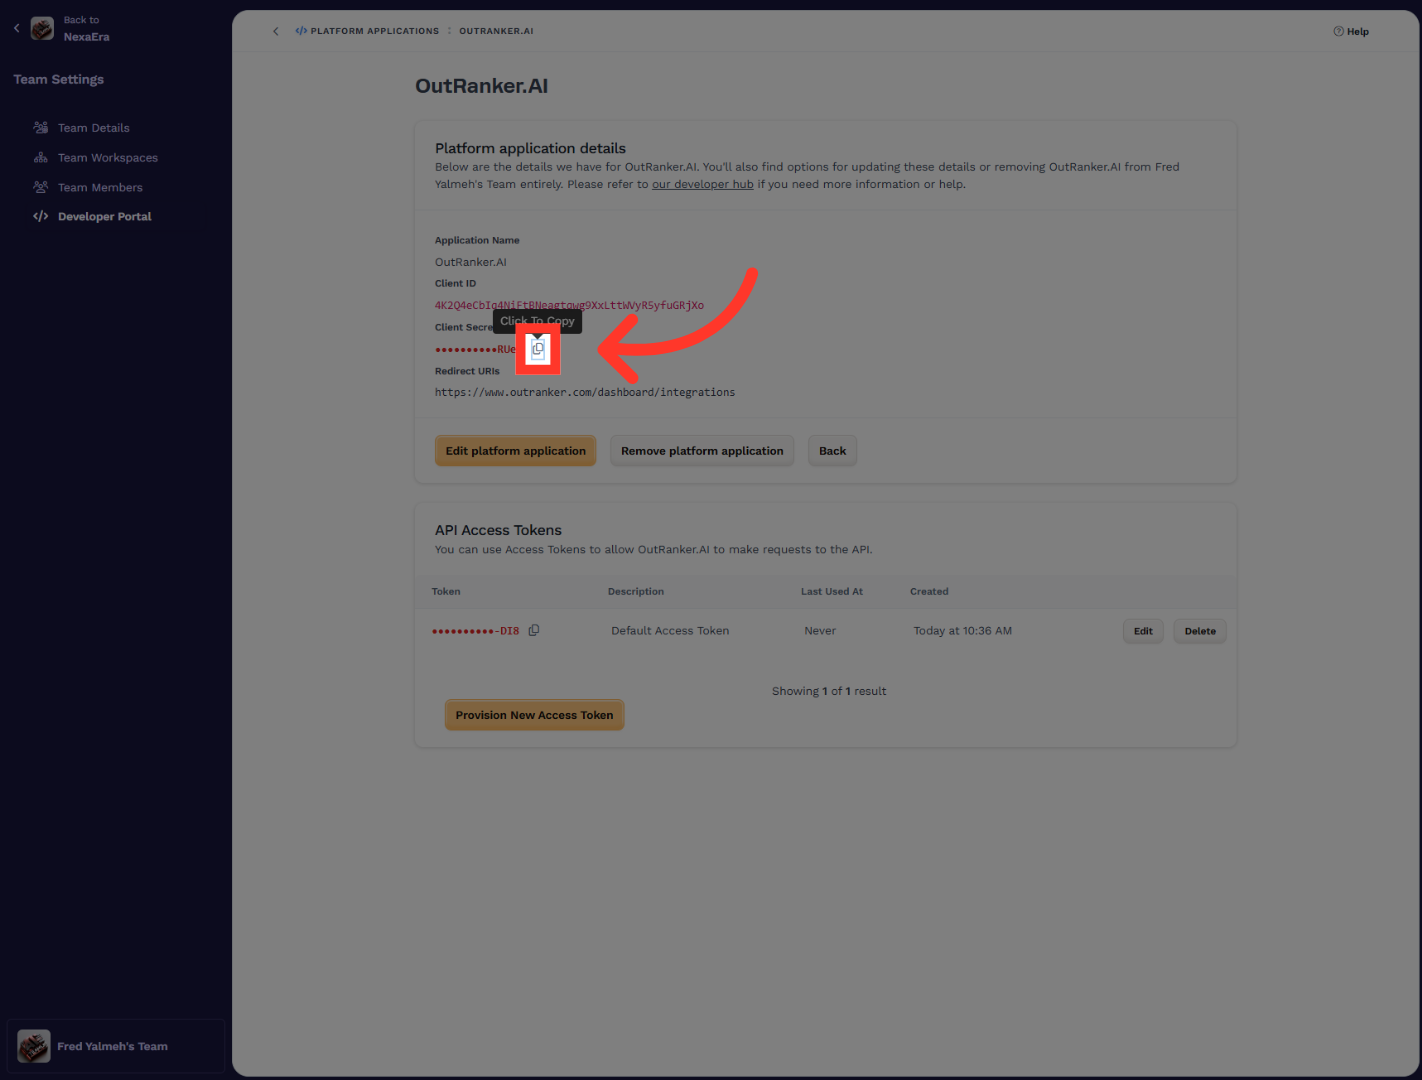
12. Copy Client ID
"After the app is created, ClickFunnels will show your new application details. Copy the Client ID first, because you’ll need to paste it into Outranker."
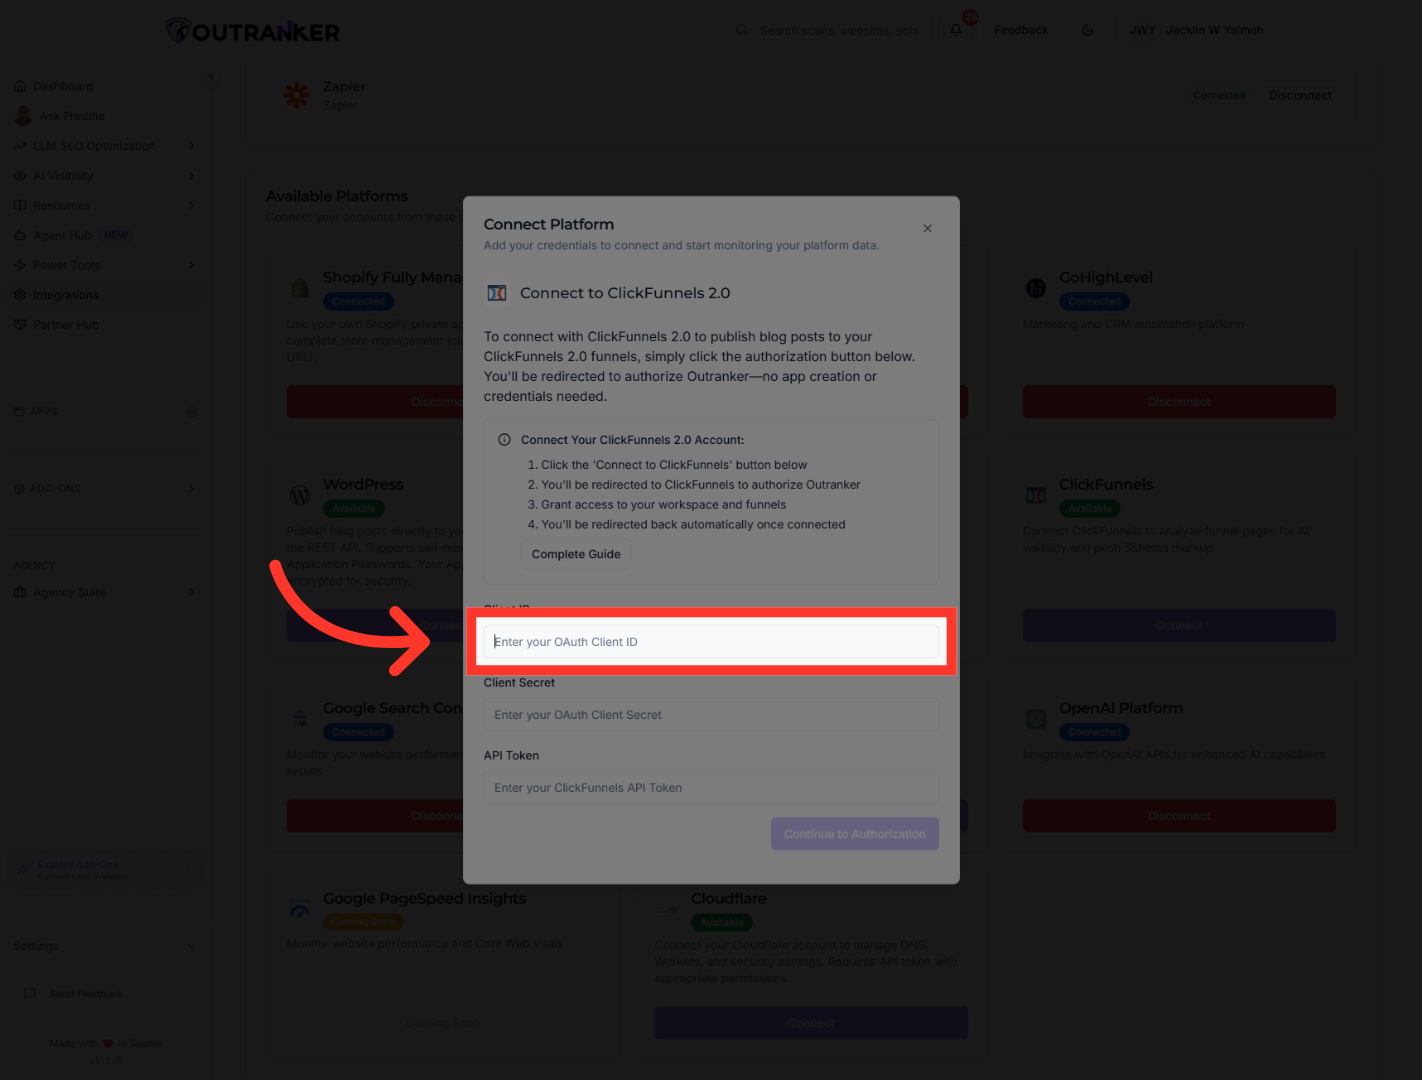
13. Select Client ID Field
"Return to the ClickFunnels connection window in Outranker AI. Click into the Client ID field and paste the value you just copied from ClickFunnels."
14. Click Authorization Link
"Go back to the ClickFunnels Developer Portal and copy the Client Secret for the same platform application."
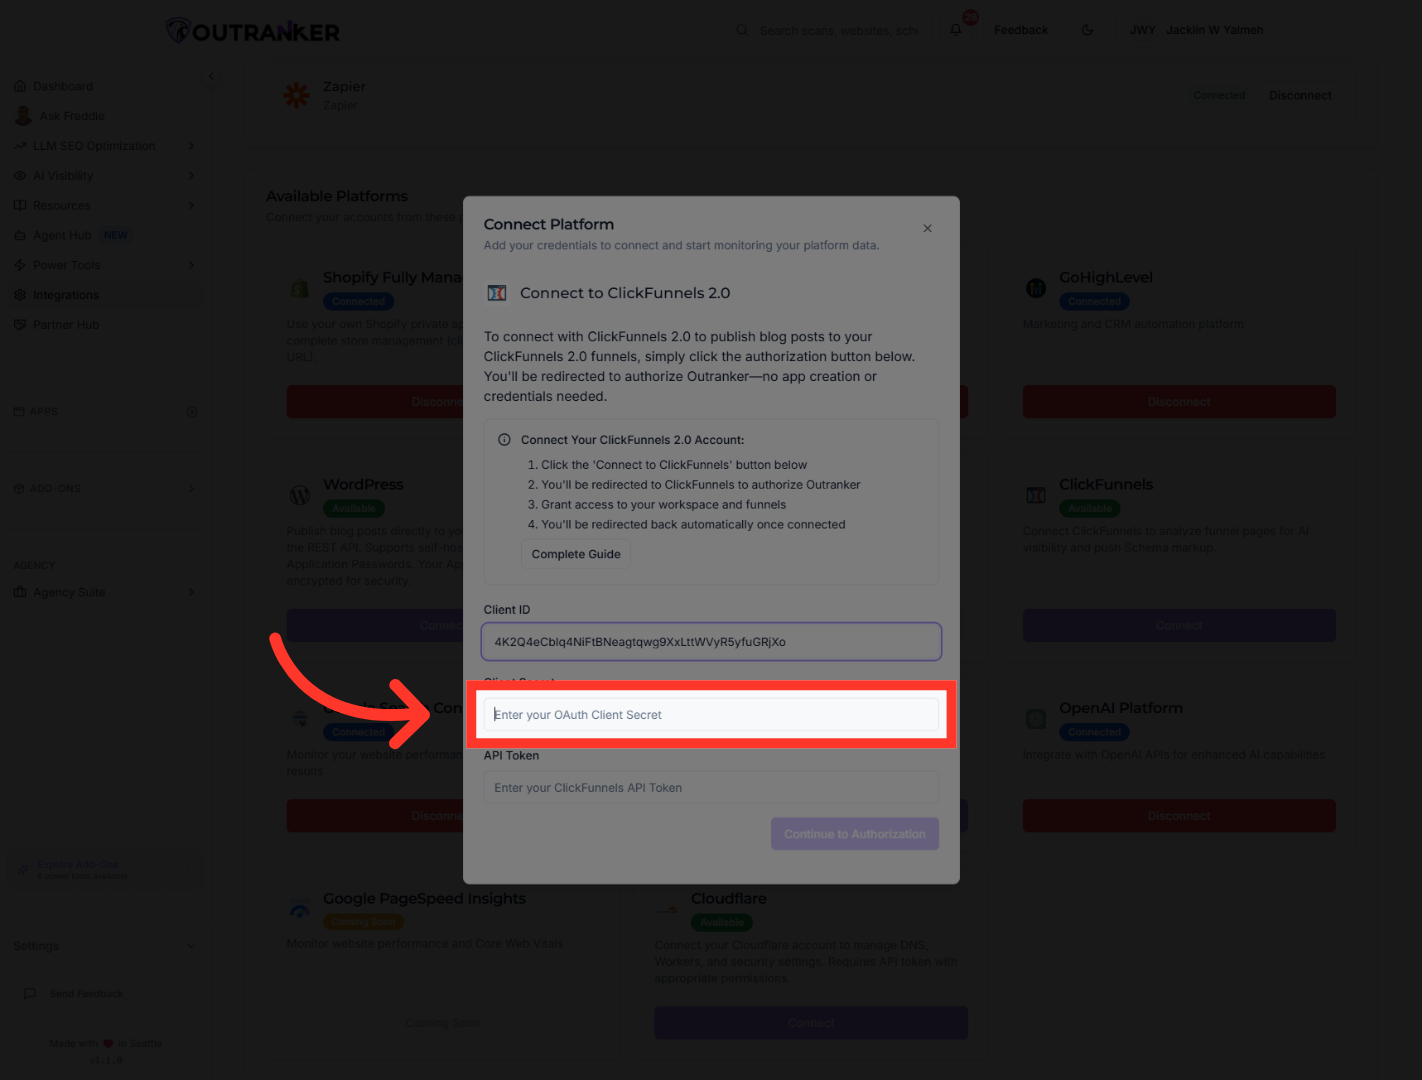
15. Select Client Secret Field
"Switch back to Outranker again, click the Client Secret field, and paste in the client secret."
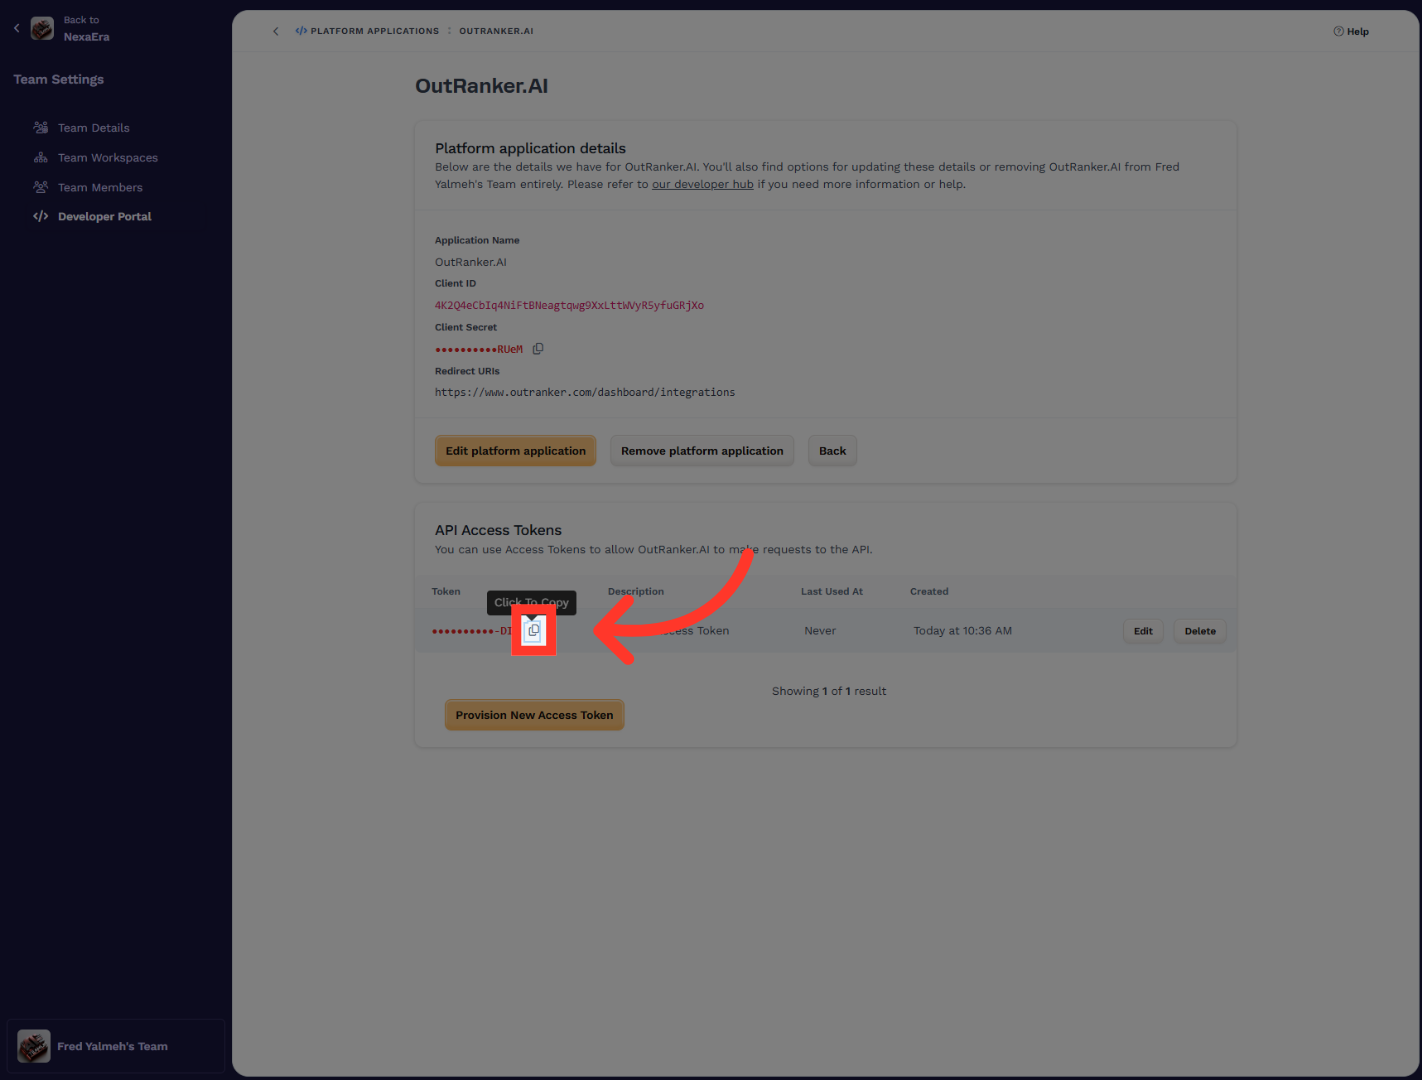
16. Click Secret Entry Link
"Back in ClickFunnels, locate the API Access Token section for the application. Copy the token shown there so you can use it in the Outranker setup."
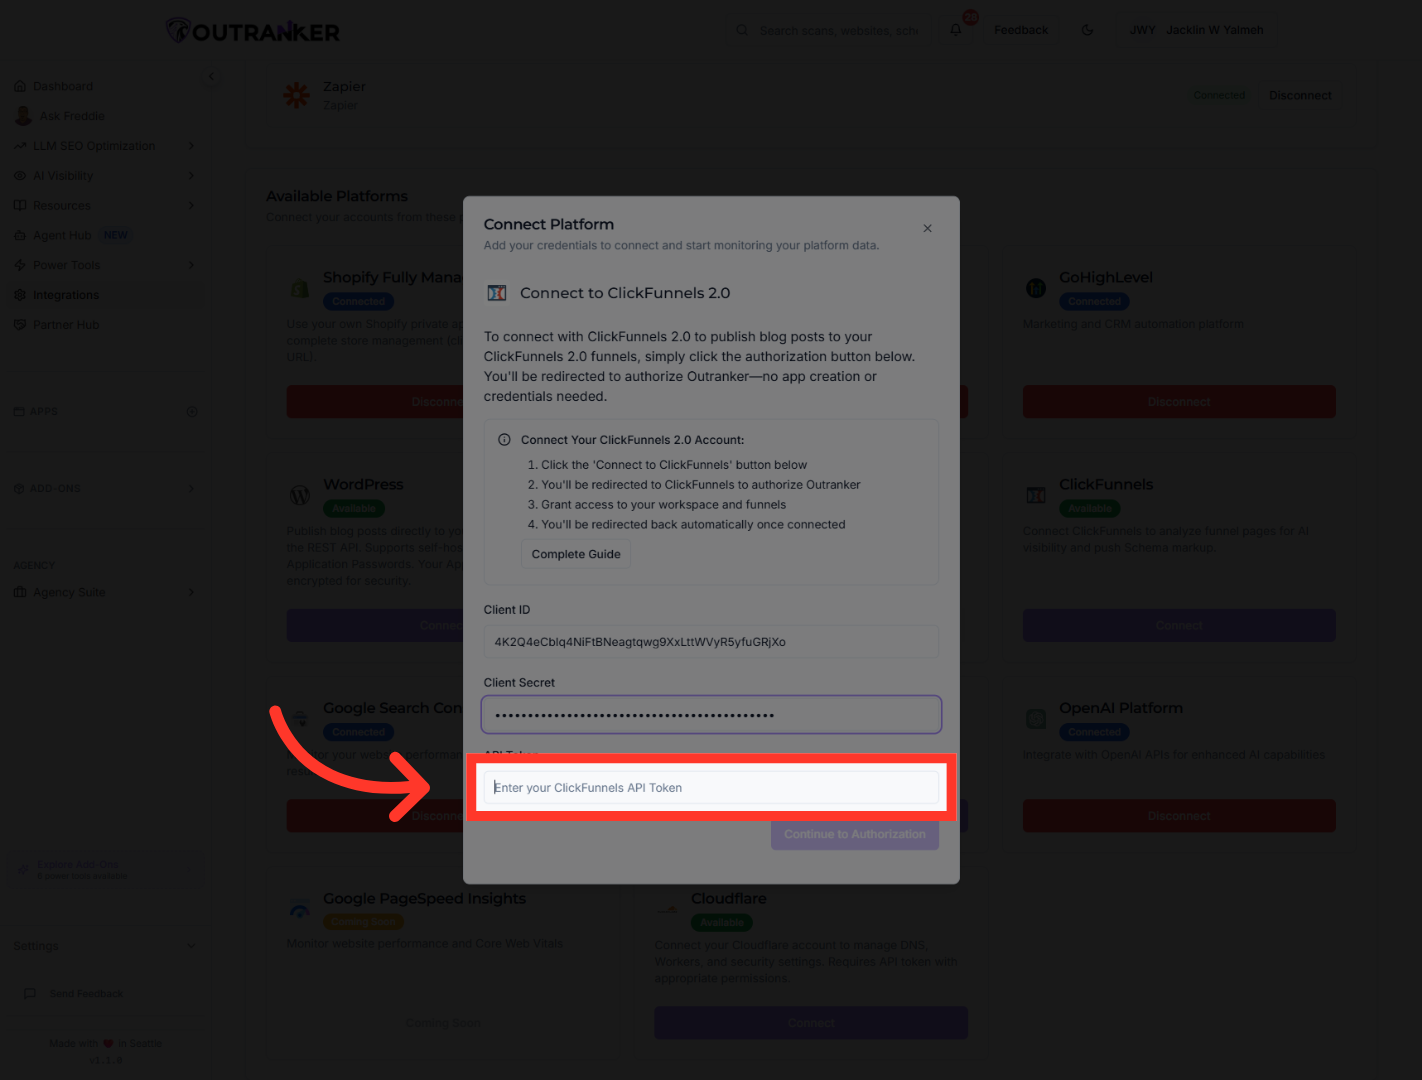
17. Access API Token Section
"Return to Outranker one more time, click the API Token field, and paste the API access token into the form."
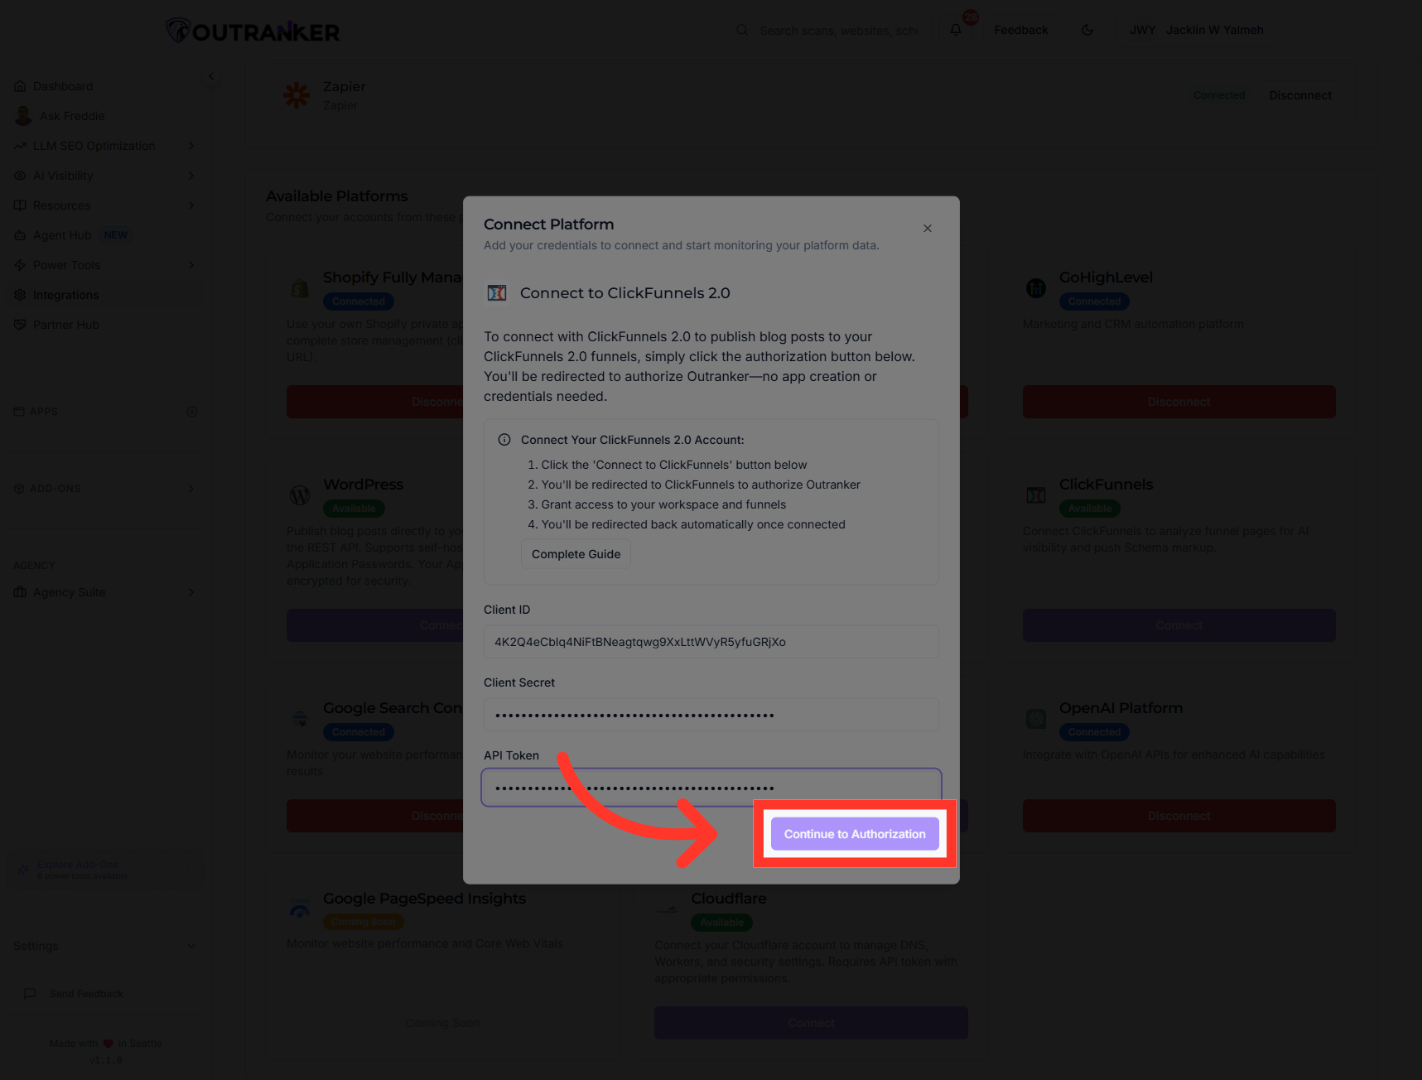
18. Proceed to Authorization
"With all three values entered, click Continue to Authorization. This moves you into the final connection step between Outranker and ClickFunnels."
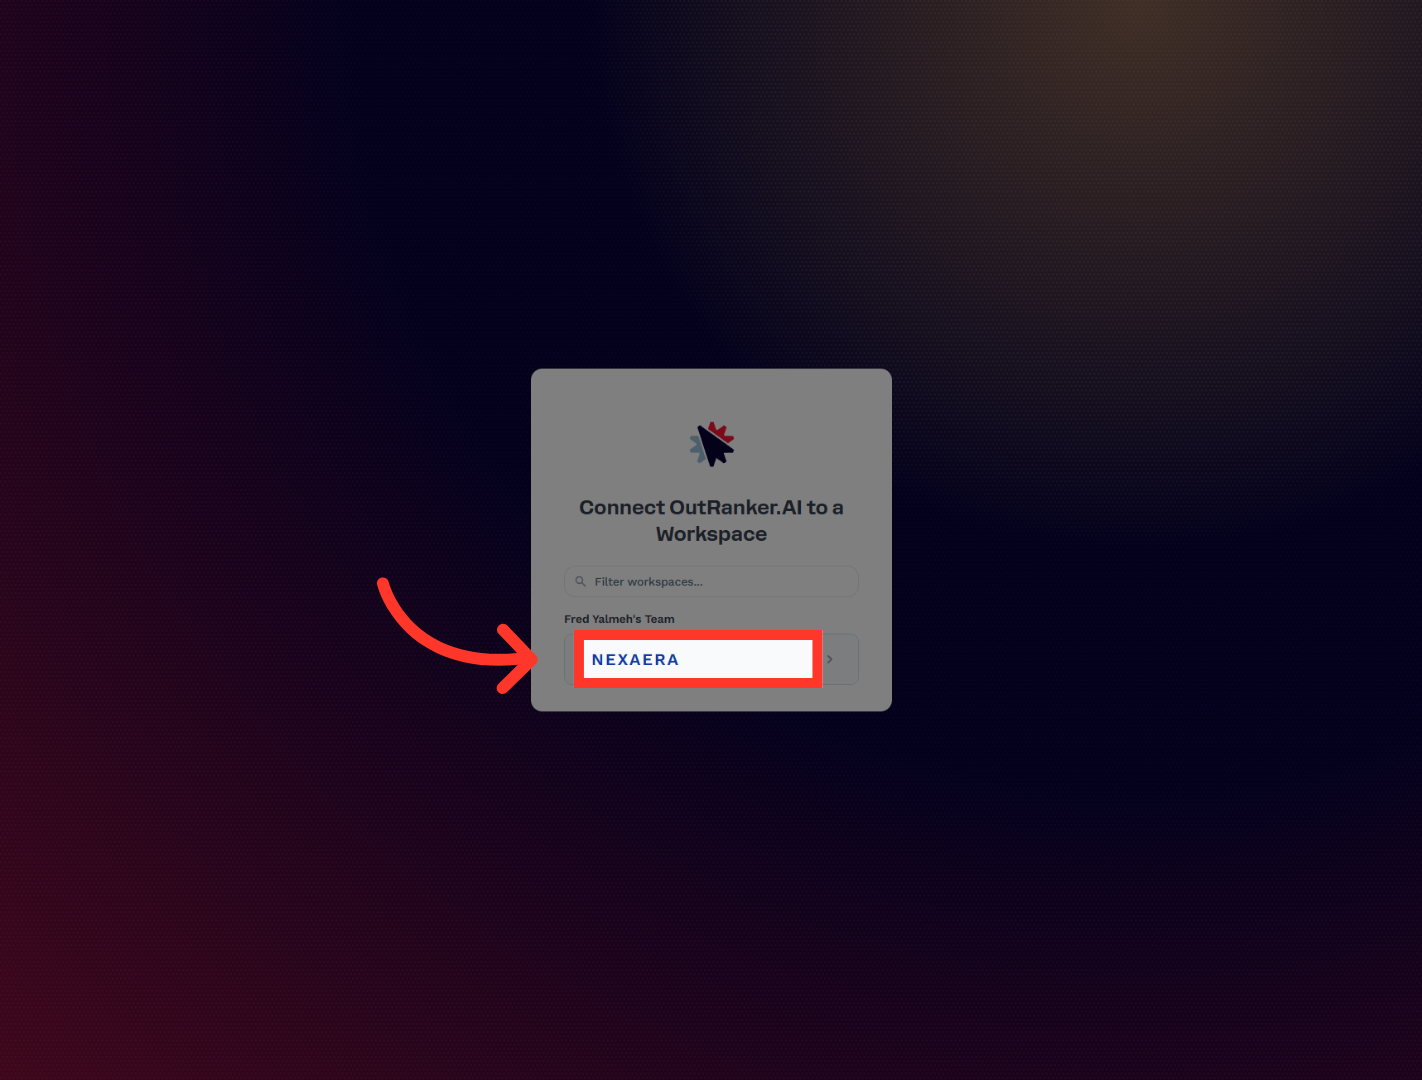
19. Select NexaEra Authorization
"ClickFunnels will now ask where you want to authorize the connection. Find the correct team and select the NexaEra workspace to complete the authorization." "Once the workspace is selected, the integration is complete. Outranker and ClickFunnels are now connected, and you can begin using the integration inside your workflow."
"You’ve now successfully configured the ClickFunnels integration with Outranker AI by creating the platform application, adding your client credentials, and completing the final authorization. Your account is now ready to use this connection in your marketing workflows. In the next video, we can walk through how to use the integration after setup."
