This tutorial guides you through connecting Zapier with the Outranker AI SEO Optimization Platform.
Go to www.outranker.com
1. Introduction
“In this video, you’ll learn how to connect Zapier with the Outranker platform. We’ll go step by step, so you can set up the webhook correctly, test the connection, and finish the integration with confidence.”
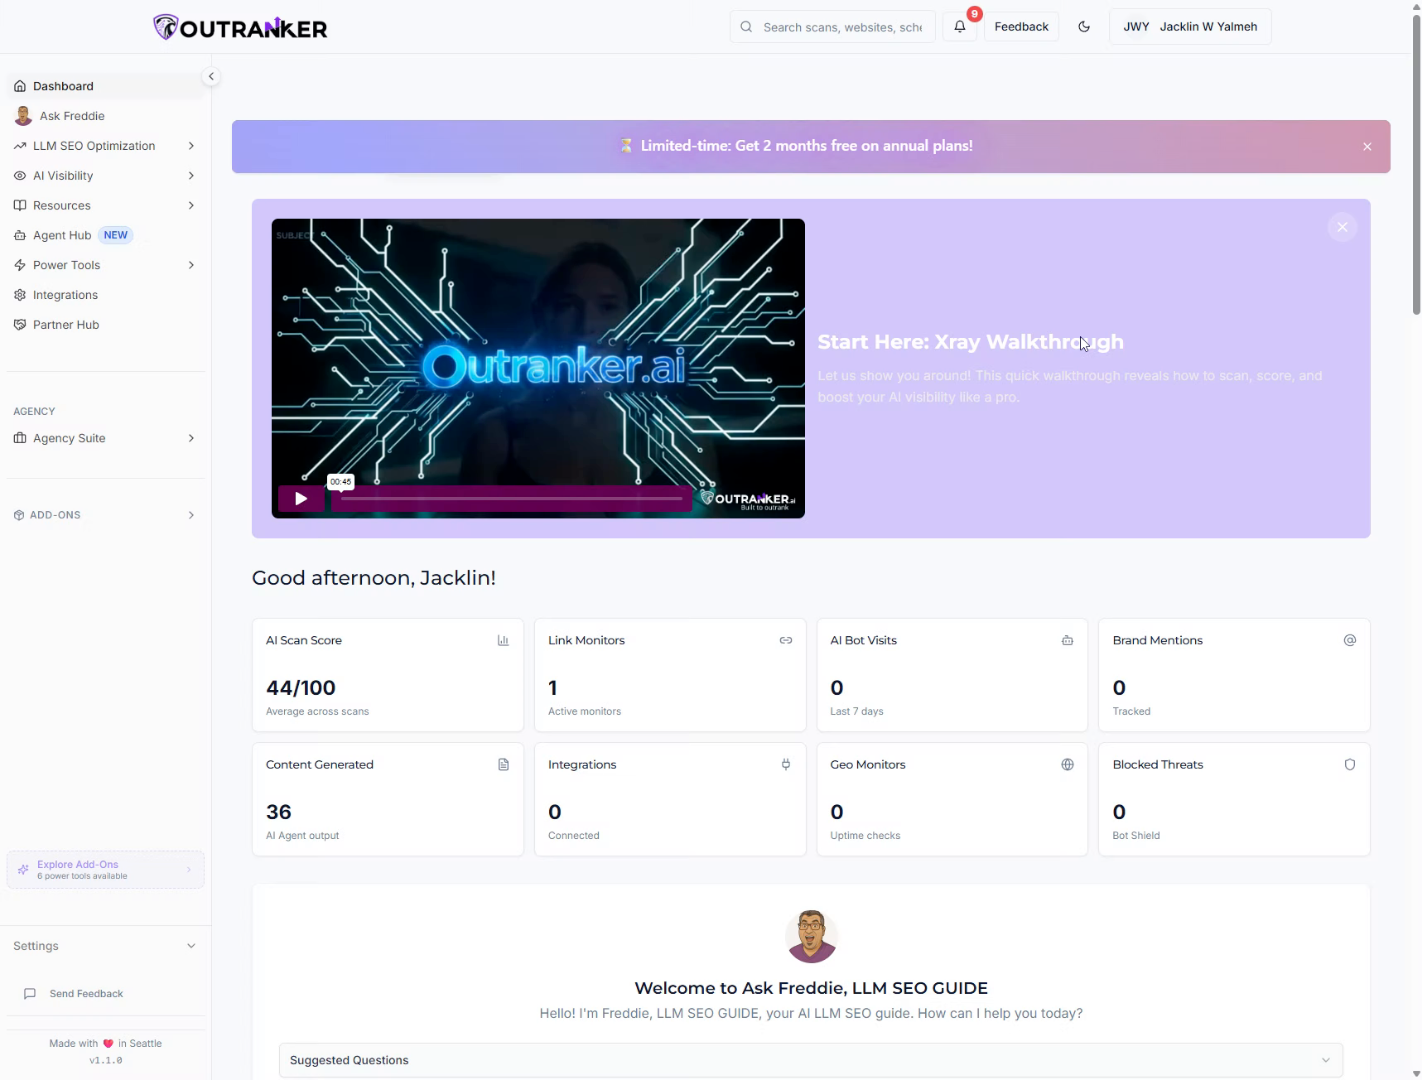
2. Access Integrations Section
“Start inside Outranker. In the left menu, click Integrations. This is where you connect Outranker with other platforms.”
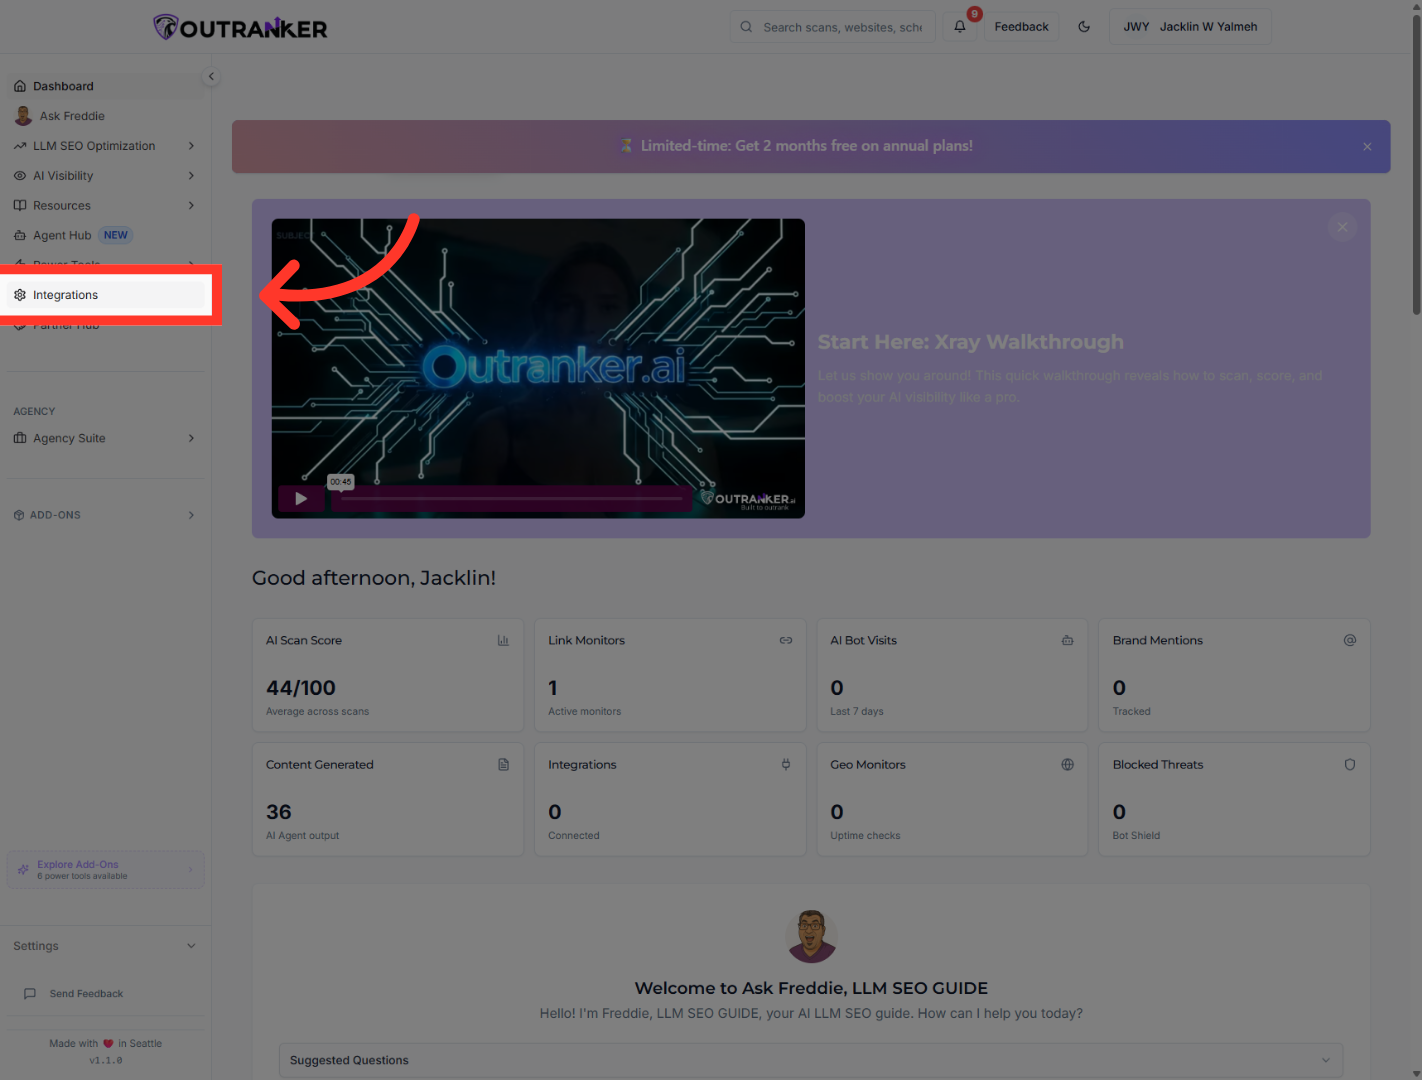
3. Open Connect Options
“Find Zapier in the list of available platforms. Then click Connect. This opens the Zapier setup window.”

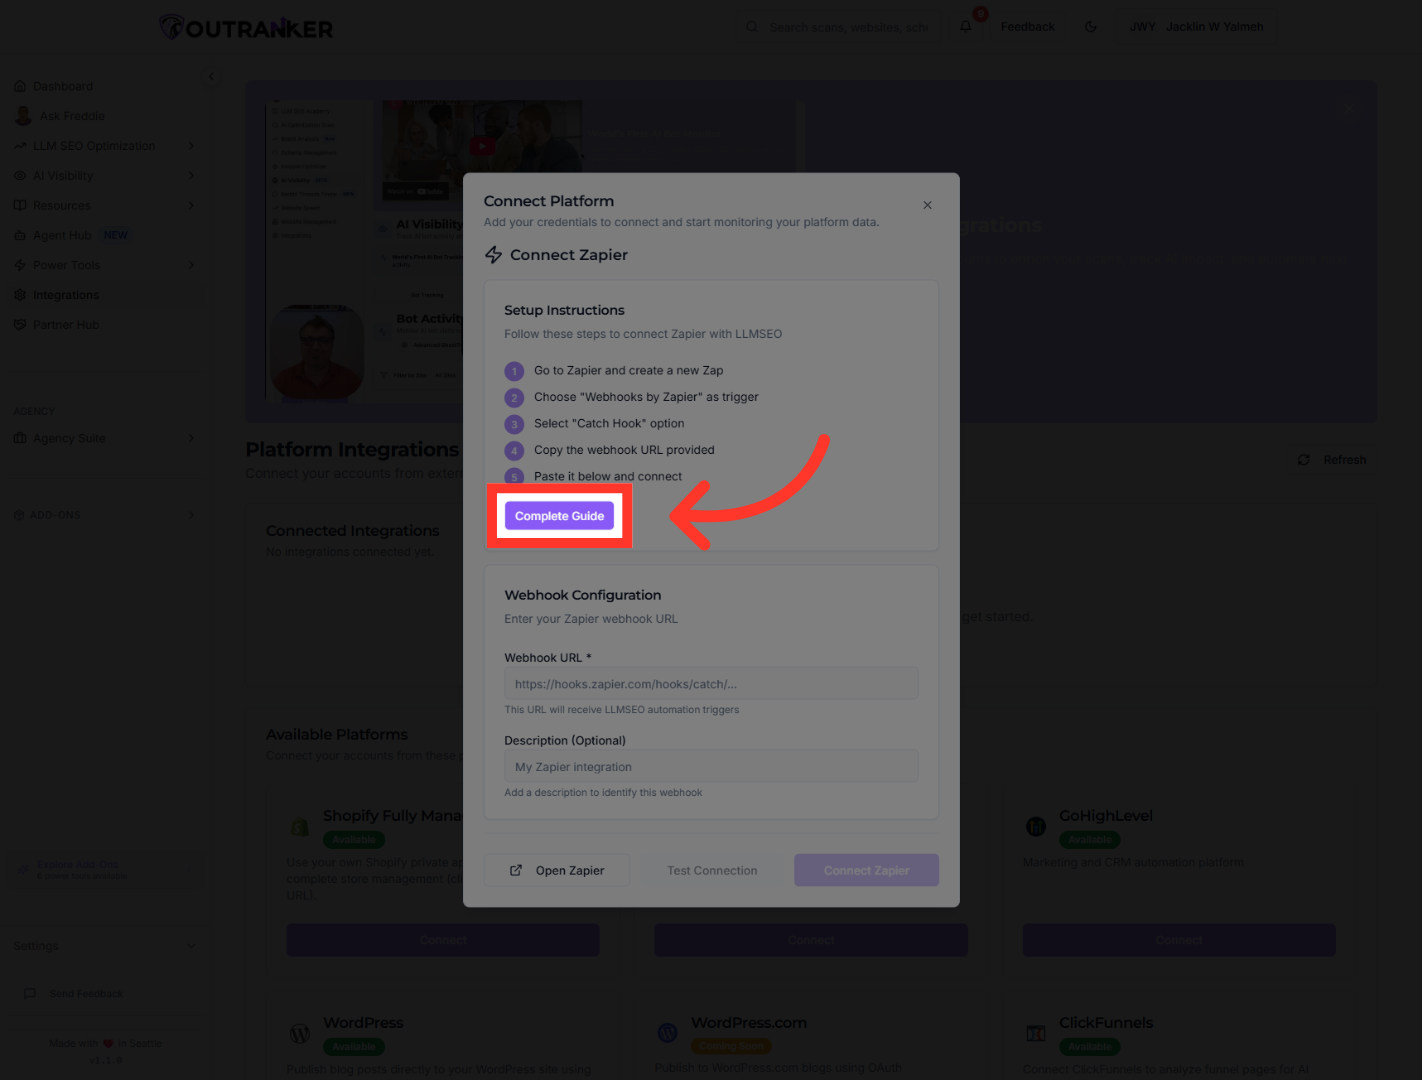
4. View Complete Integration Guide
“Next, click Complete Guide. Keep this guide open, because you’ll use it while setting up the connection.”
5. Initiate New Zap Creation
“Now go to zapier.com. This is where you’ll create the Zap that receives data from Outranker.”
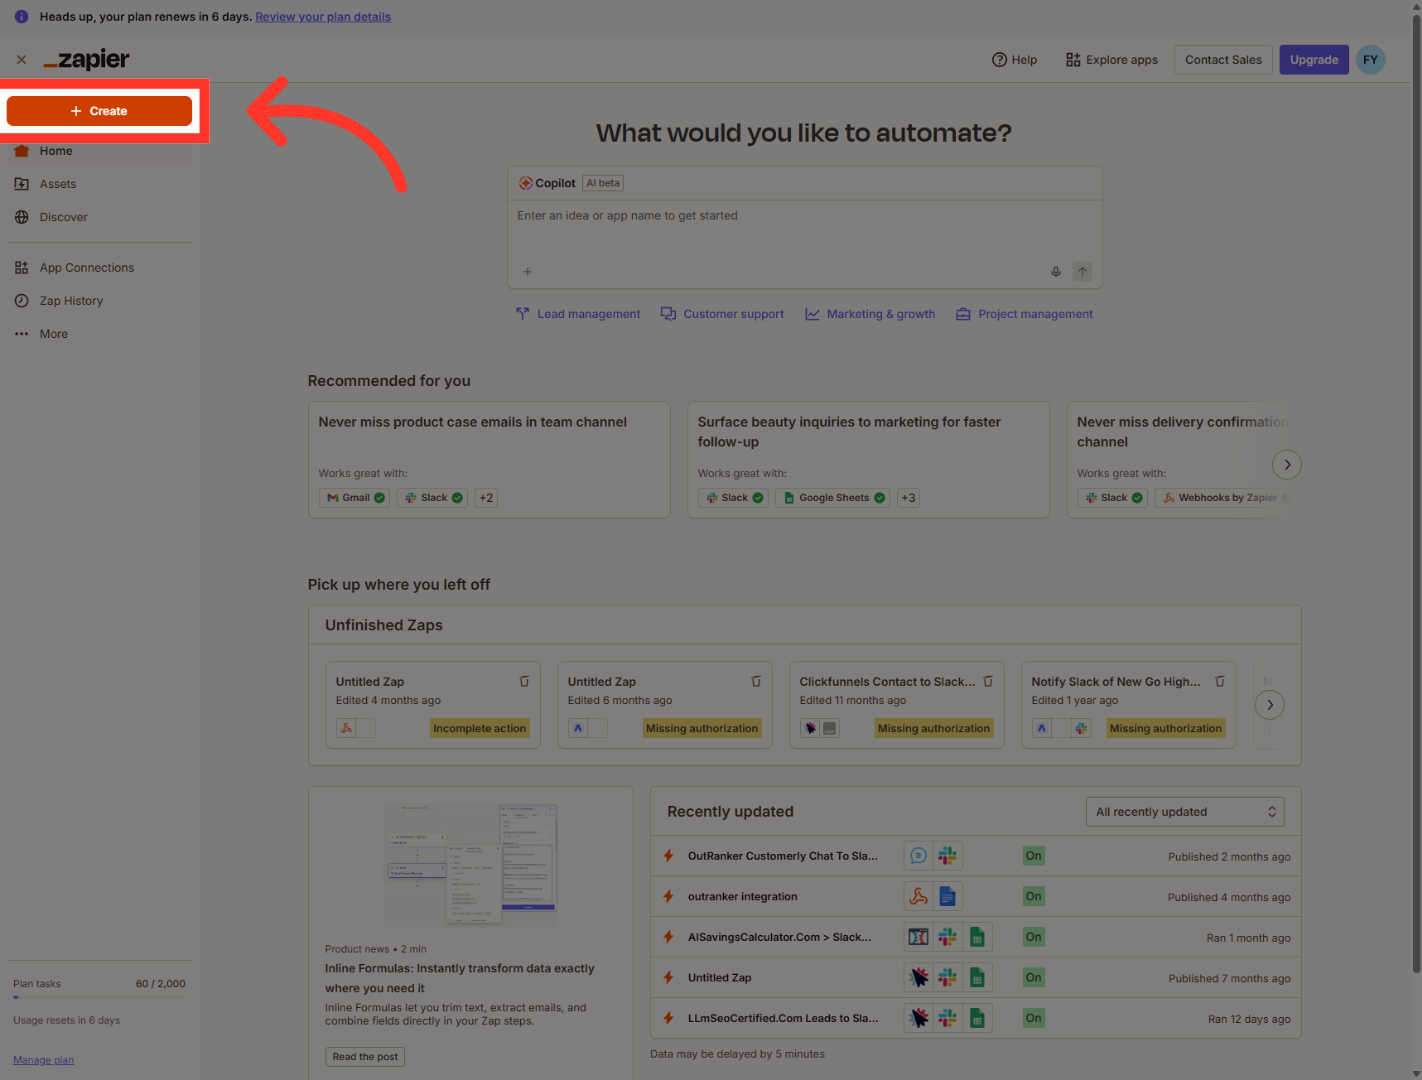
6. Open Zaps Section
“In Zapier, click Create. Then open Zaps to start building a new workflow.”

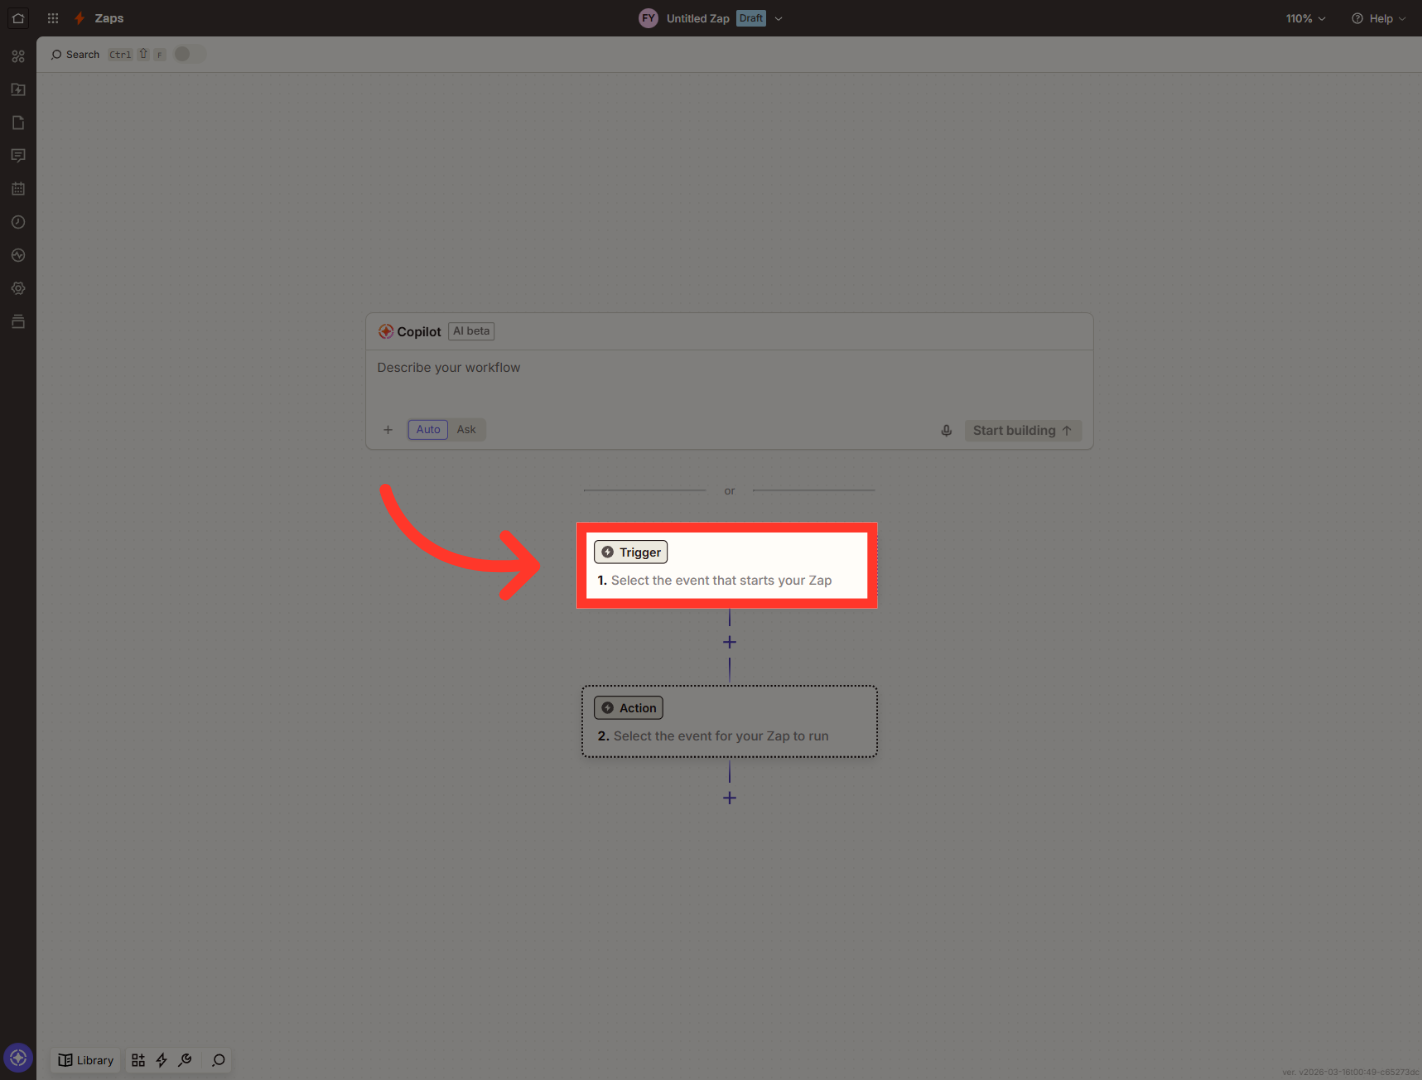
7. Select Zap Trigger Event
“In the new Zap, click the Trigger step. This is where you choose what starts the workflow.”
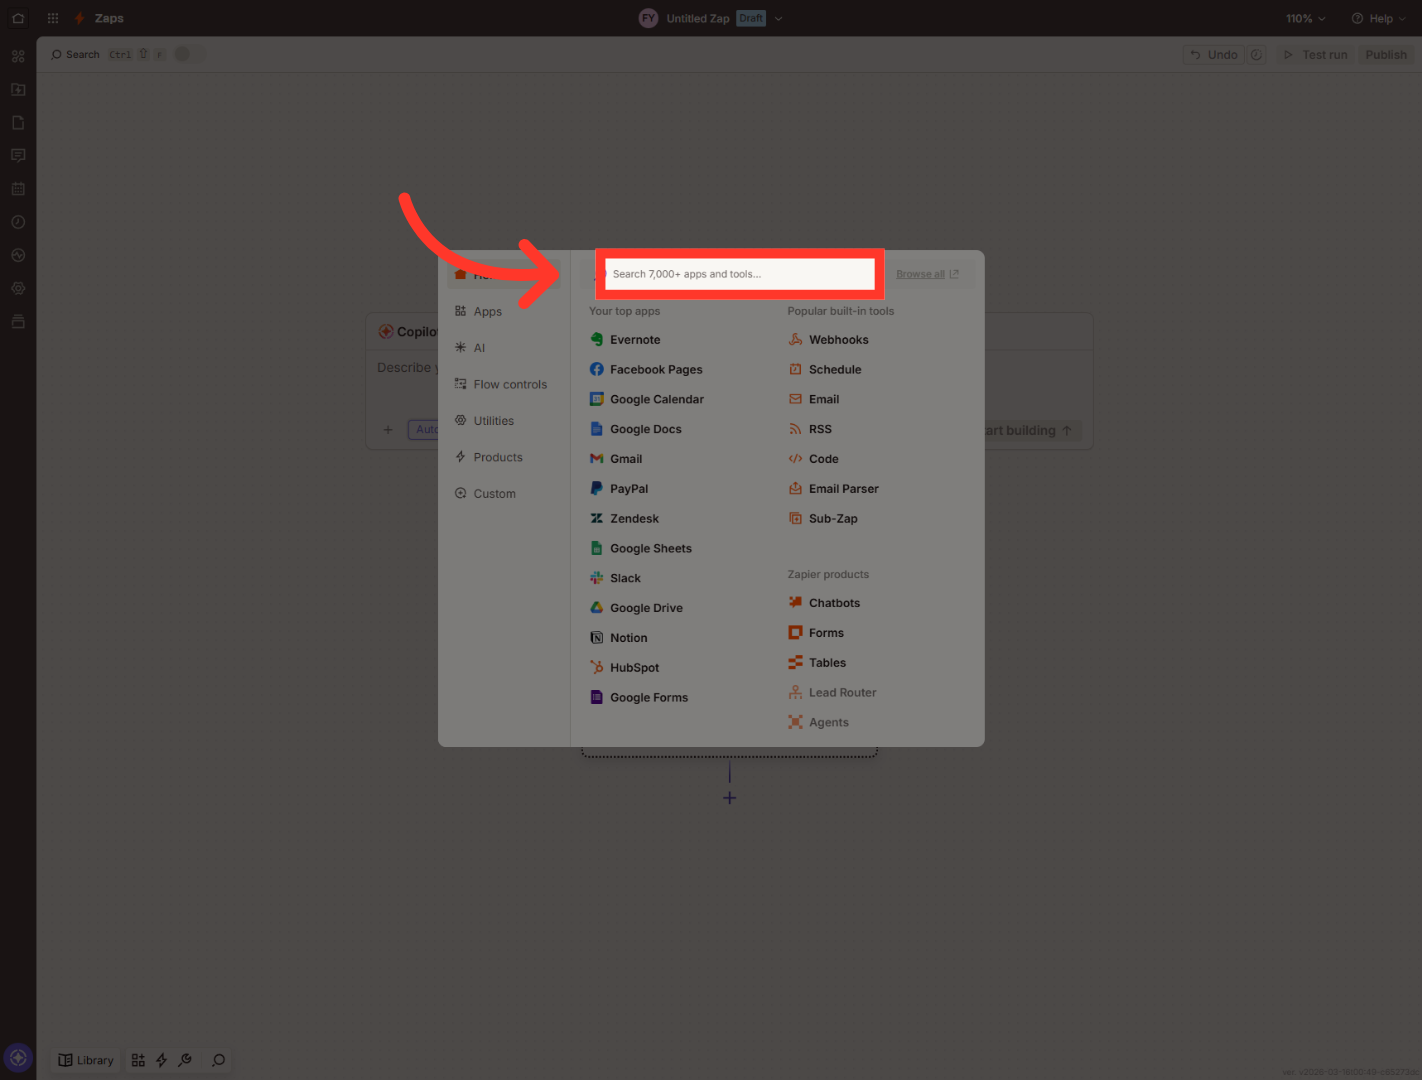
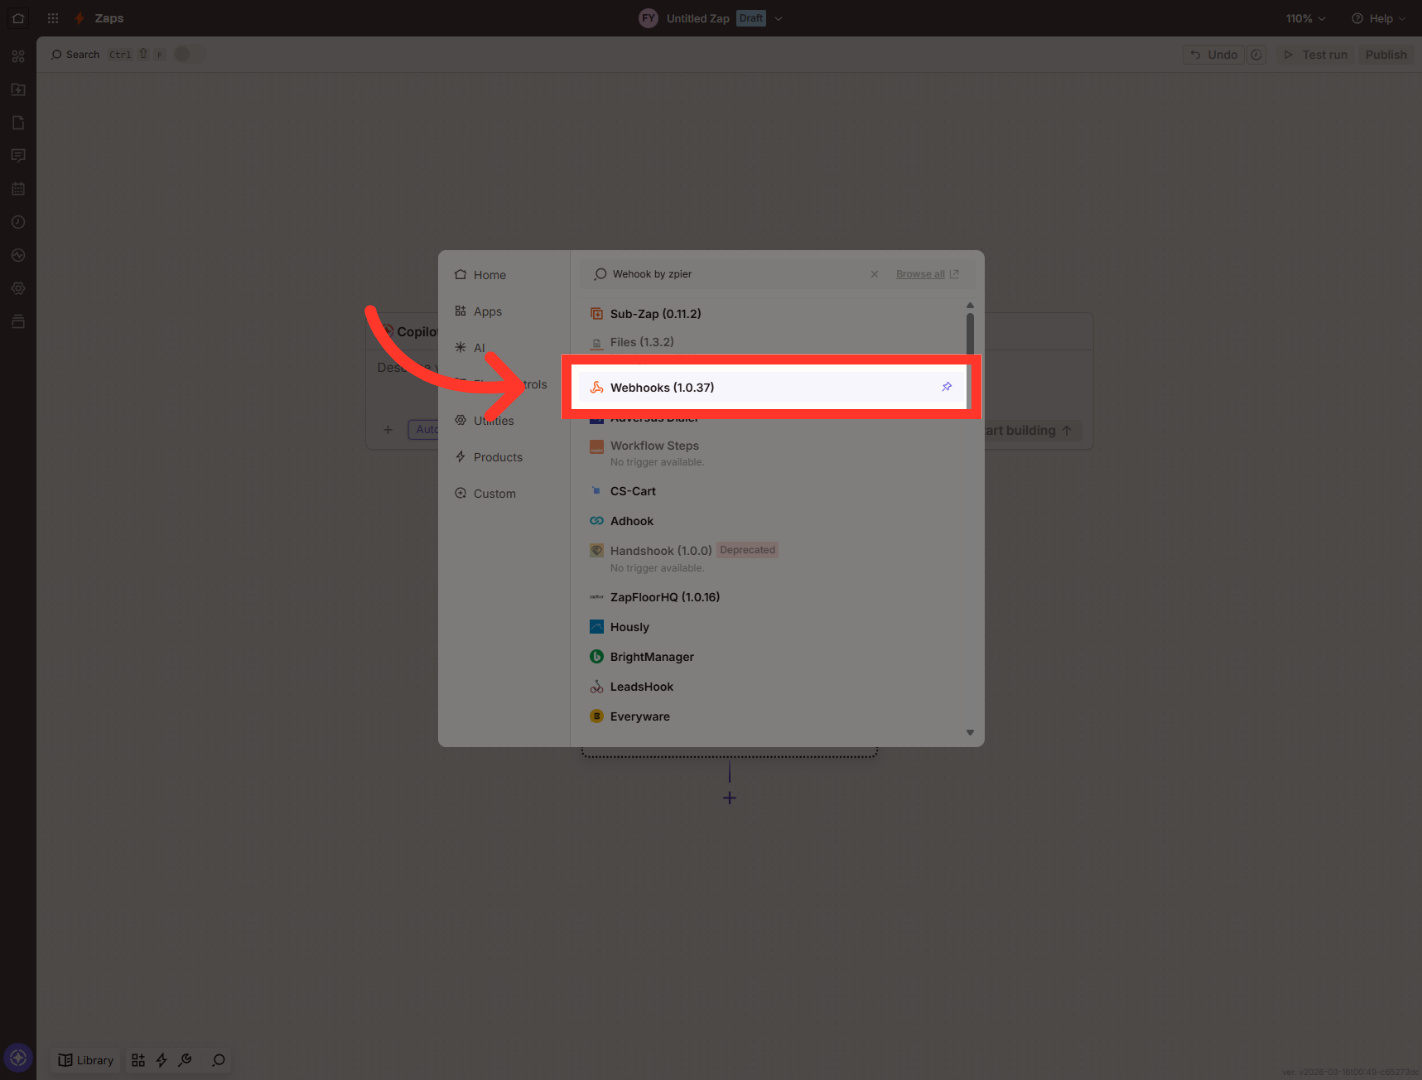
8. Search For Webhook App
“Click the app search box. Type Webhooks by Zapier. Then select it from the results.”
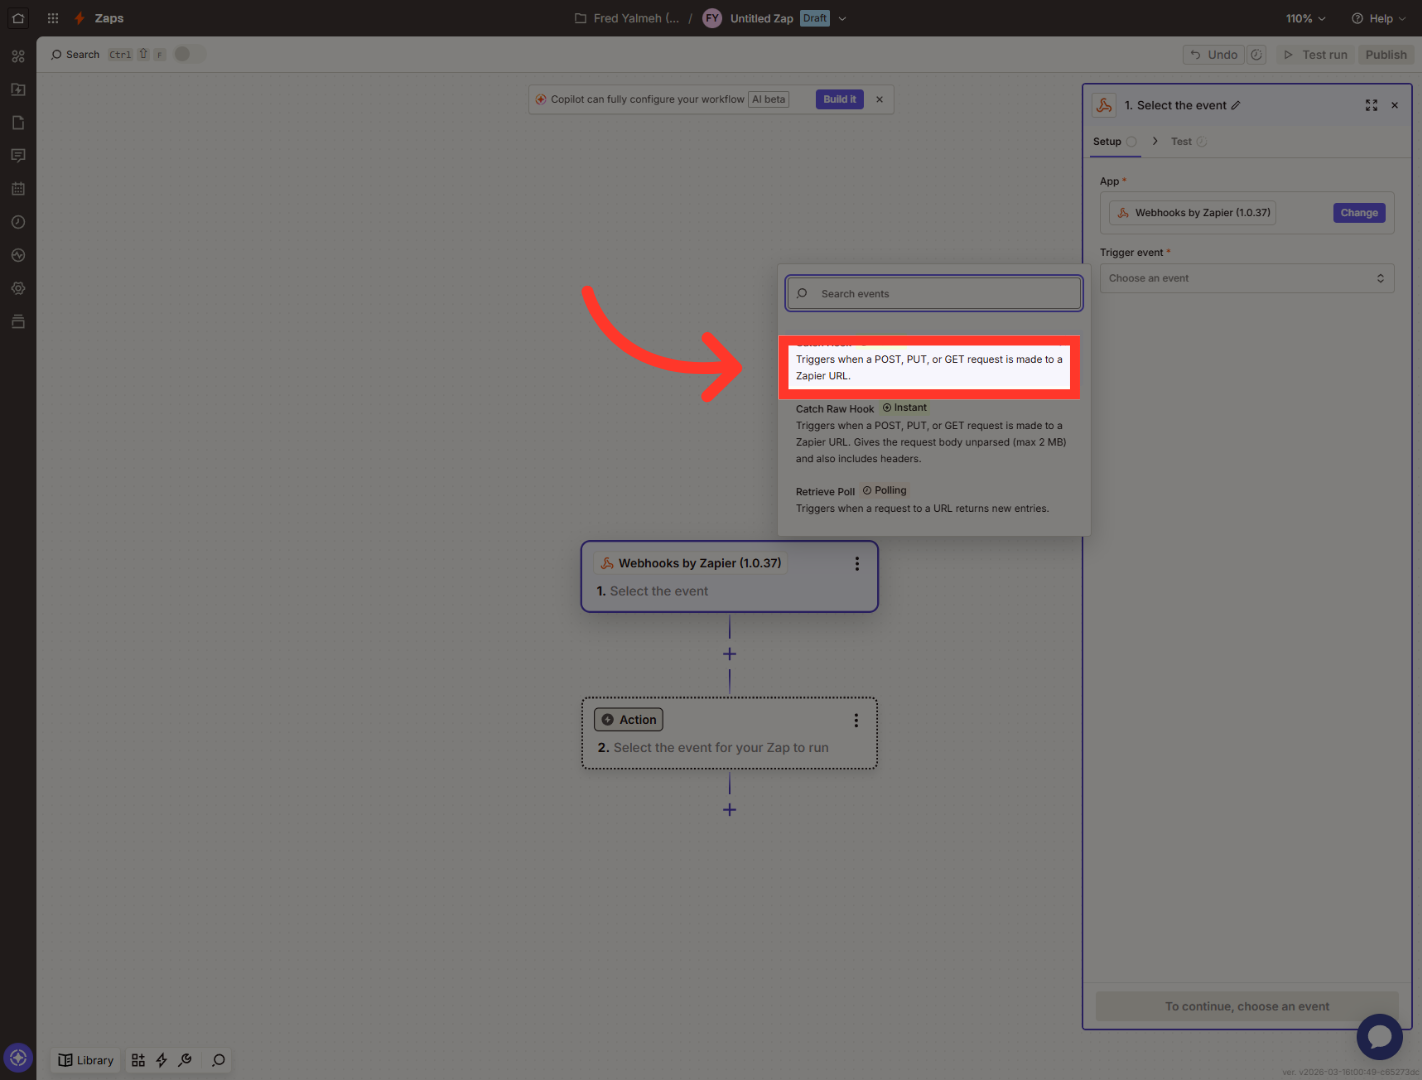
9. Select Webhooks App
“Now click Choose an event. Select Catch Hook. This tells Zapier to wait for incoming data from Outranker.”
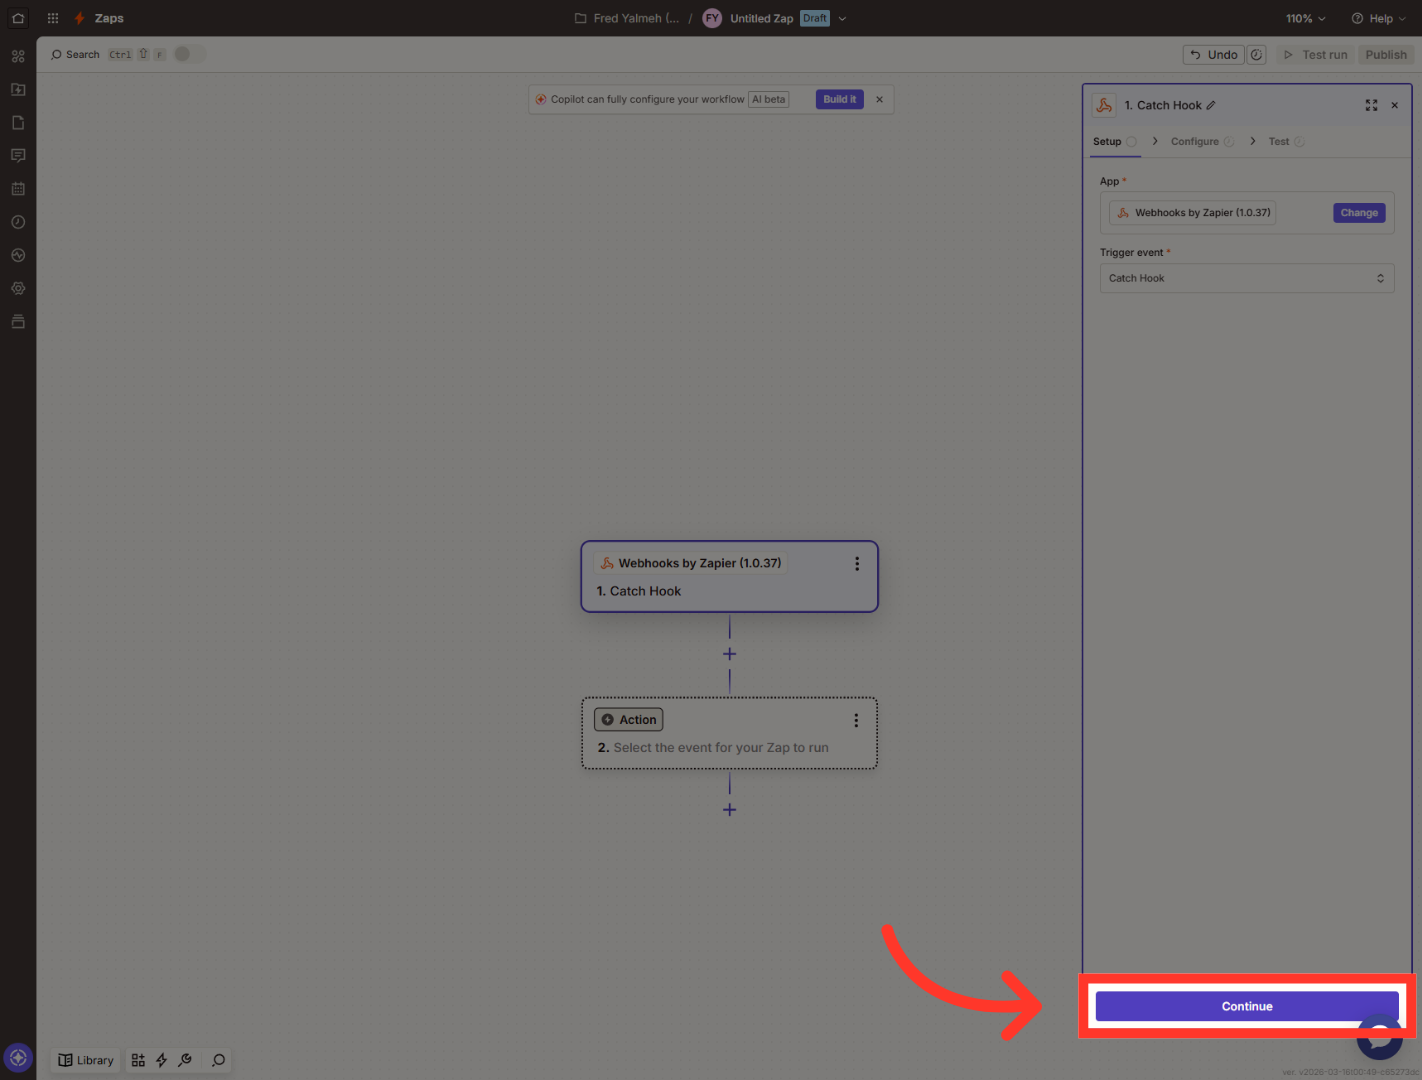
10. Select Catch Hook Trigger
“After selecting Catch Hook, click Continue. This moves you to the webhook setup.”
11. Proceed To Next Step
Click "Continue" to move forward with the webhook configuration.
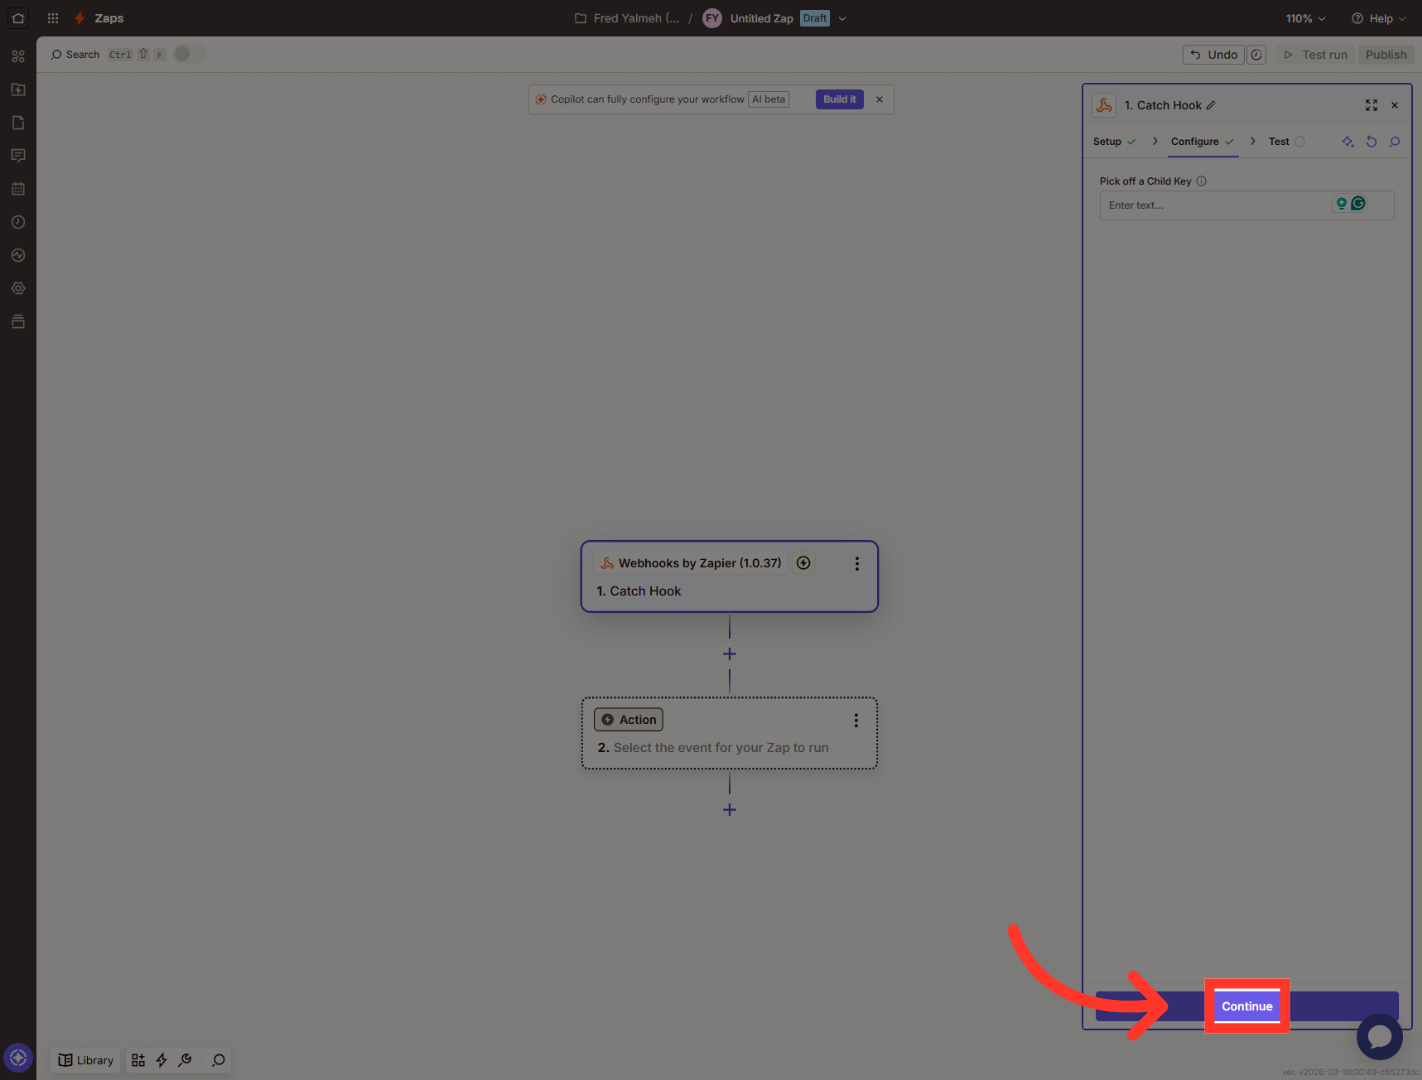
12. Continue Zap Setup
Click "Continue" to proceed with the Zap configuration after entering the webhook URL.
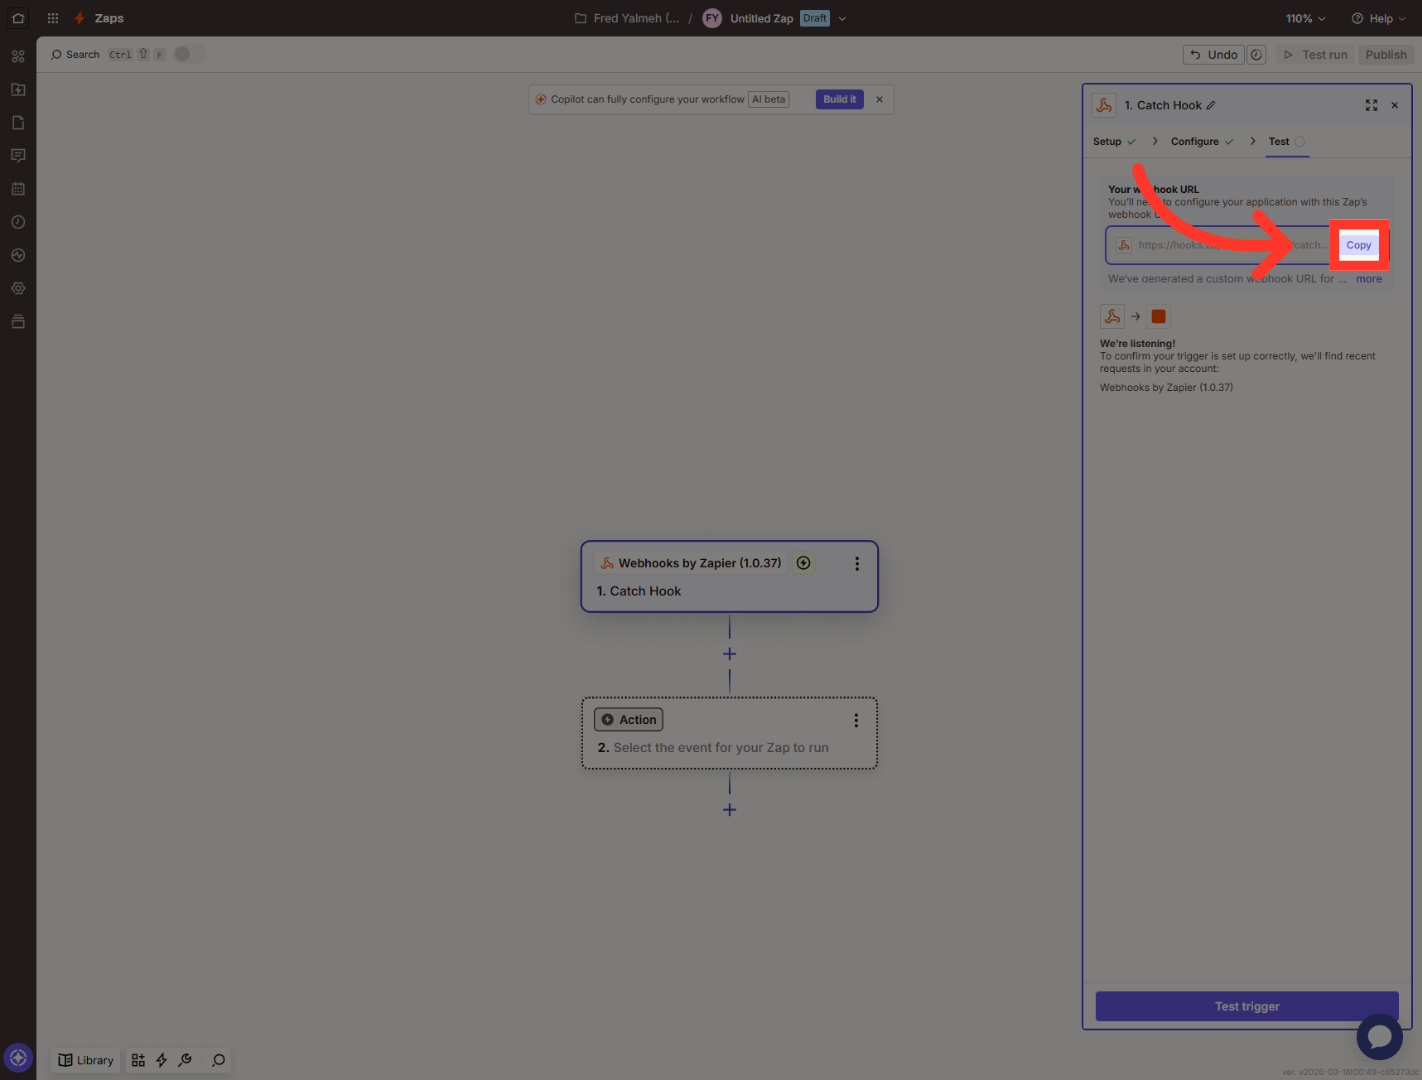
13. Copy Zapier Webhook URL
“Zapier will now generate a webhook URL for you. Click Copy to copy that URL. You’ll paste it into Outranker in the next step.”
14. Select Webhook URL Field
“Go back to Outranker. Your Zapier connection window should still be open.” “In Outranker, click the Webhook URL field. This is where you’ll add the Zapier webhook link.” “Now paste the webhook URL you copied from Zapier. This connects Outranker to the Zap you just created.”
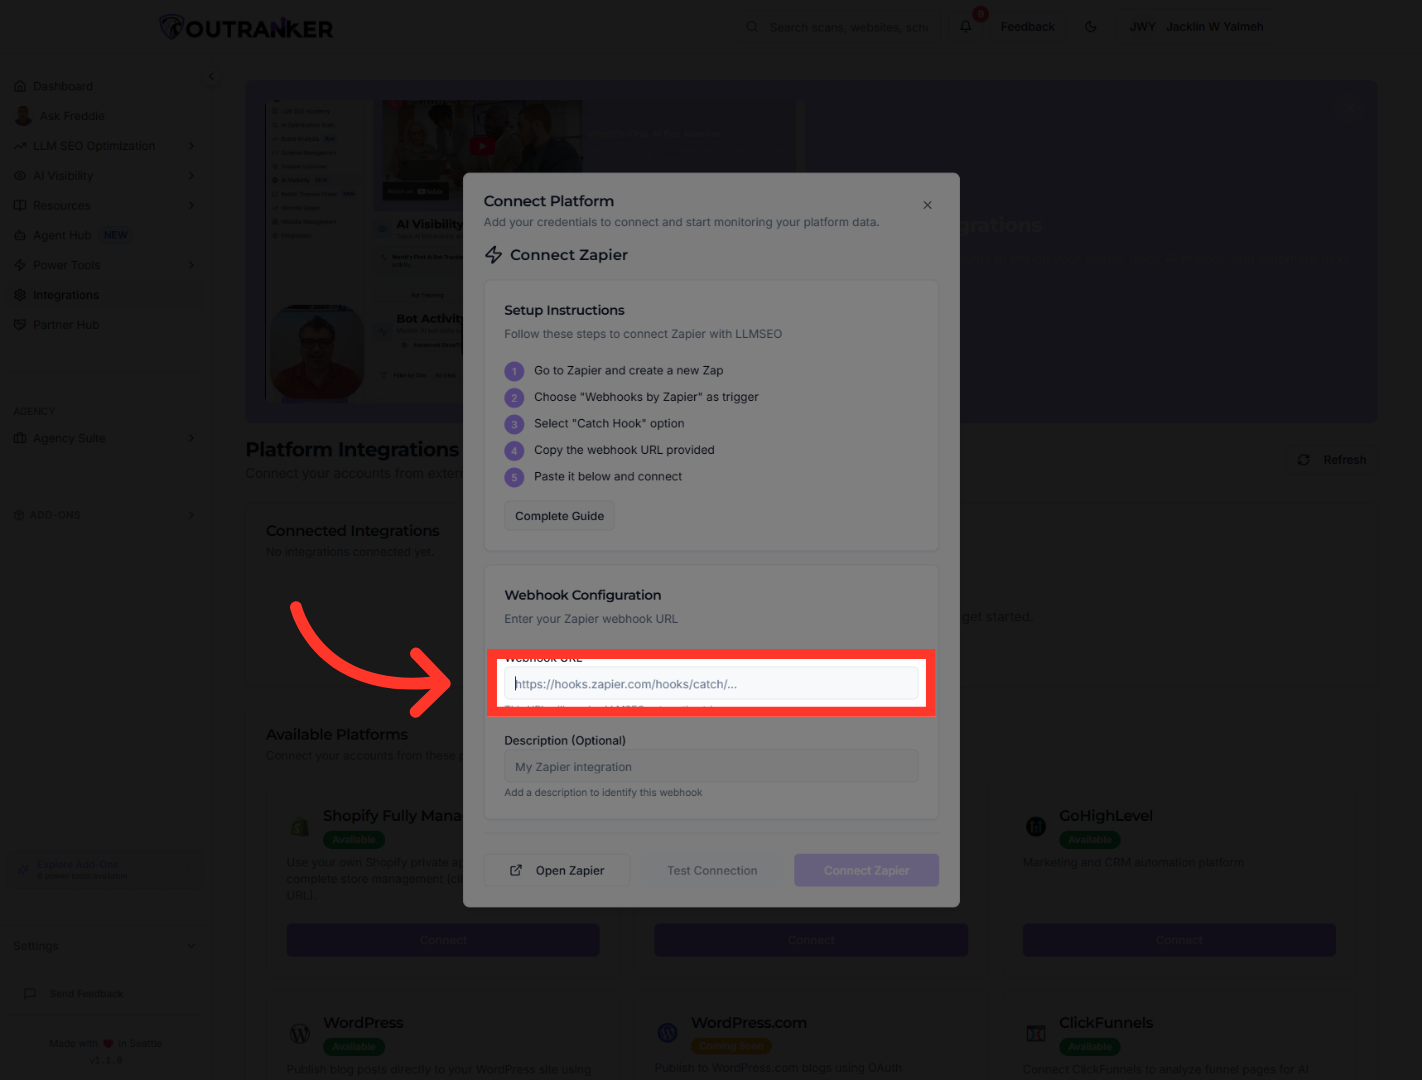
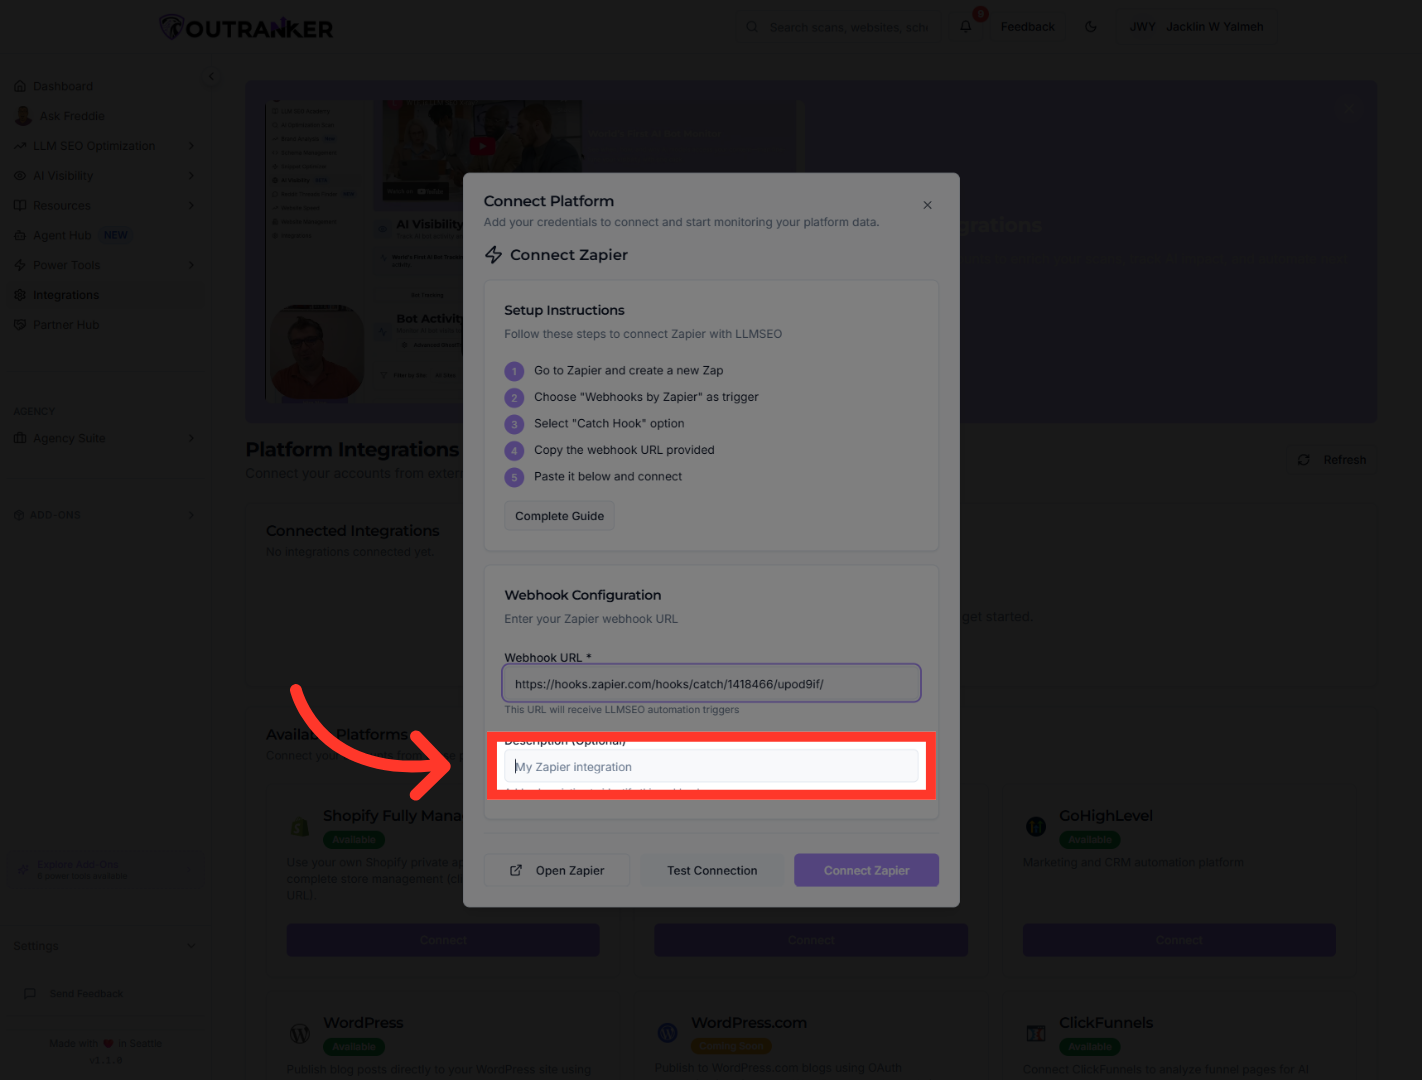
15. Open Description Field
“Next, click the Description field. Enter Zapier as the description. This makes the connection easier to recognize later.”
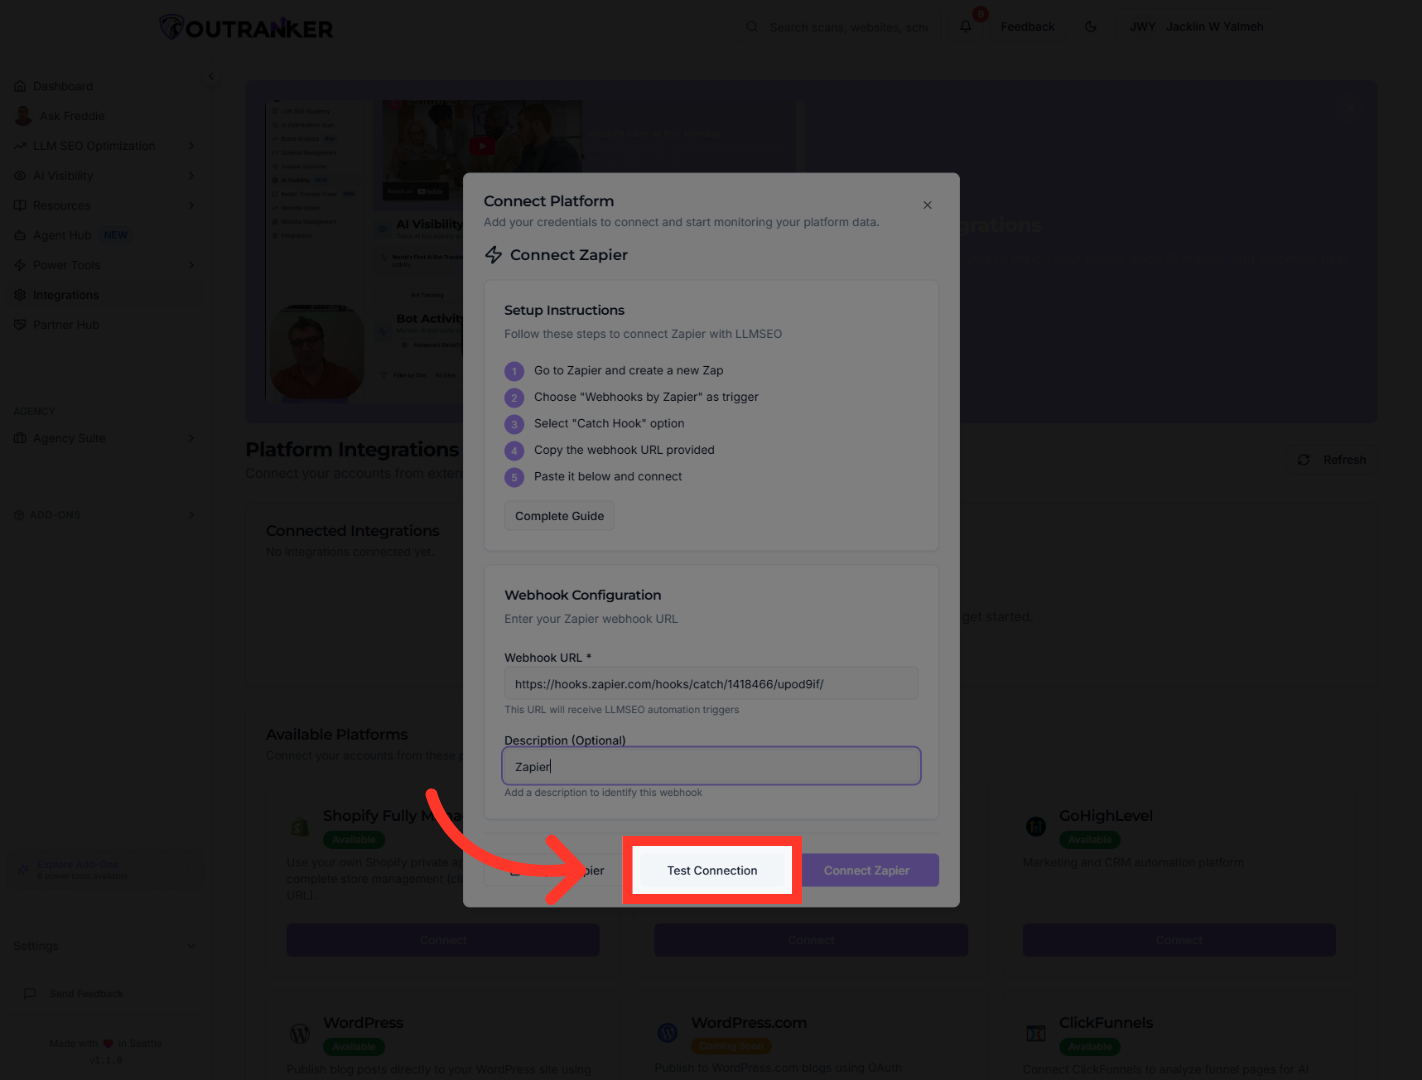
16. Test Webhook Connection
“Now click Test Connection. This checks whether Outranker can reach the Zapier webhook correctly.”
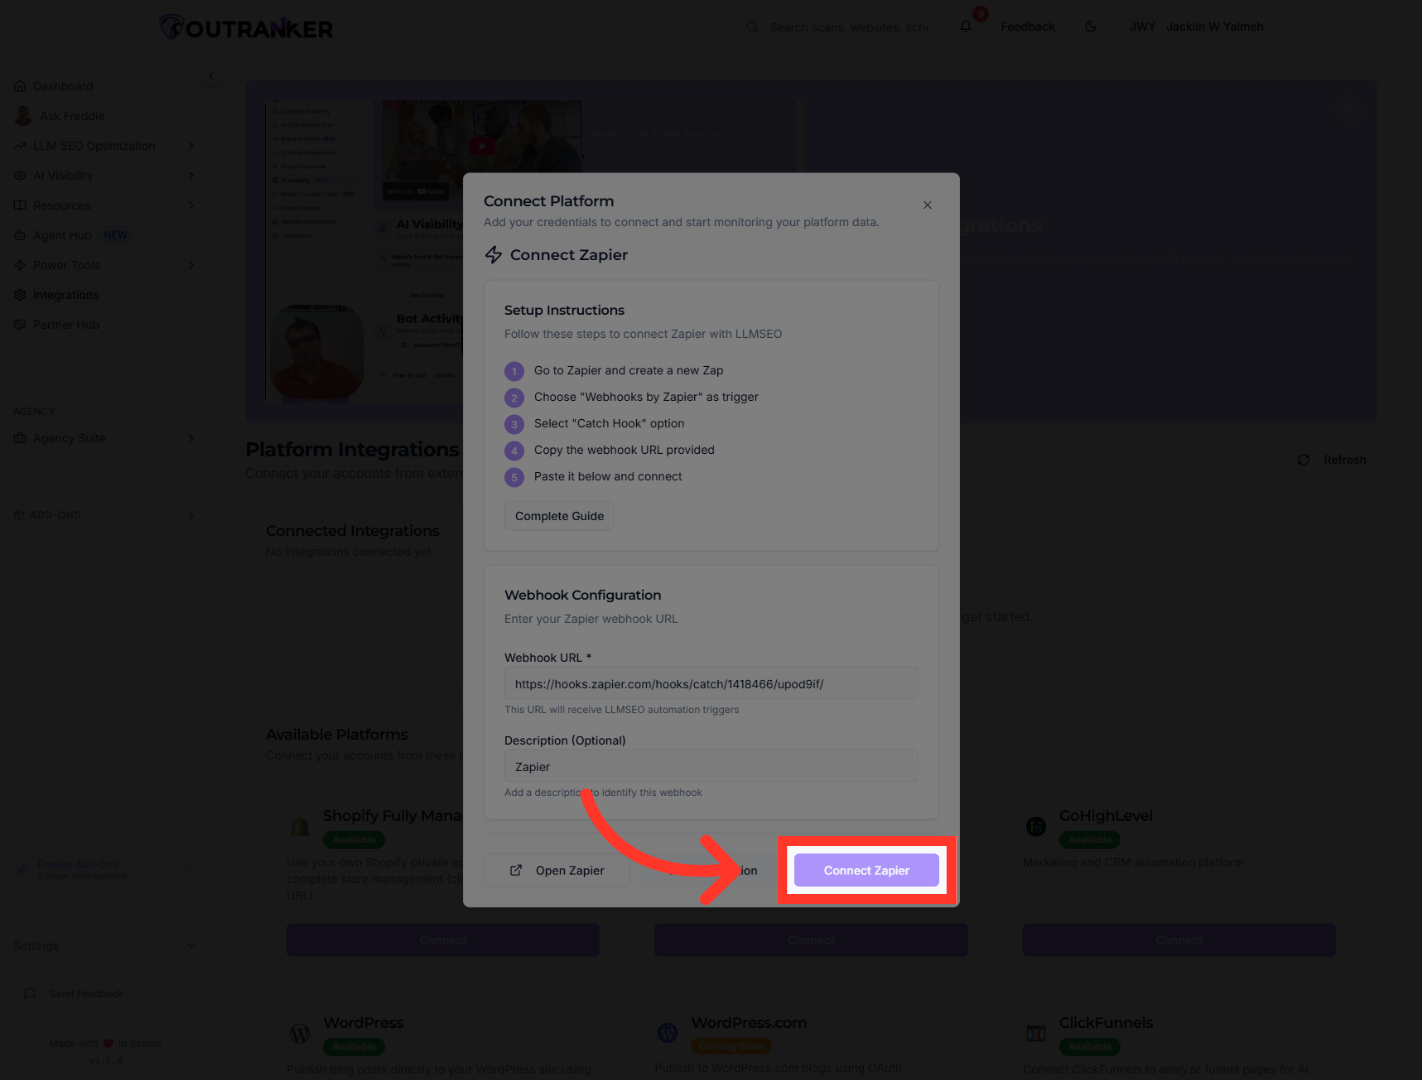
17. Connect Zapier Integration
“If the test looks good, click Connect Zapier. This saves the integration inside Outranker.”
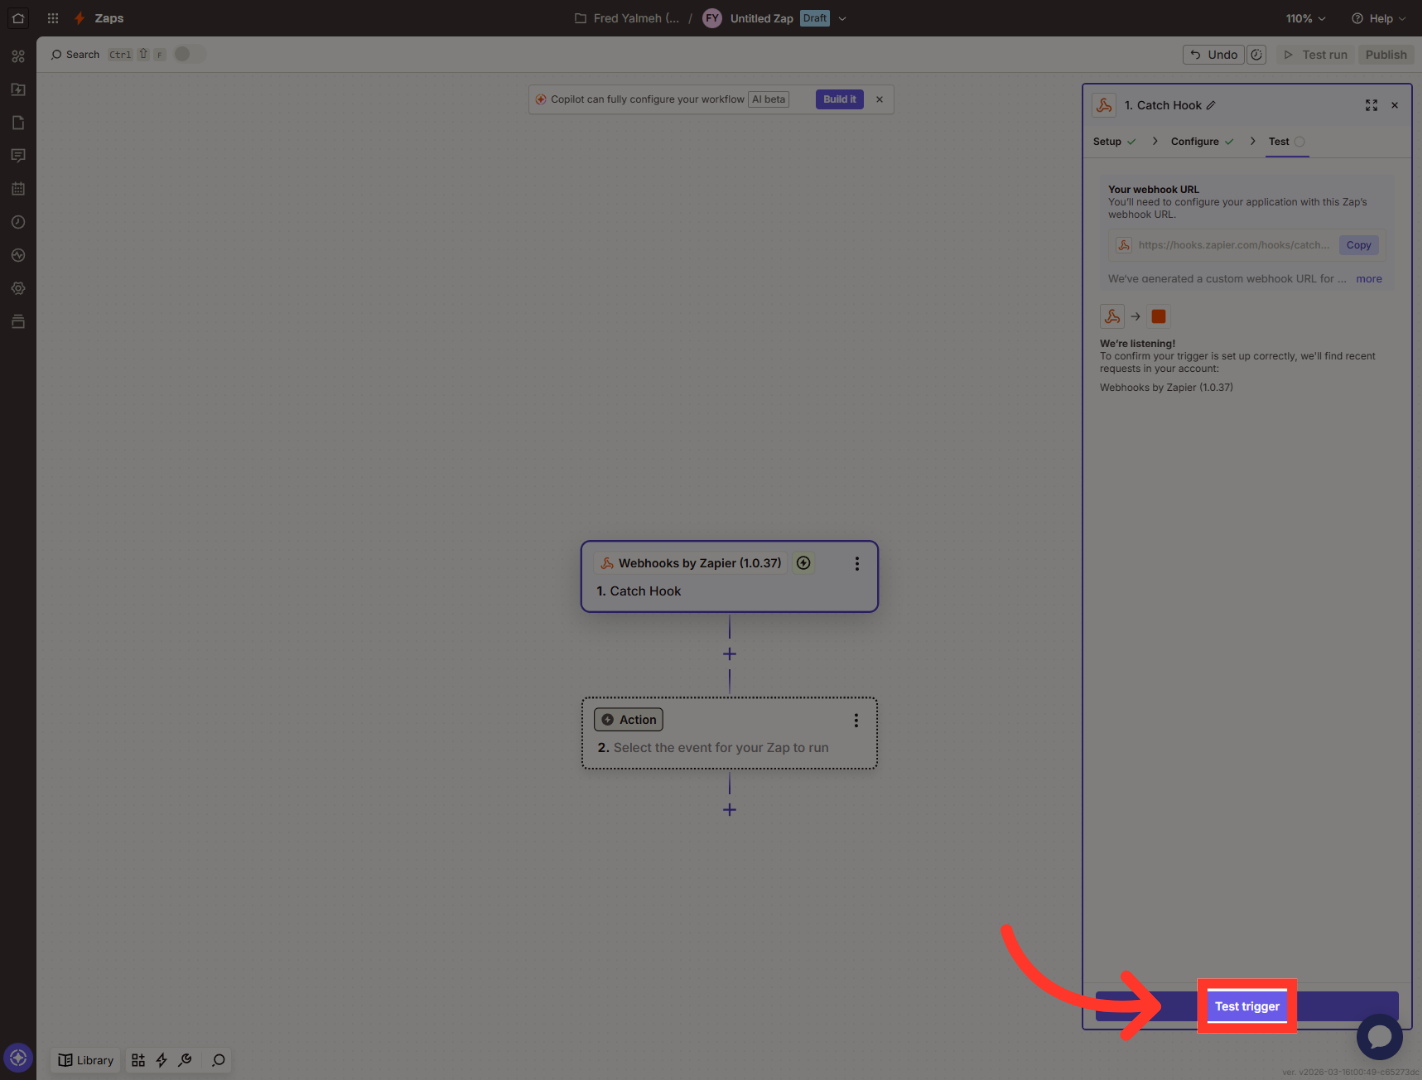
18. Test Zap Trigger
“Now switch back to Zapier one more time. You’ll finish by checking that Zapier received the test data.” “In Zapier, click Test trigger. Zapier will look for data coming in from Outranker.”
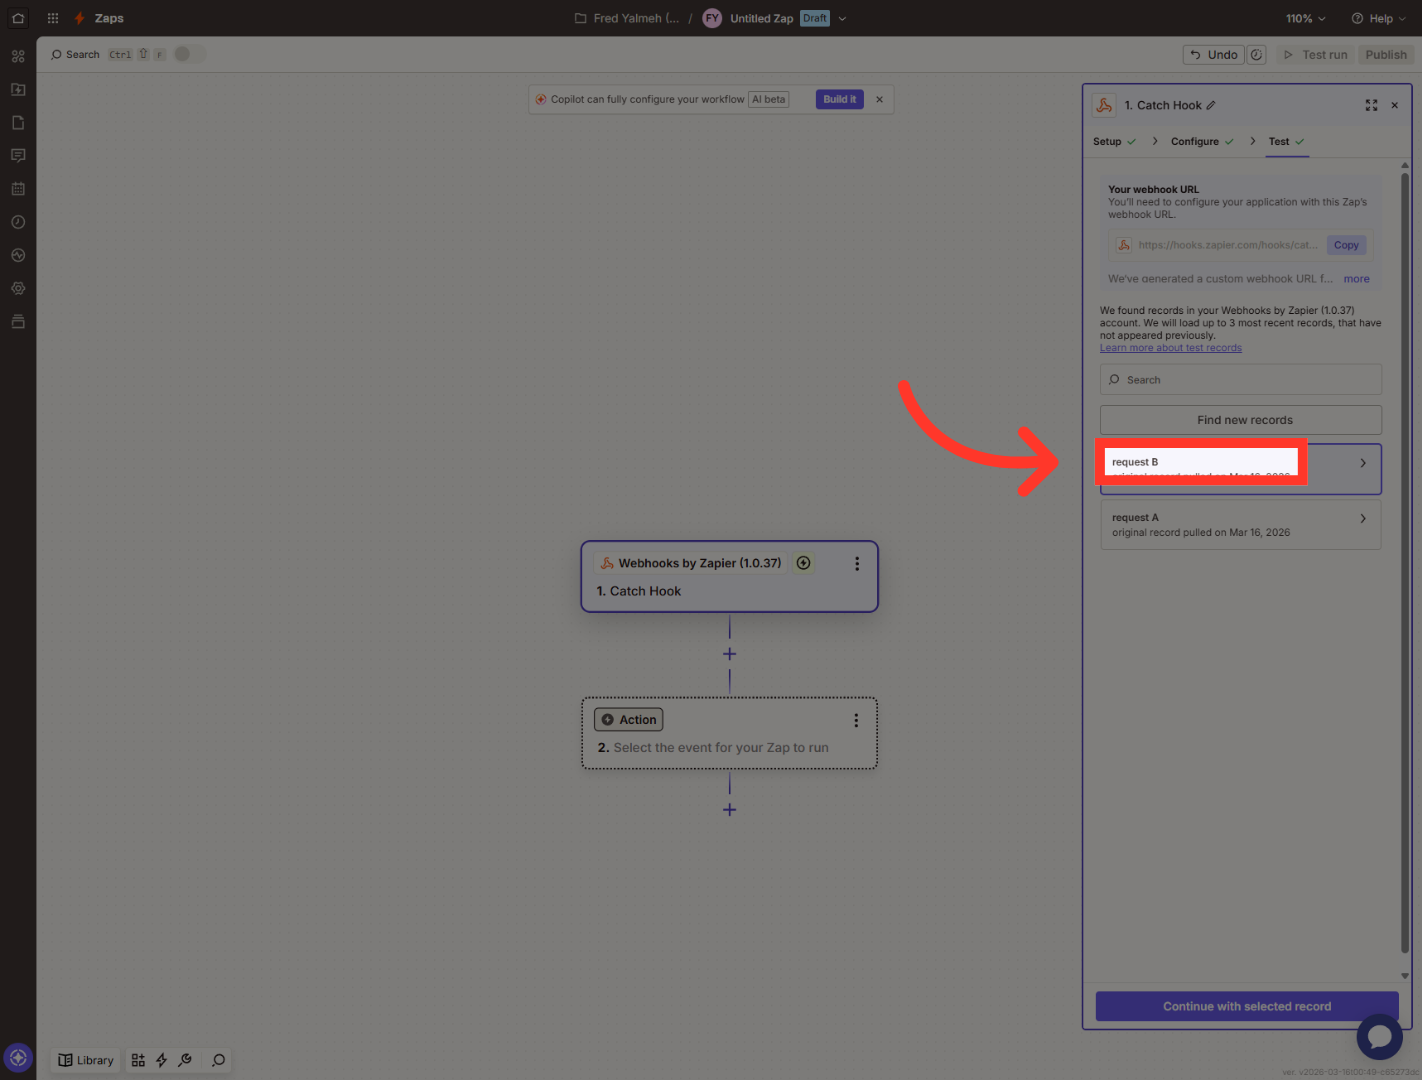
19. Select Test Request
“When Zapier shows the available test records, select request B. This gives Zapier a sample record to use for the next step.”
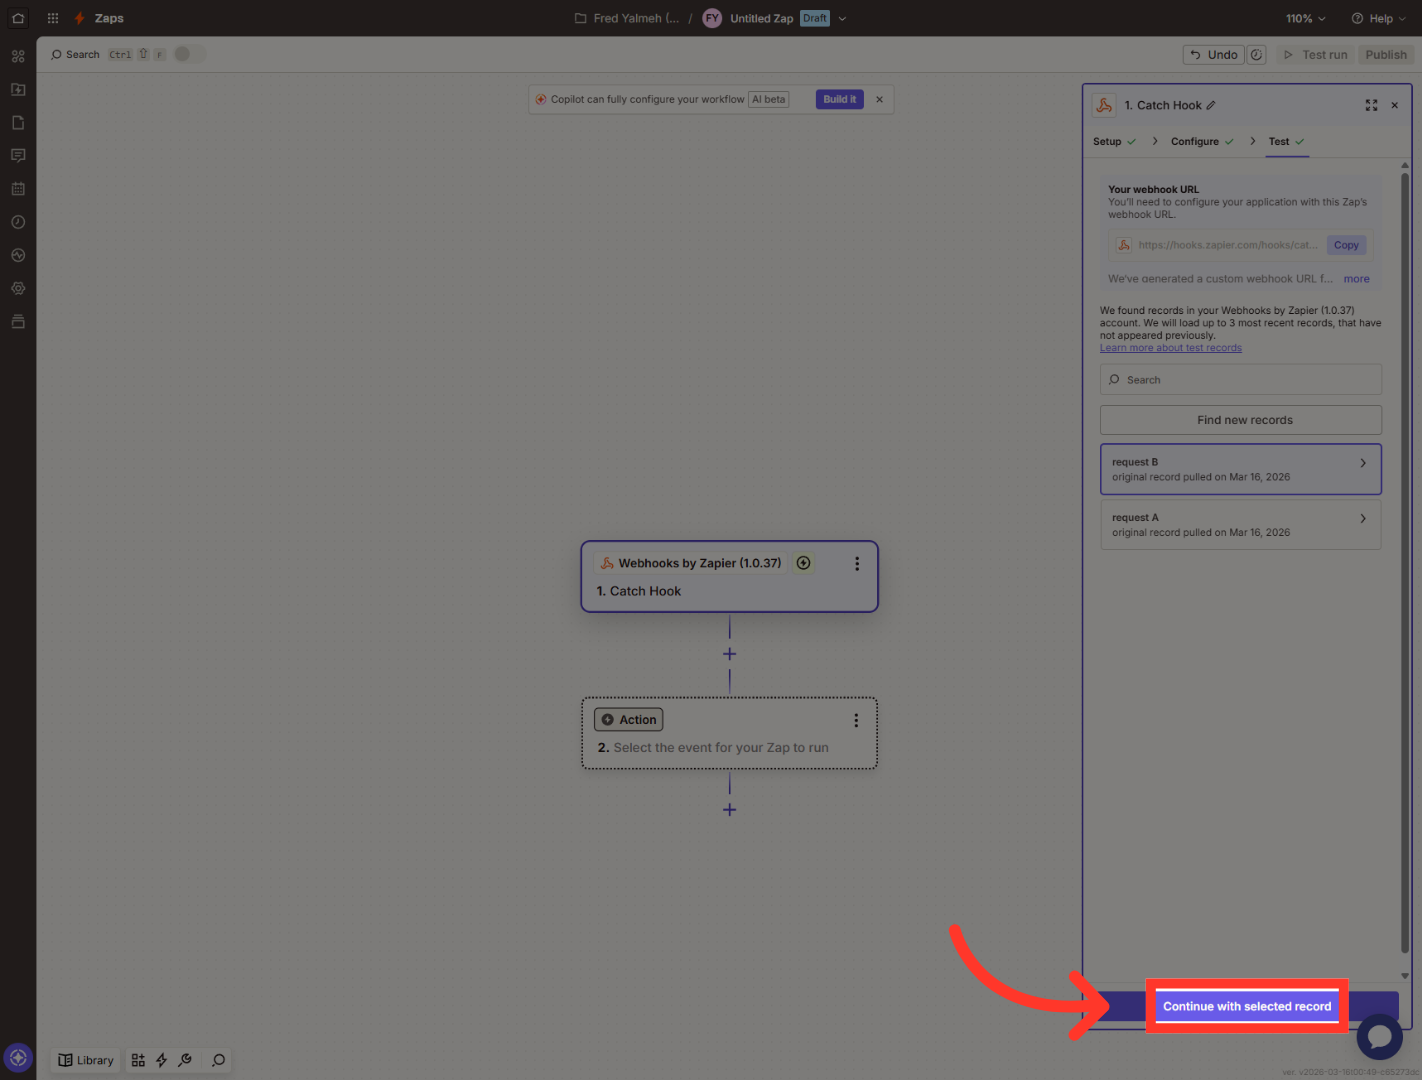
20. Confirm Selected Record
“After choosing the test record, click Continue with selected record. This confirms that the trigger is working.”
“You’ve now connected Zapier with Outranker, added the webhook URL, tested the connection, and confirmed that Zapier is receiving data correctly. From here, you can keep building your Zap and add the next action you want to automate. In the next video, we’ll show you how to use this connection inside a real workflow.”
