This tutorial guides you through connecting your Shopify store with the Outranker AI SEO Optimization Platform.
Go to www.outranker.com
1. Introduction
“In this video, you’ll learn how to connect your Shopify store with the Outranker AI Platform. This setup allows Outranker to securely communicate with your store, so you can support publishing, content workflows, and store-connected optimization from one place. We’ll walk through the full process, from opening the integration in Outranker to creating a custom Shopify app, configuring the required URLs and permissions, and finishing the connection with your store credentials.”
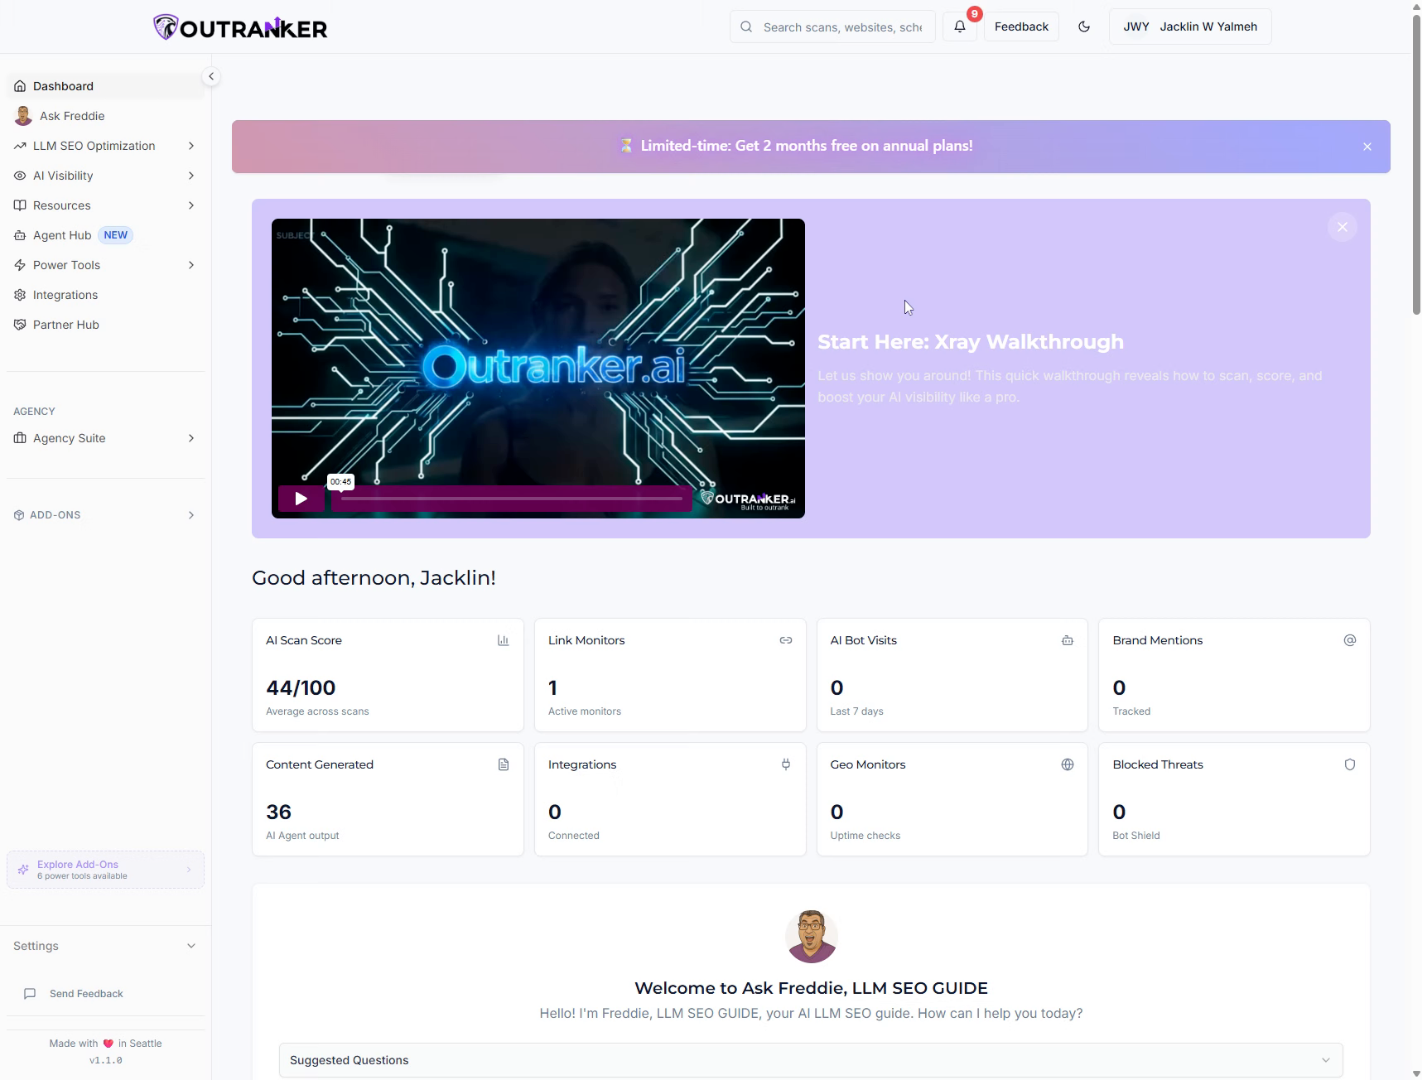
2. Initiate Connection Setup
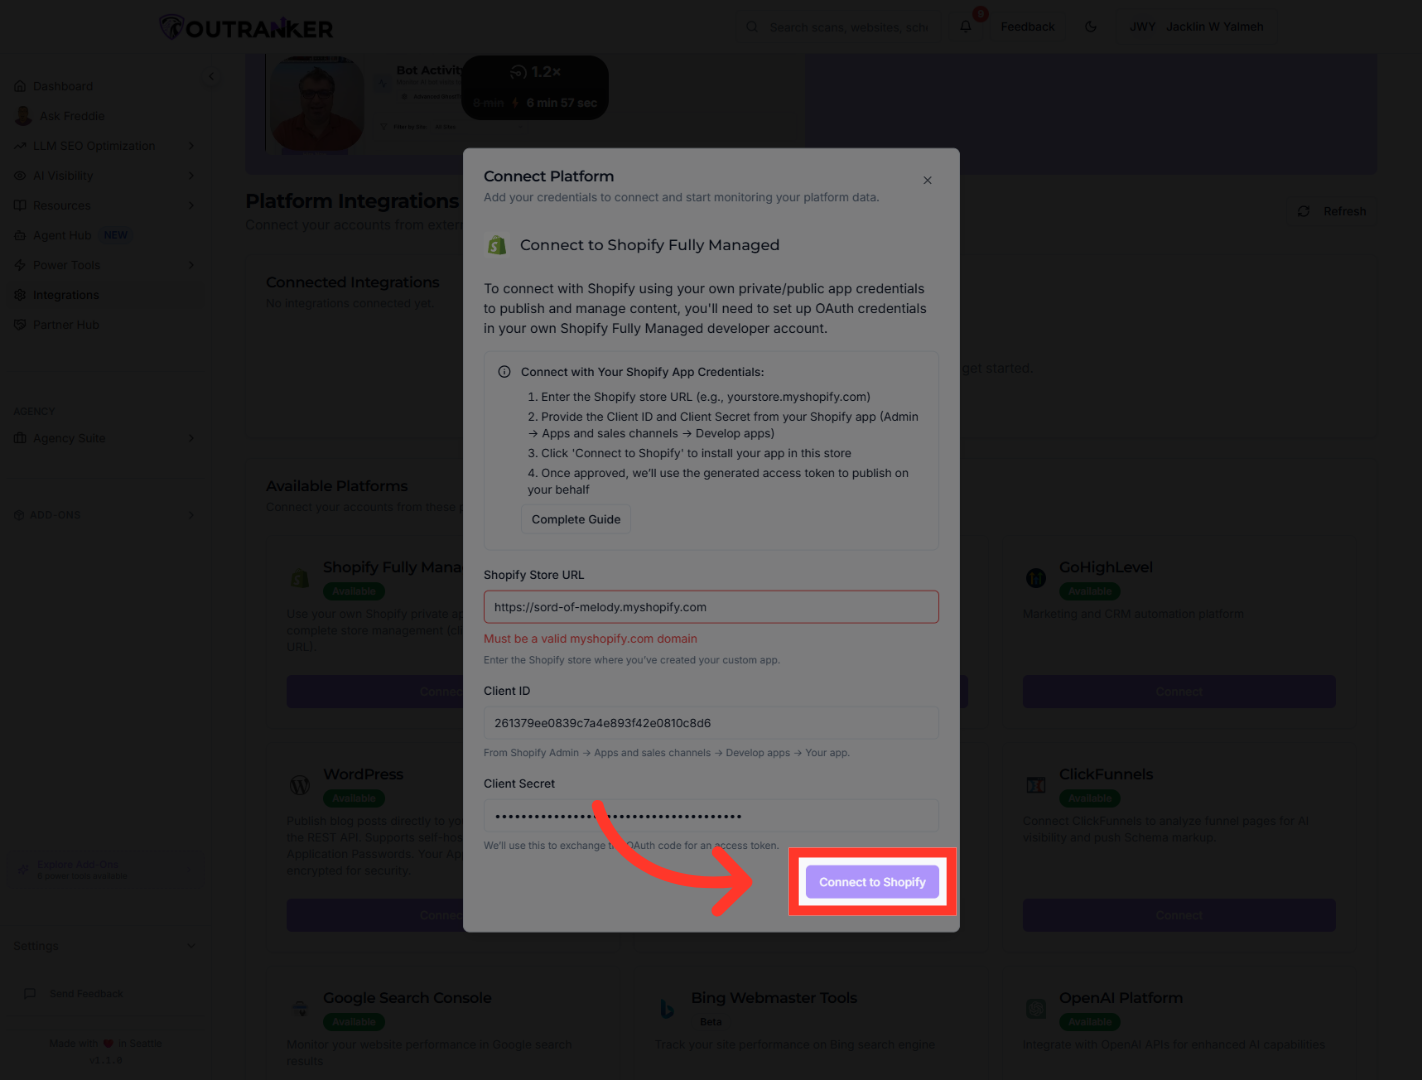
“Begin inside Outranker by opening the Integrations area. From there, find the Shopify integration and click Connect to start the setup.
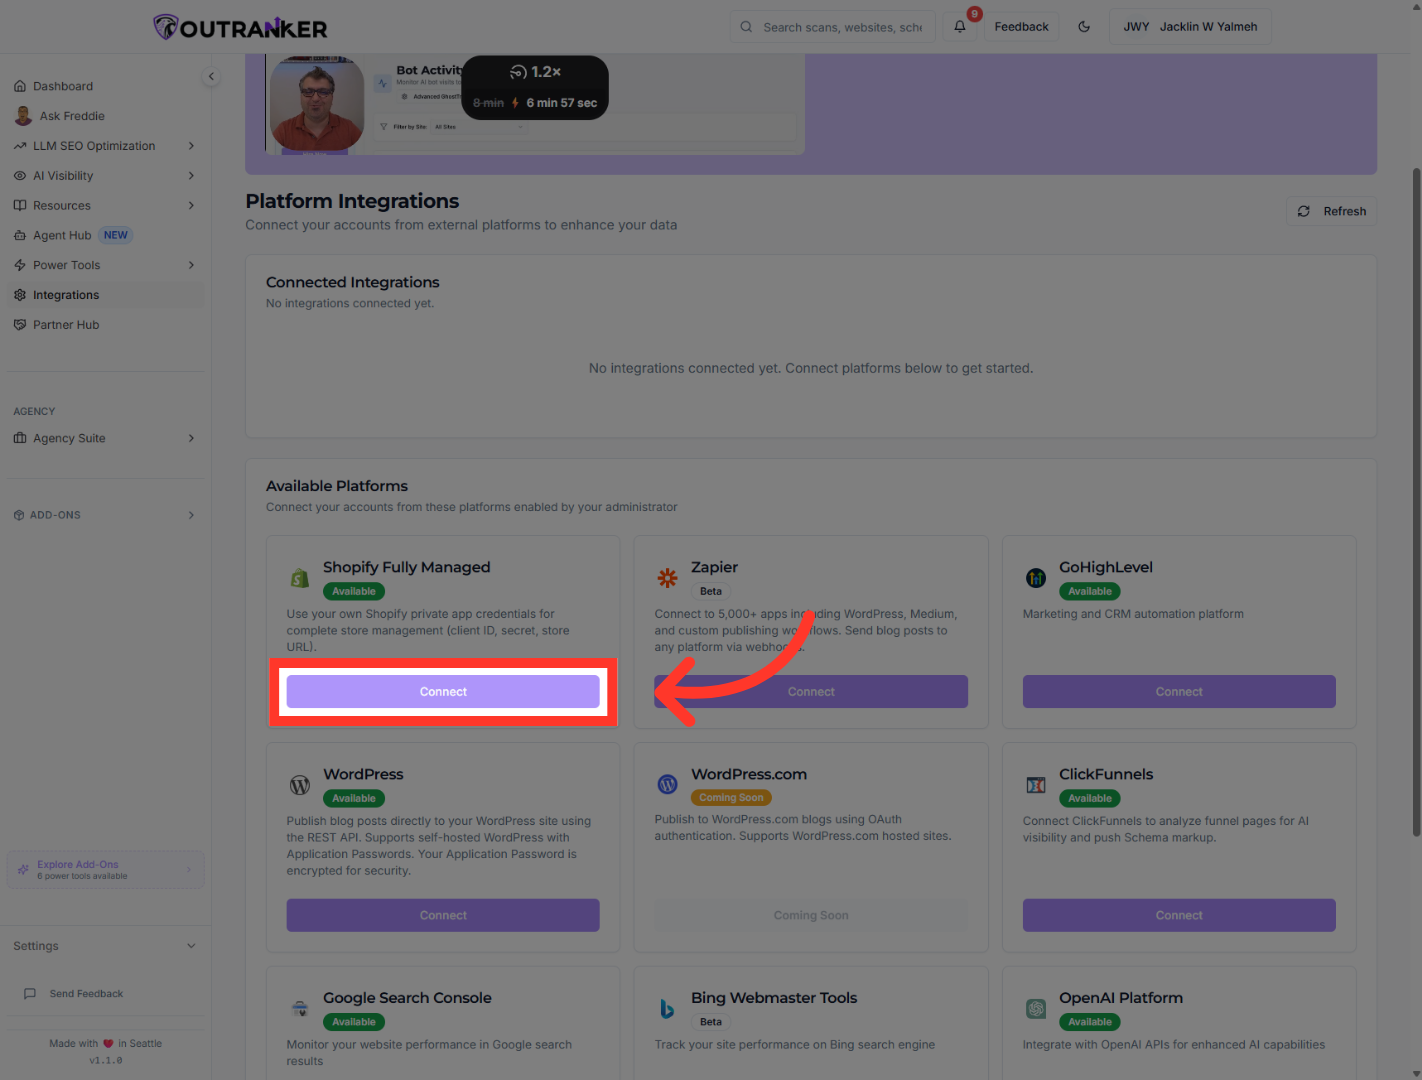
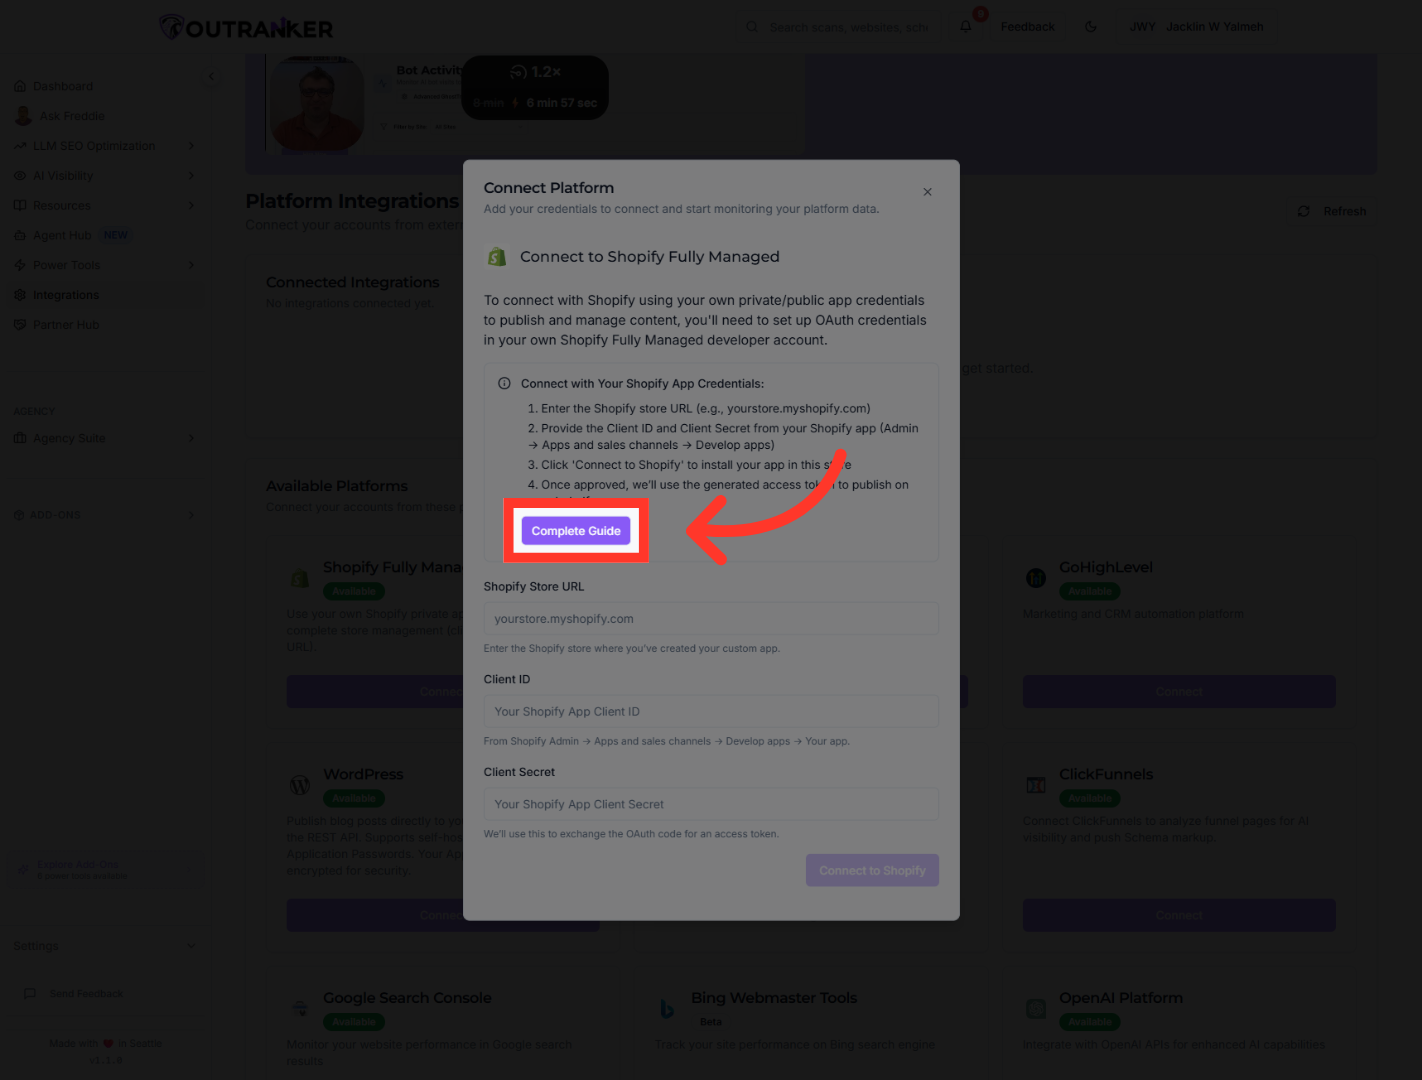
3. Open Complete Guide
Outranker also provides a Complete Guide, which shows the exact values you’ll need during configuration. This is especially useful because the integration depends on matching settings between Outranker and Shopify.”
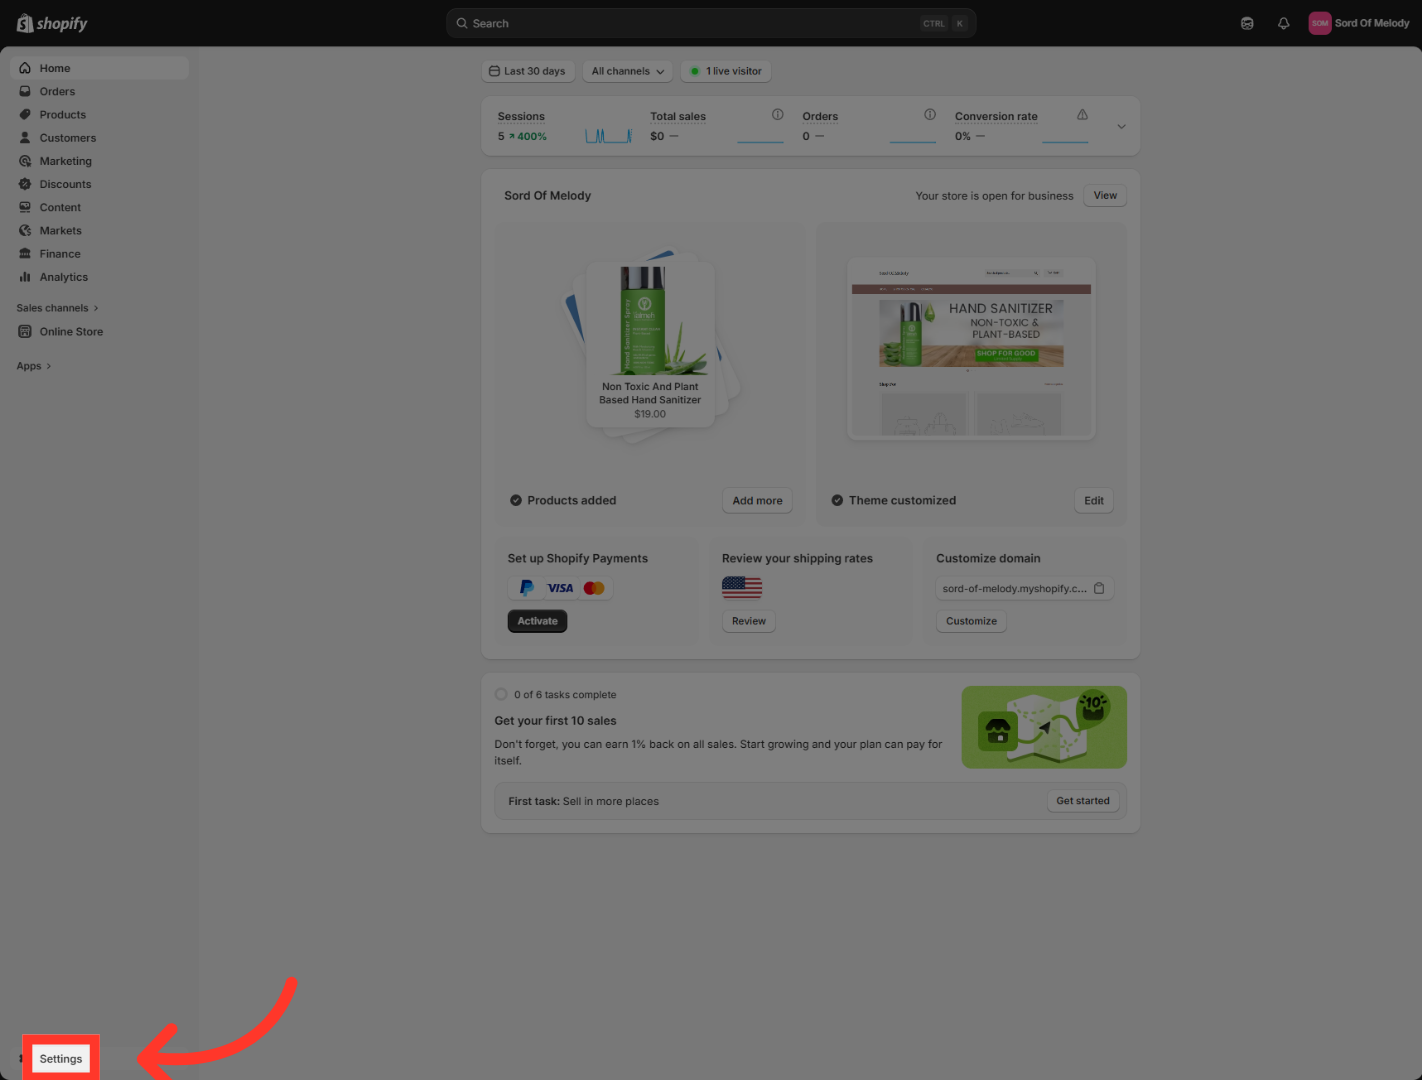
4. Open Store Settings
“Next, switch to your Shopify admin and open the store you want to connect. Click "Settings" to access the configuration options for your Shopify store.
5. Access Apps Settings
Click "Apps" to manage installed applications and integrations within Shopify.
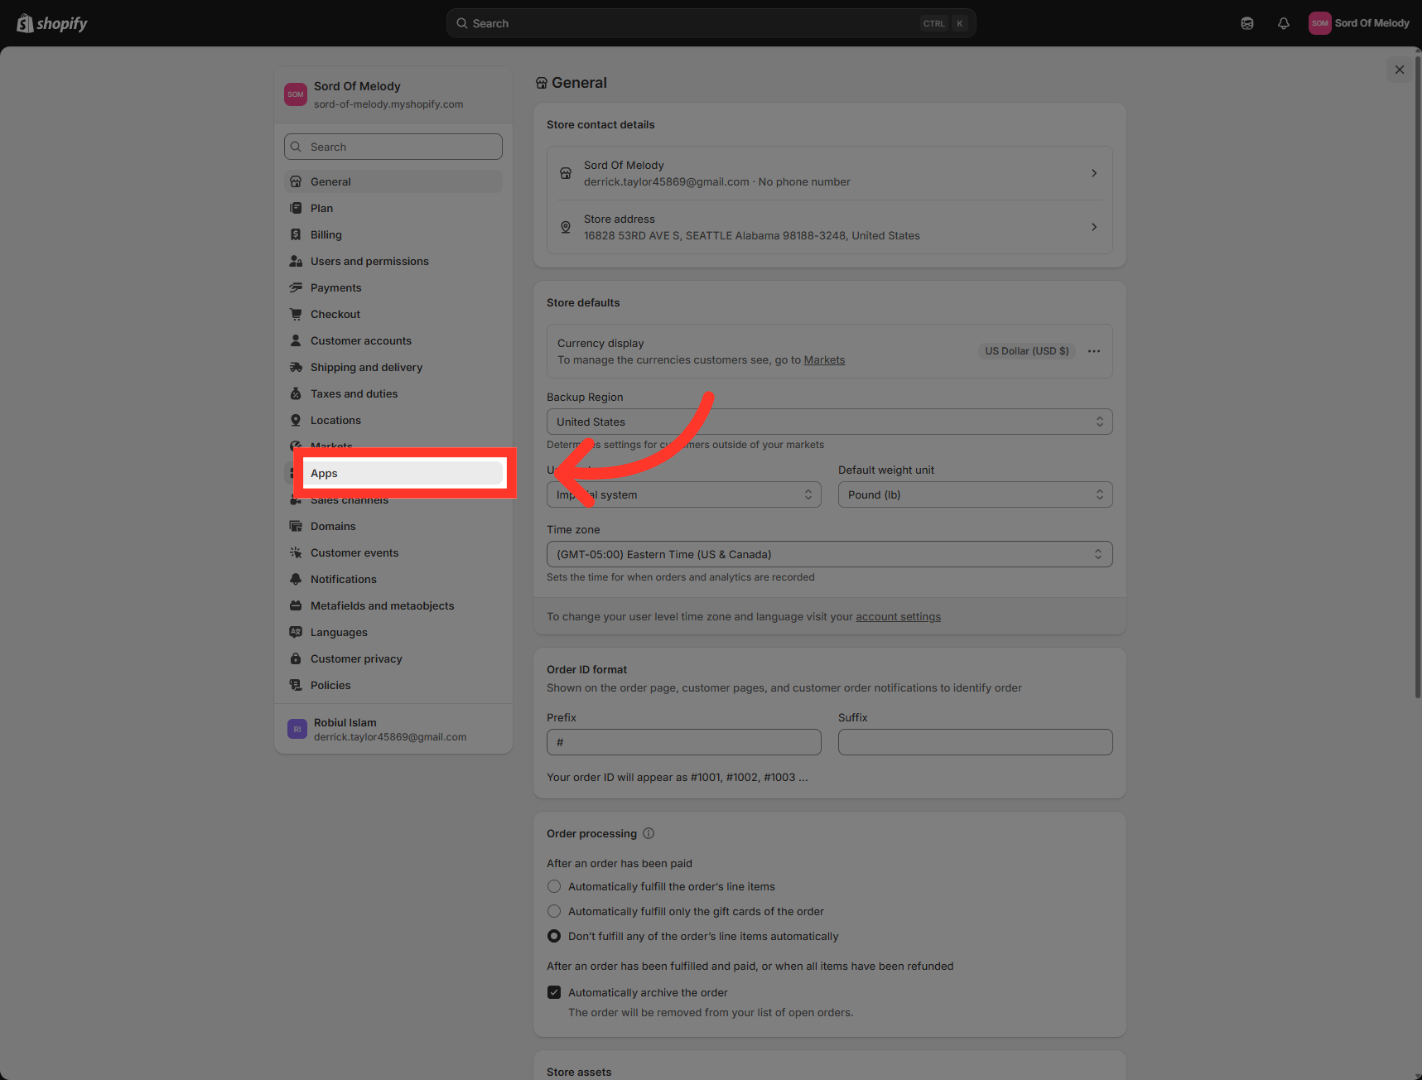
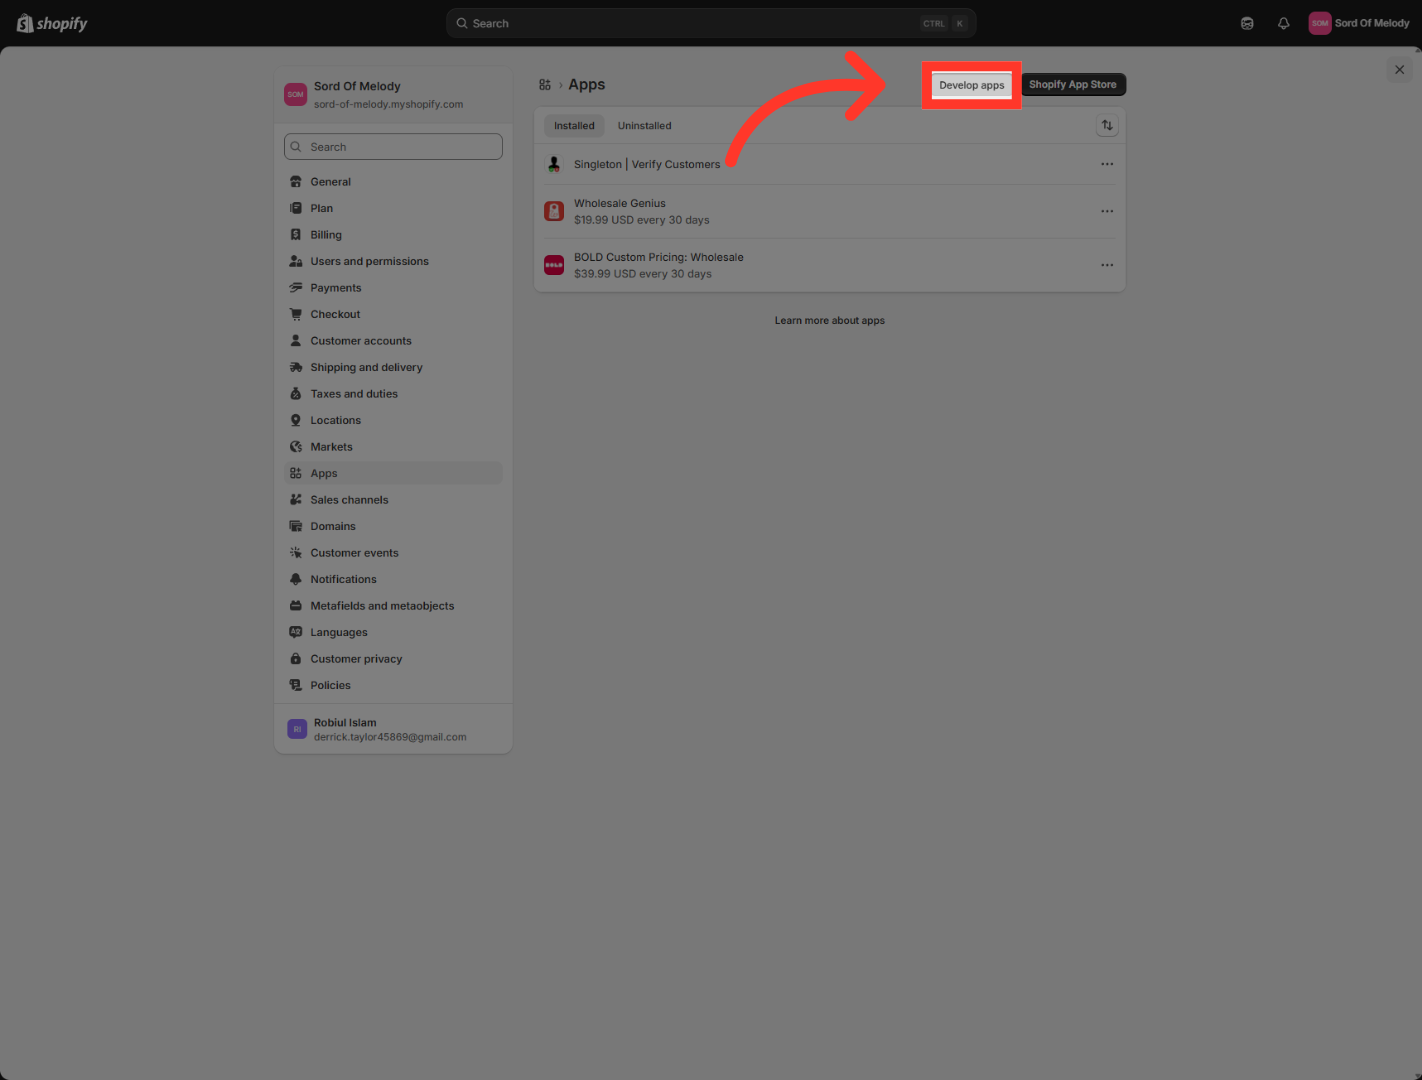
6. Open Developer Apps
Go to Apps, then open Develop apps so you can create a custom app for this integration. This app acts as the secure bridge between Shopify and Outranker. Instead of using a shared connection, you’re creating a store-specific setup that gives you more control over access and permissions.”
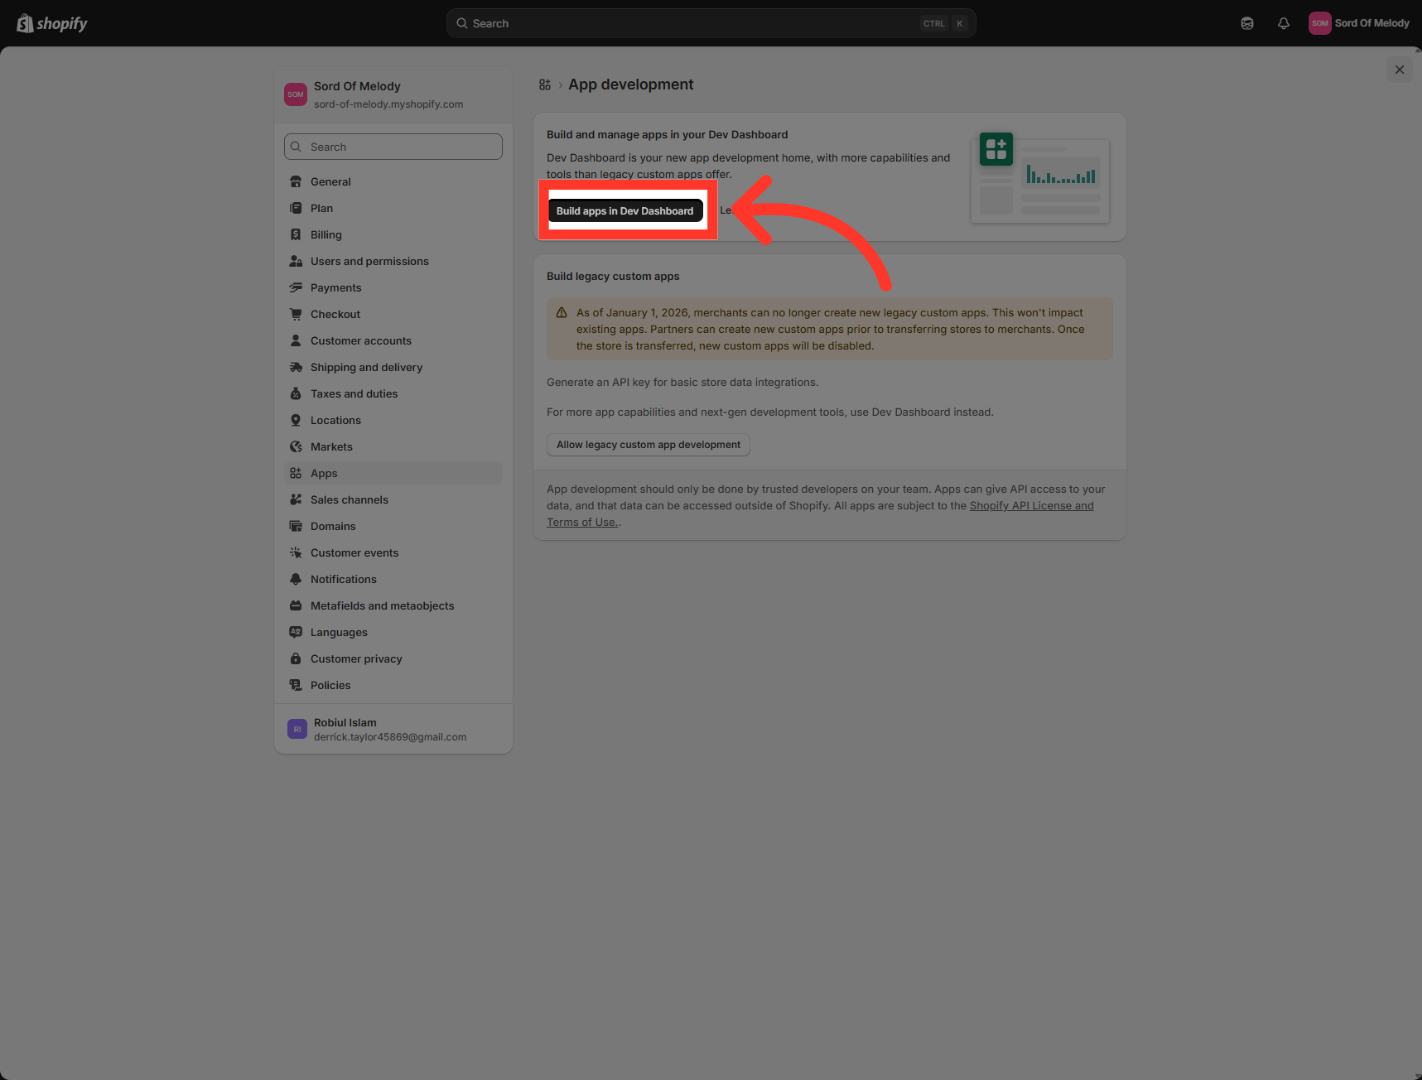
7. Launch Dev Dashboard
“Now click "Build apps in Dev Dashboard" to create a new app.
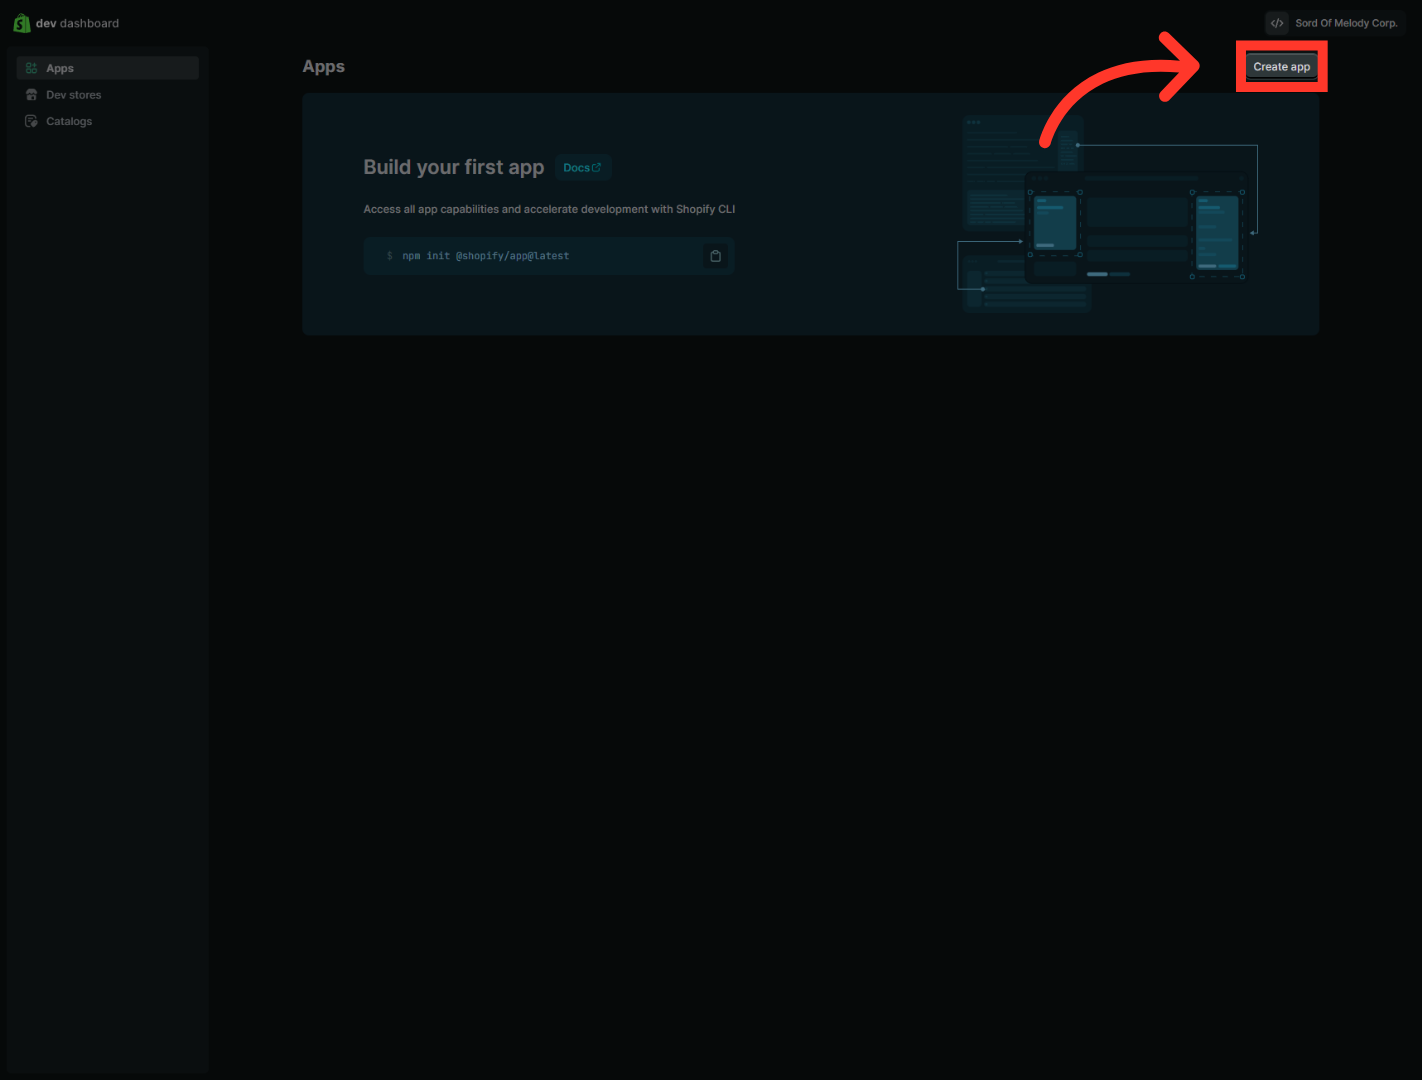
8. Create New App
Click "Create app" to start building a new custom app for your Shopify store.
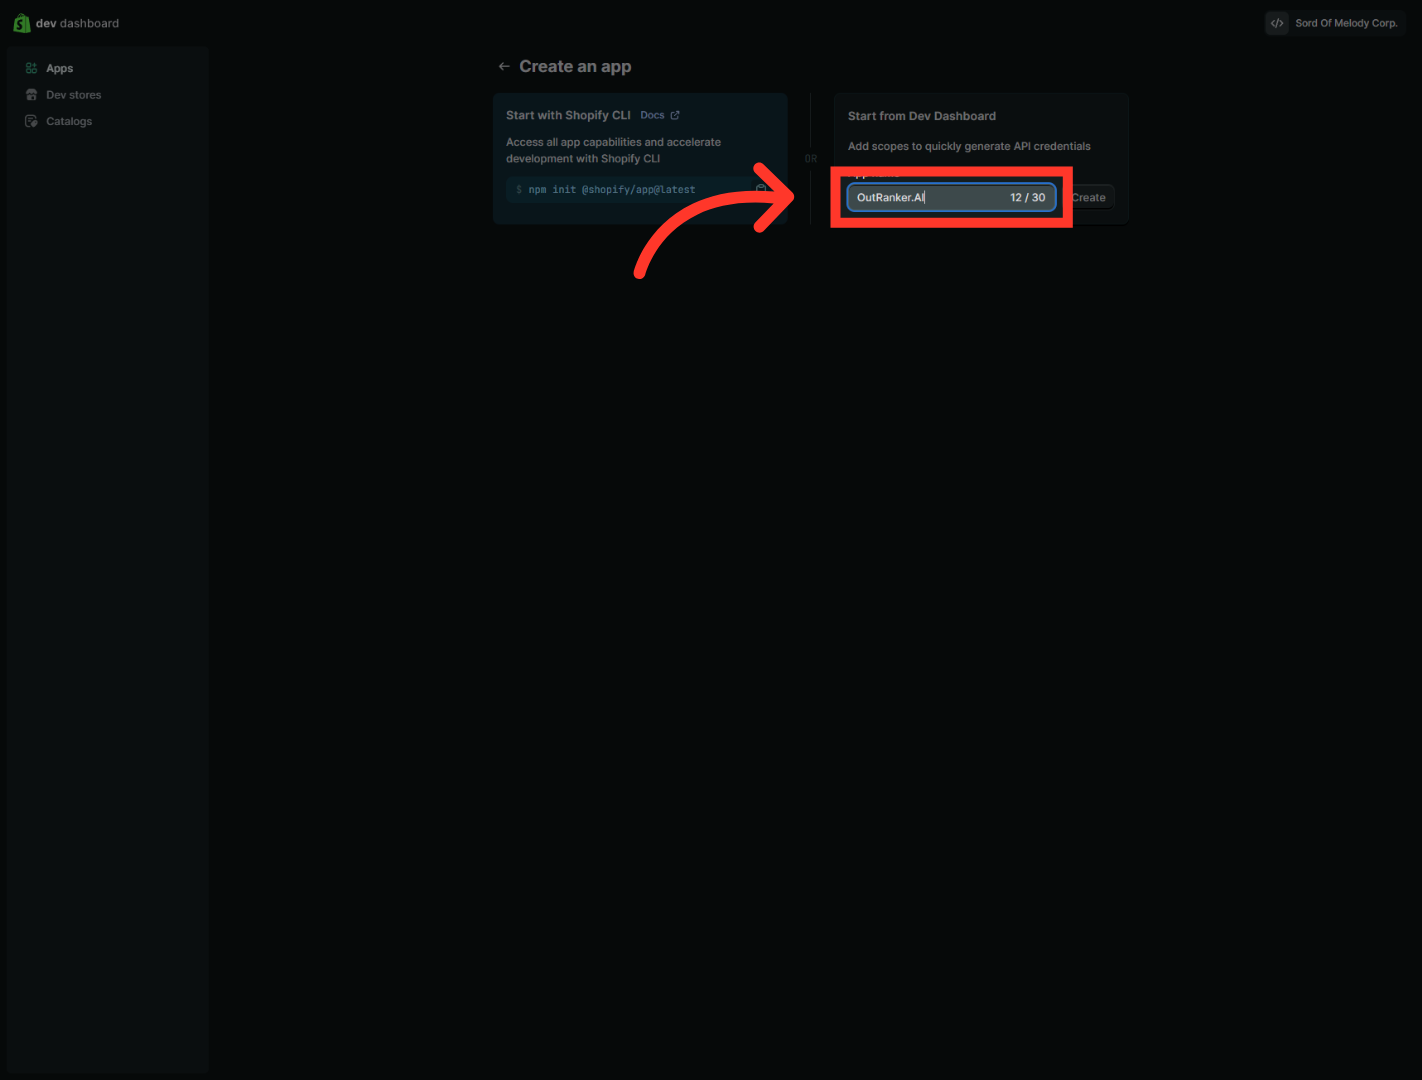
9. Name Your App
When Shopify asks for the app name, enter OutRanker.AI. Then confirm to create the app.”
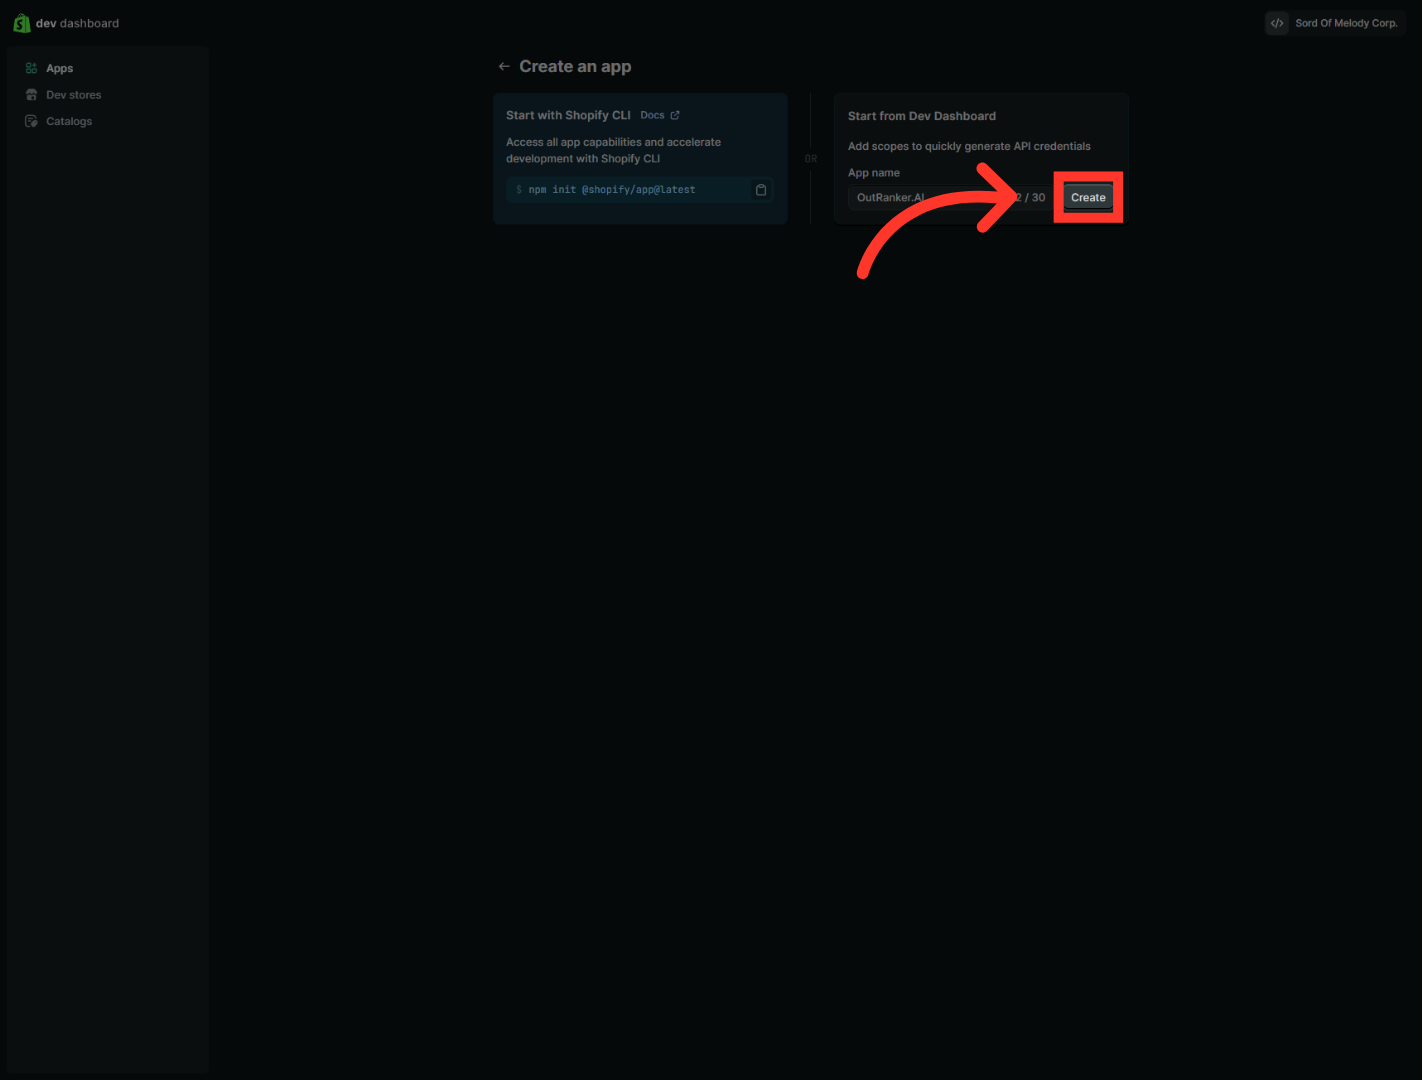
10. Confirm App Creation
Click "Create" to finalize the creation of your custom Shopify app.
11. Return To Dev Dashboard
“Once the app is created, open its configuration settings. This is where you’ll add the URLs and permissions needed for the integration.”
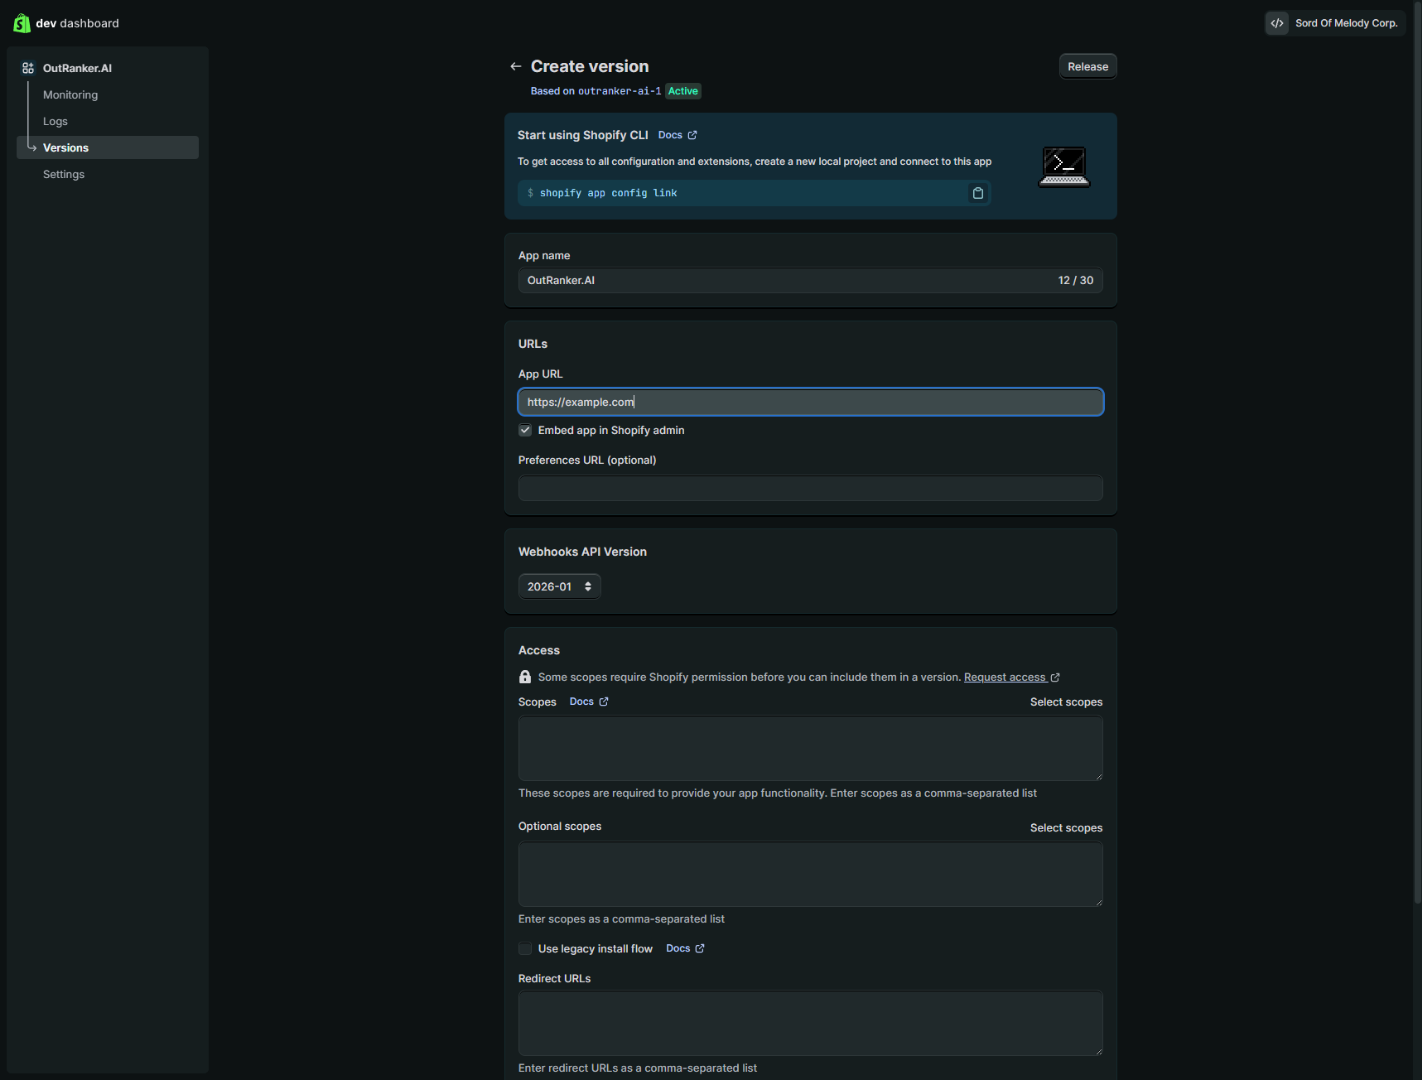
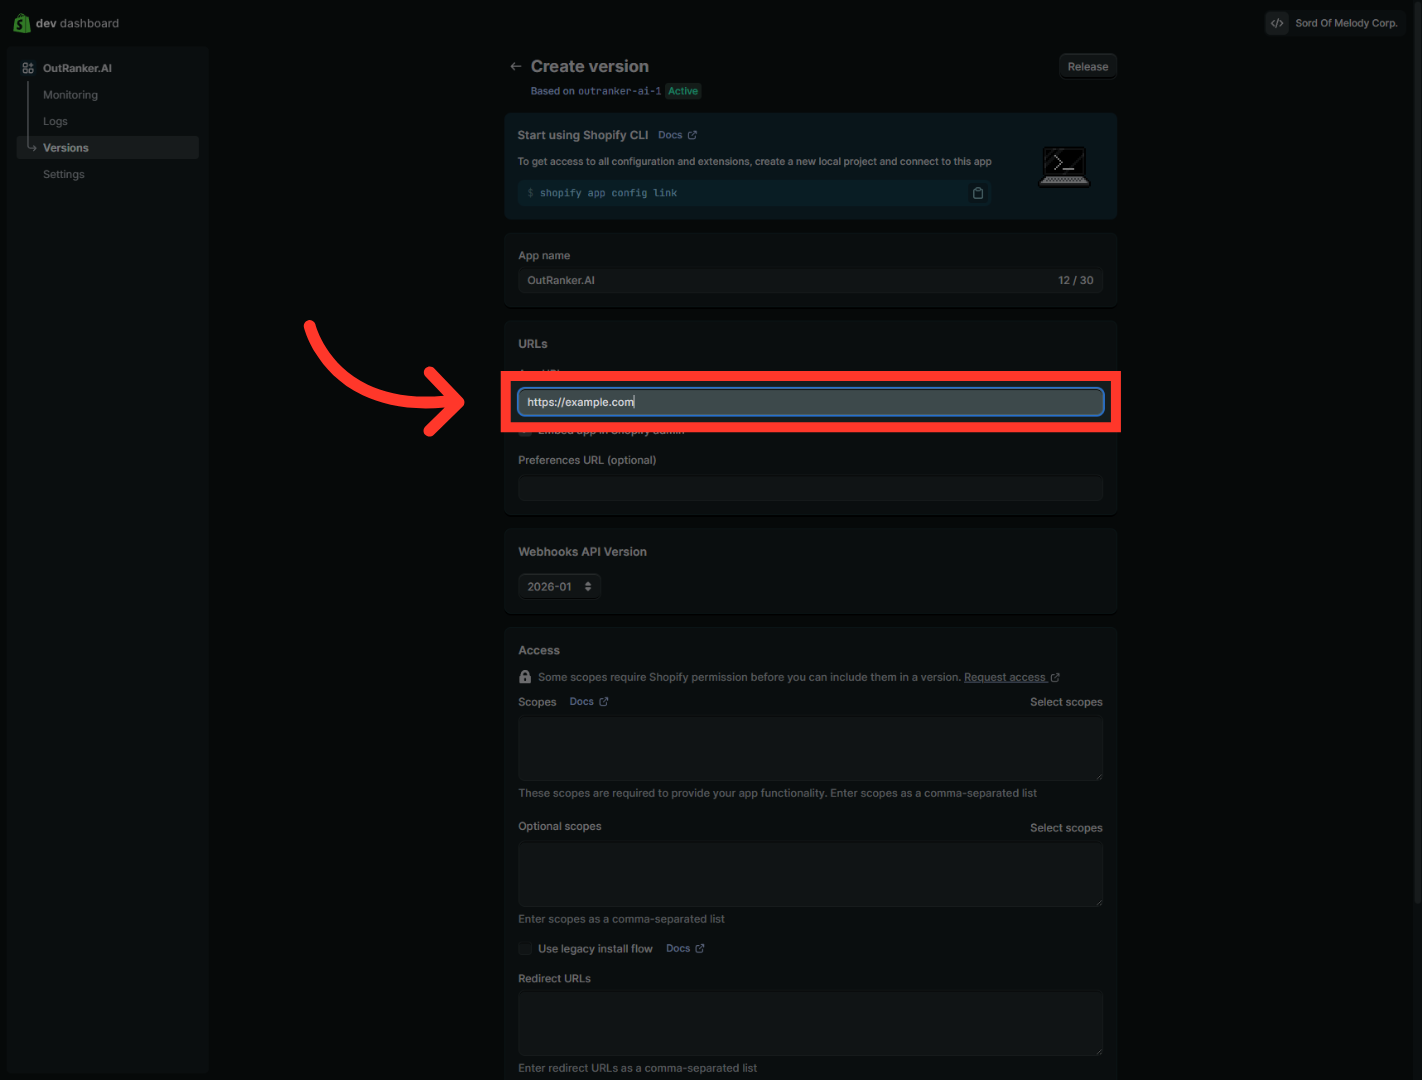
12. Select App URL Field
“Go back to the Outranker guide. Find the App URL value. Copy it. Then return to Shopify and paste it into the App URL field.”
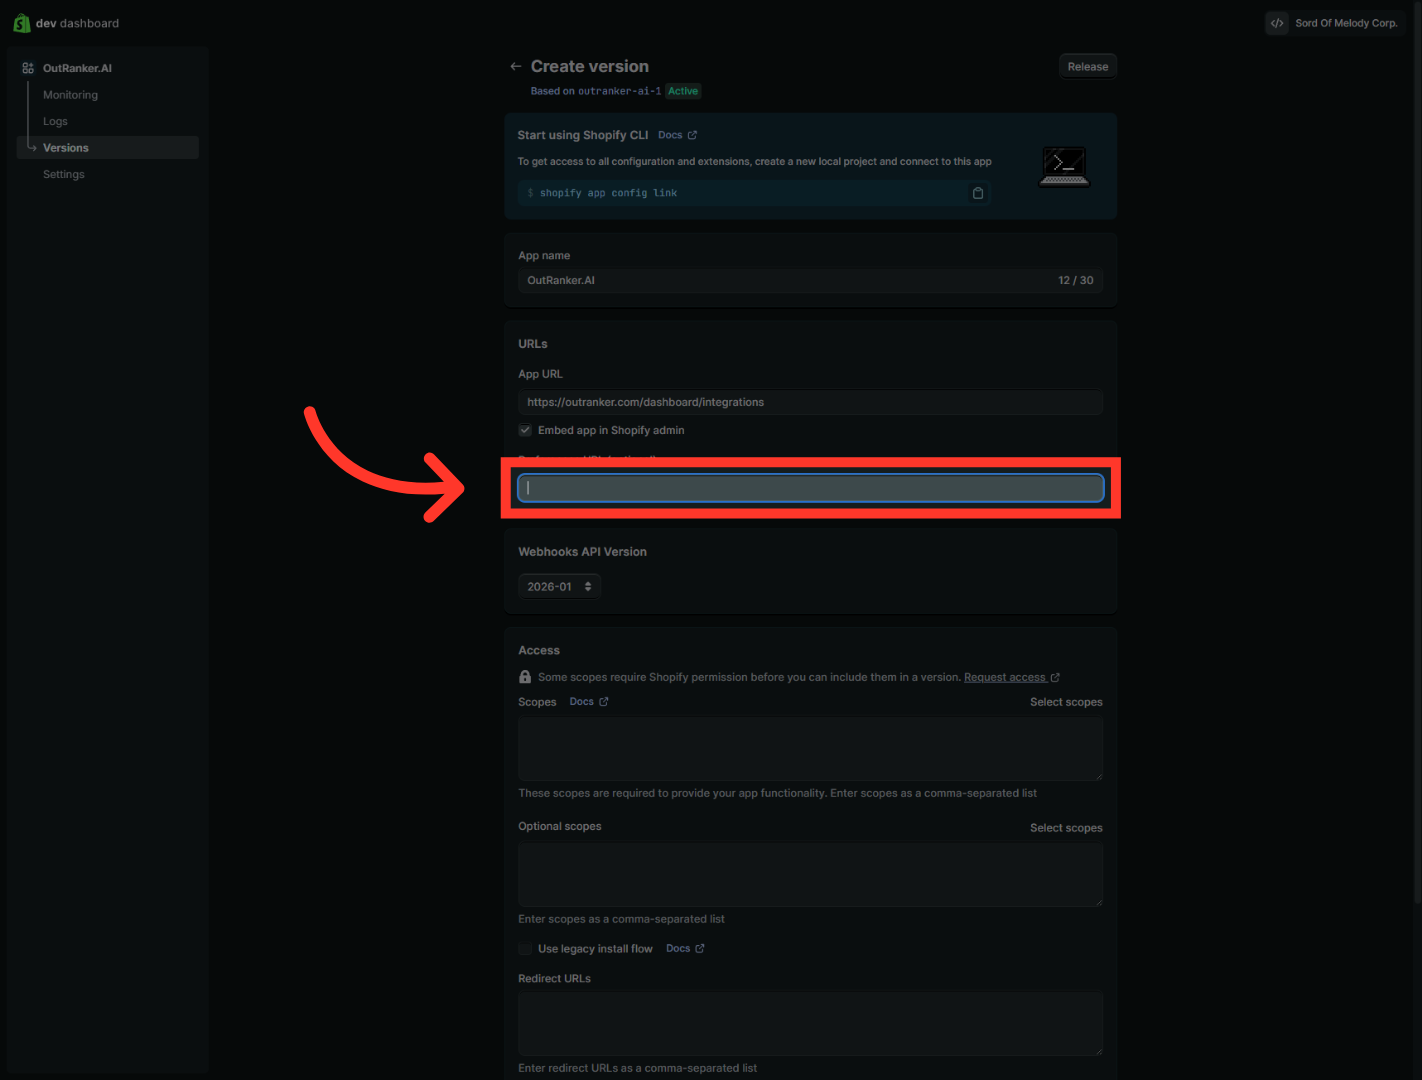
13. Open Preferences URL Field
“Next, return to the guide and copy the Preferences URL. Then paste that value into the matching field in Shopify. Make sure it matches exactly.”
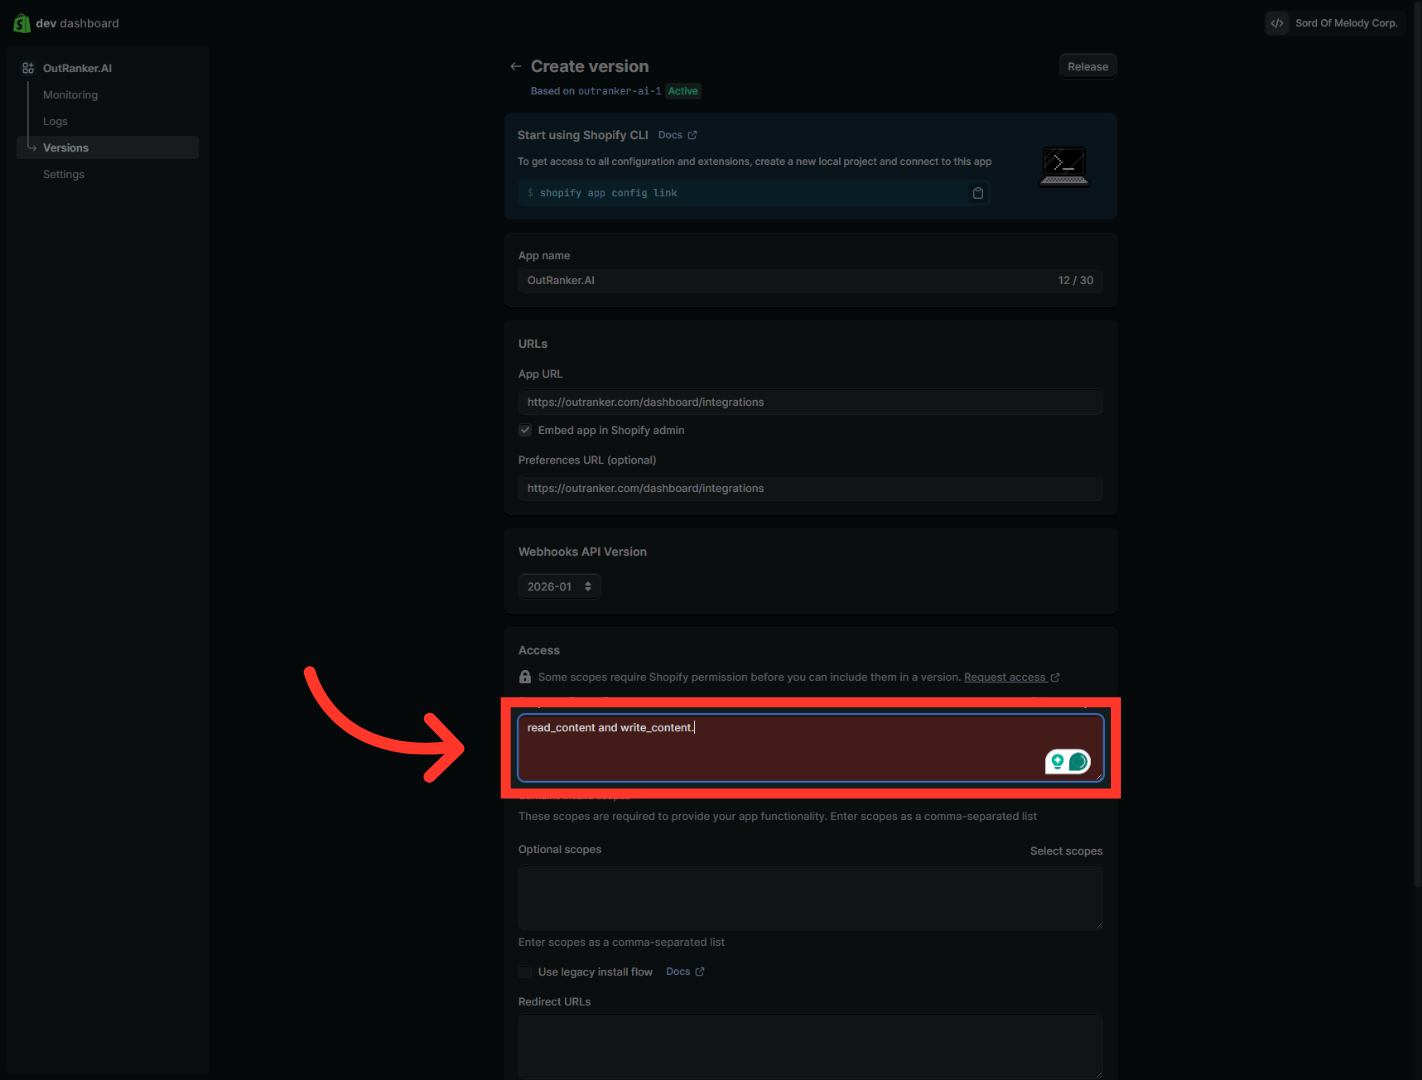
14. Enter Permissions
“Next, open the permissions or access scopes section for the app. Here, you need to enable the required access for Outranker.” “Turn on read_content. This allows the app to read the content it needs from your Shopify store.” “Then turn on write_content. This allows the app to make supported content updates when needed as part of the integration.”
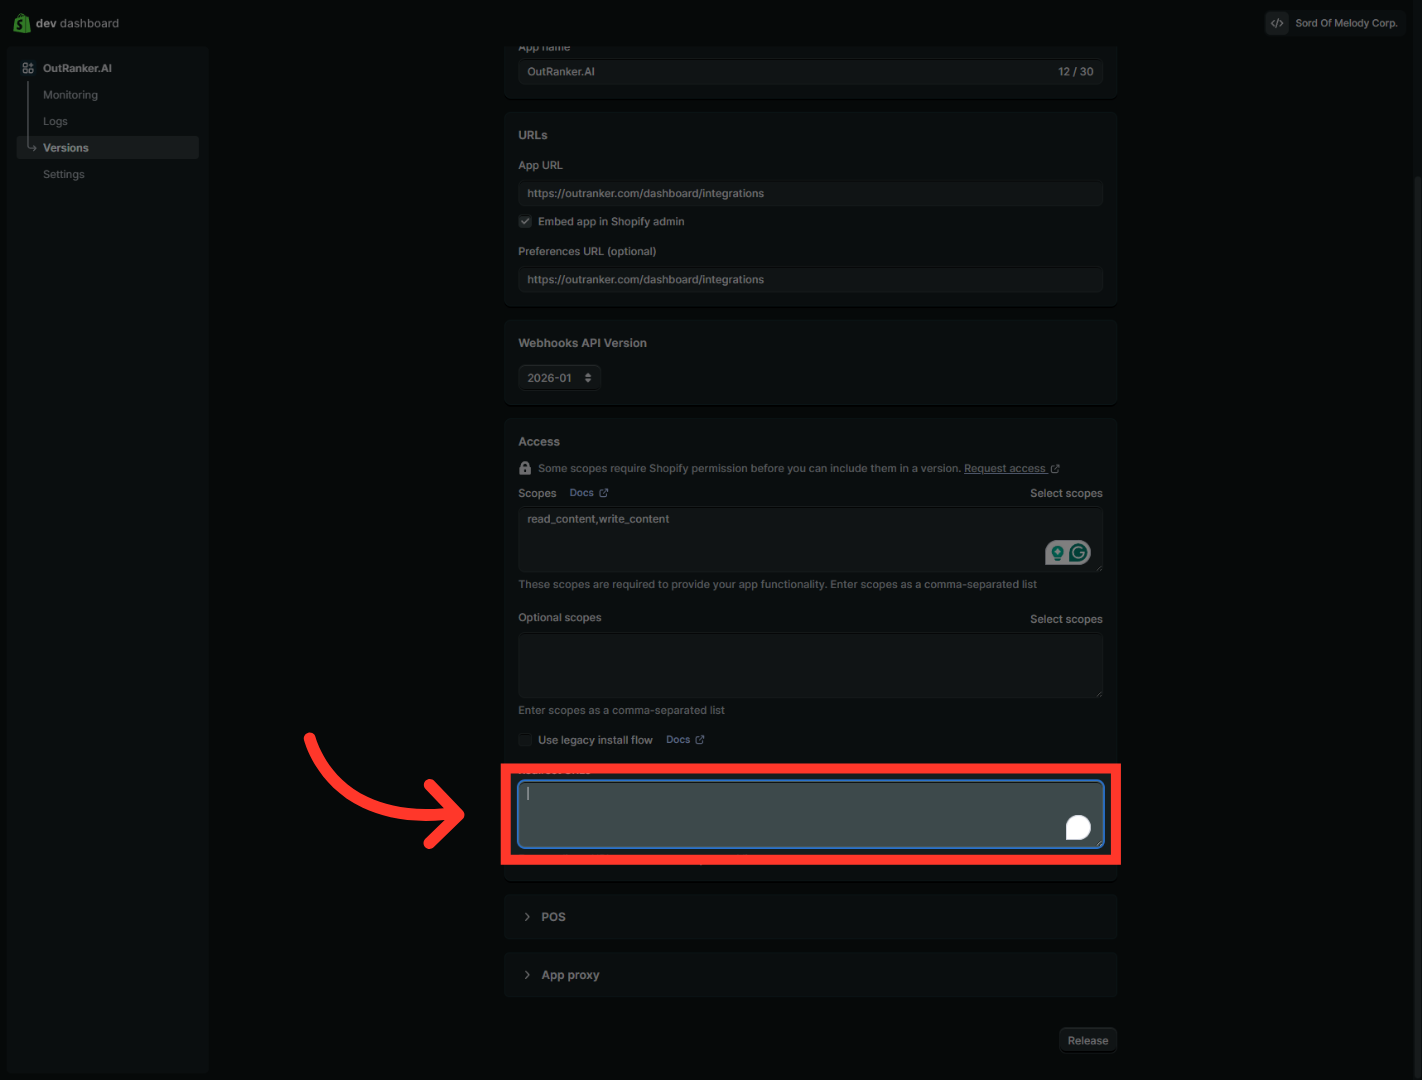
15. Open Redirect URLs
“Now copy the redirect or callback URL shown in the Outranker guide. Paste it into the Allowed redirection URL field in Shopify. This step is important because Shopify uses this URL to complete the connection securely.”
16. Release App Version
“After enabling the required permissions, save the changes. This makes sure your app has the access it needs before you publish it.”

17. Enter Version Name
“Now go to the app version section. Create a version if needed, or open the version that is ready to be released.”
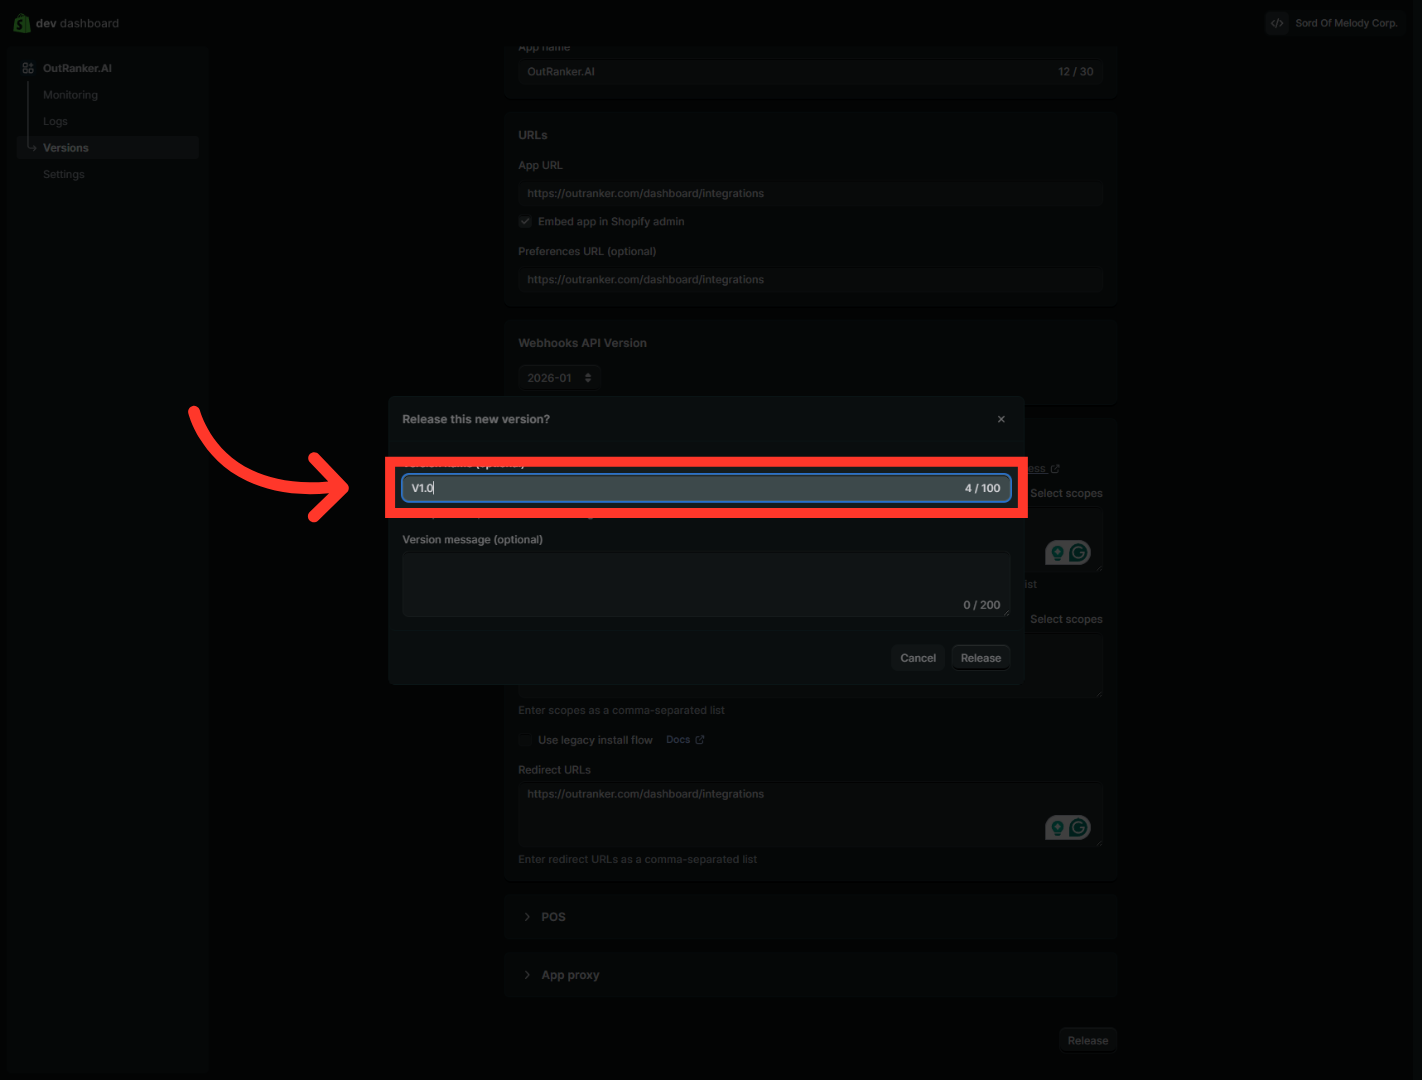
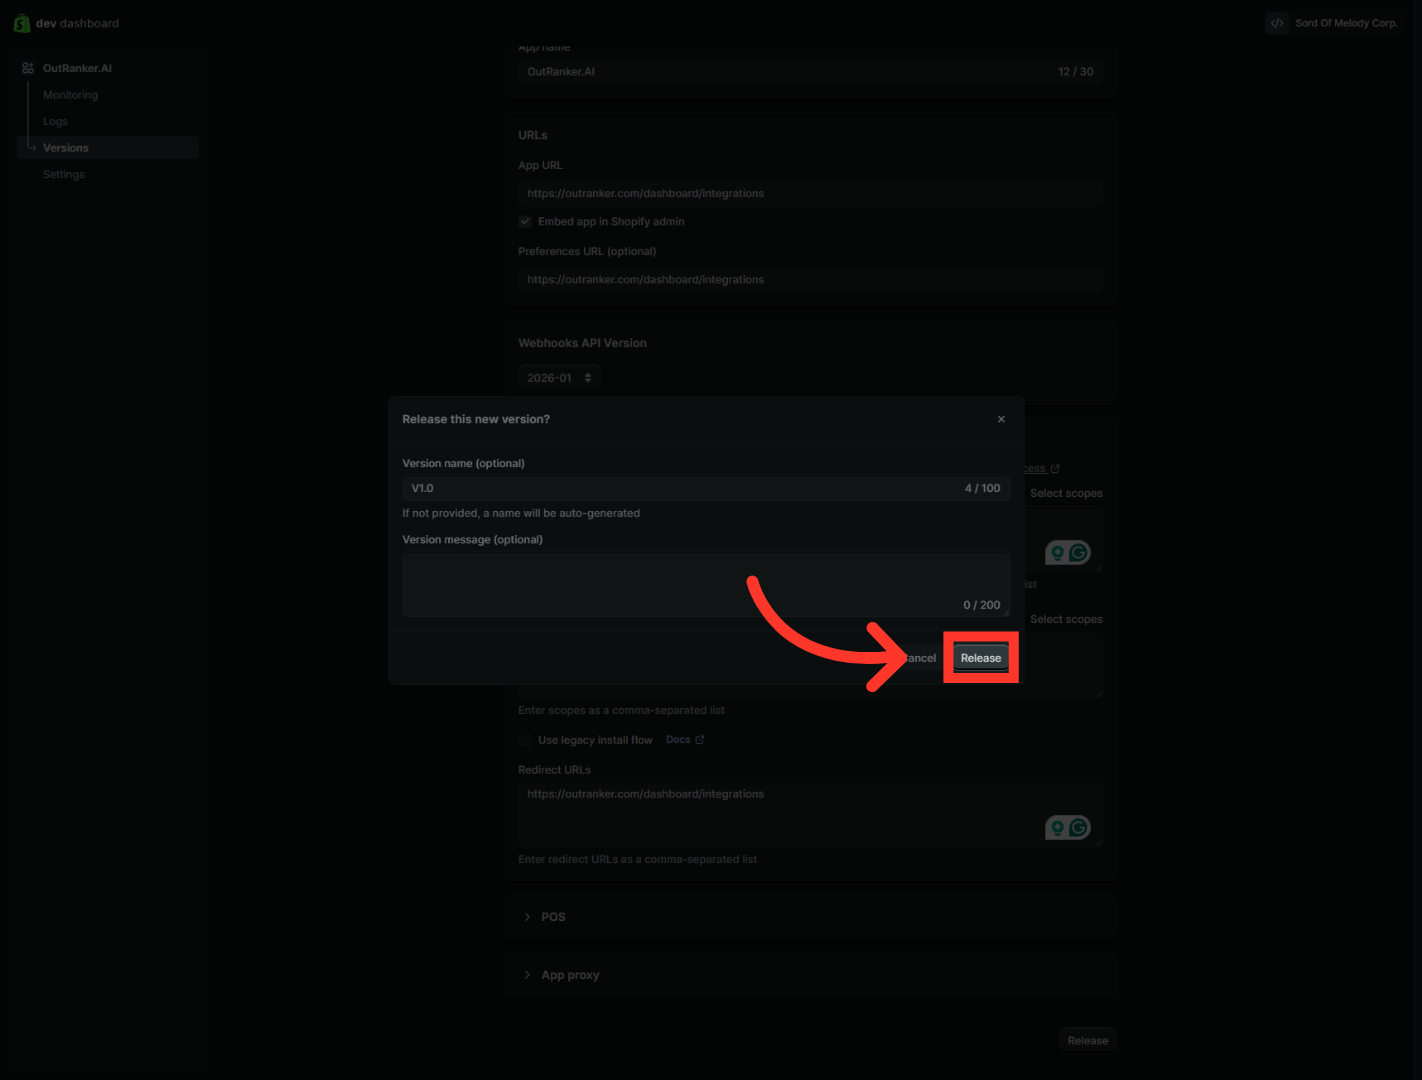
18. Confirm Release
“Release or publish the app version to make it live. Shopify may ask you to enter a version name before publishing. Once the version is released, your app setup becomes active.”
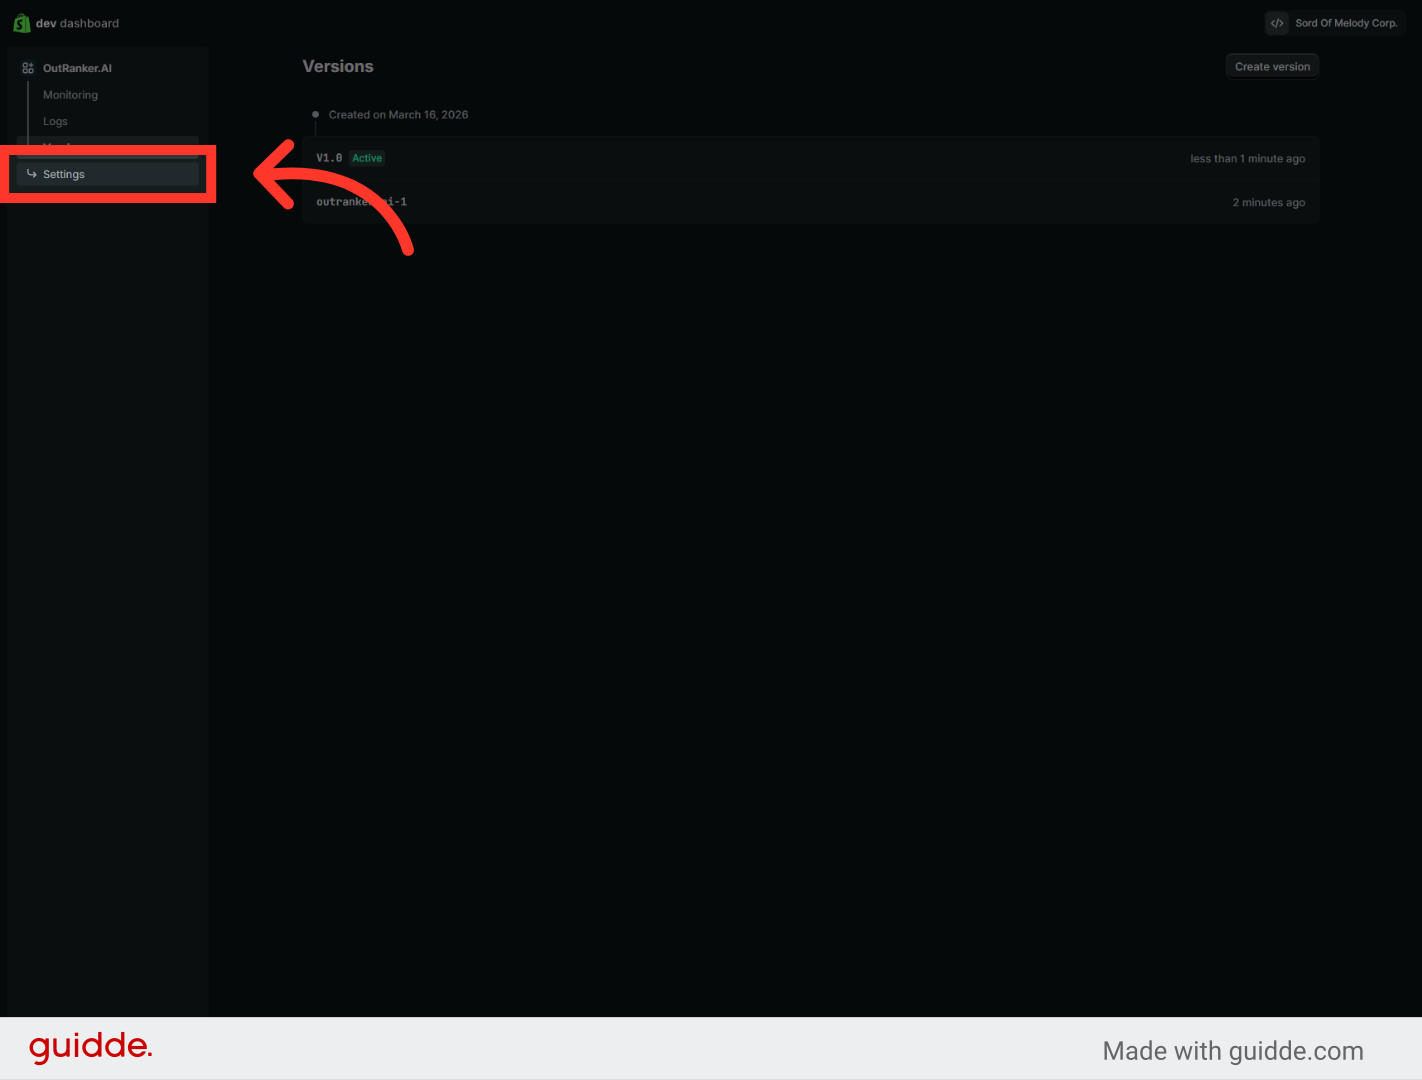
19. Open Settings
“After the app version is live, open the API credentials section. ”Click "Settings" to access app configuration options. This is where Shopify gives you the client details needed to finish the connection in Outranker.
20. Select Shopify Store URL
“Now enter your Shopify store URL into Outranker. This tells Outranker exactly which Shopify store to connect to.”

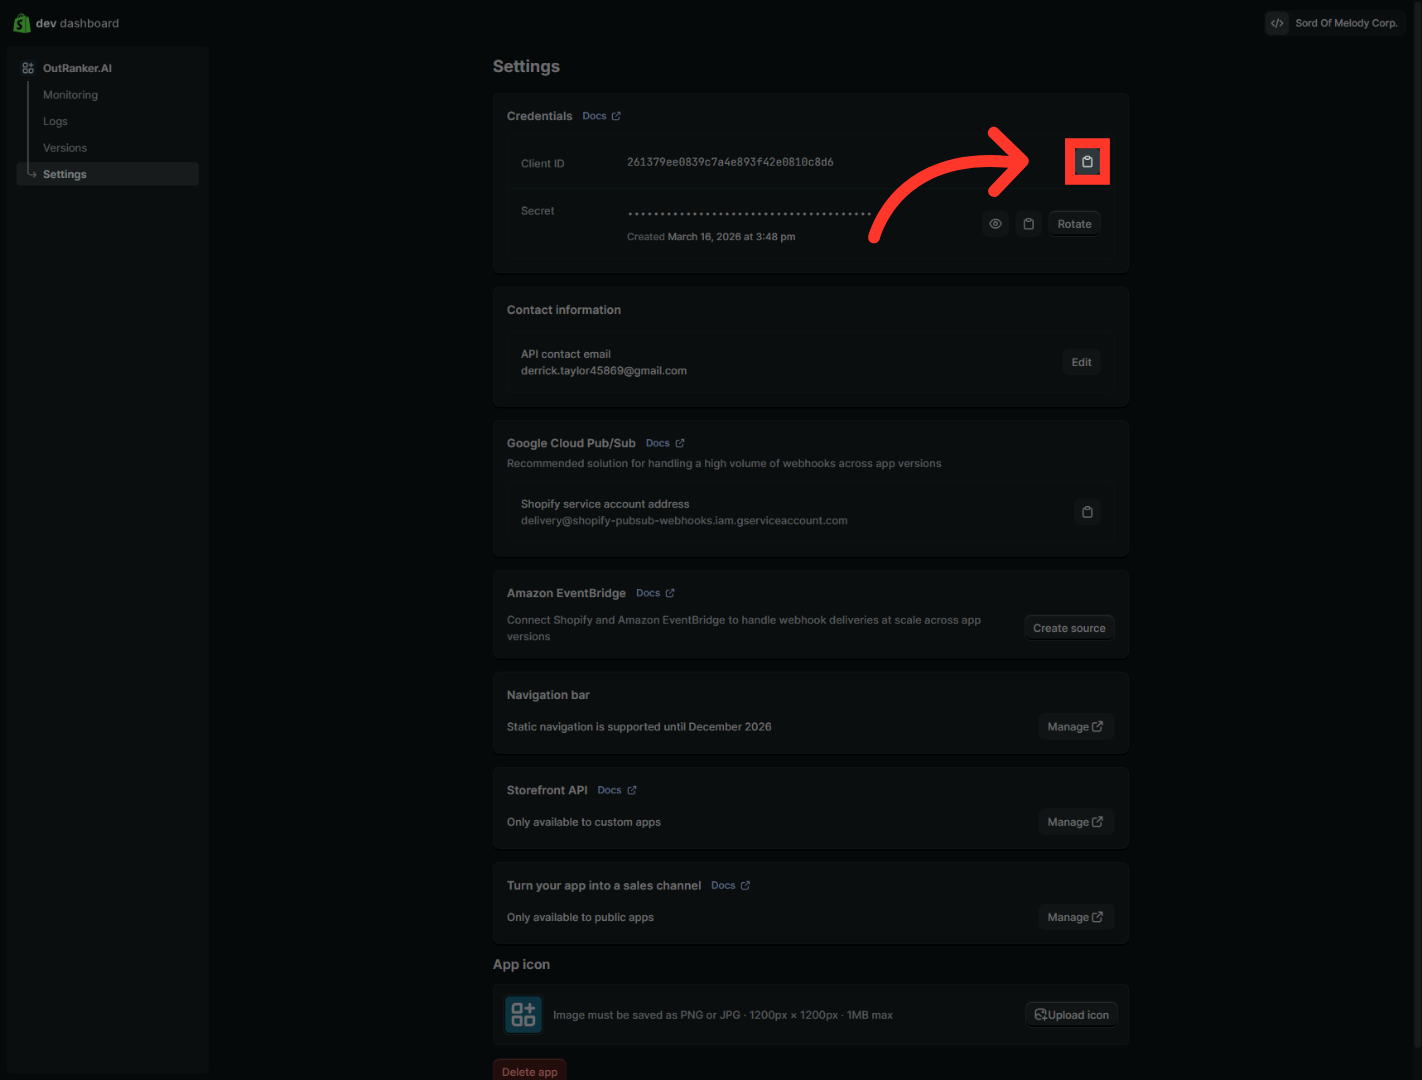
21. Proceed In Dev Dashboard
“First, copy the Client ID from Shopify. Then go back to Outranker and paste it into the correct field.”
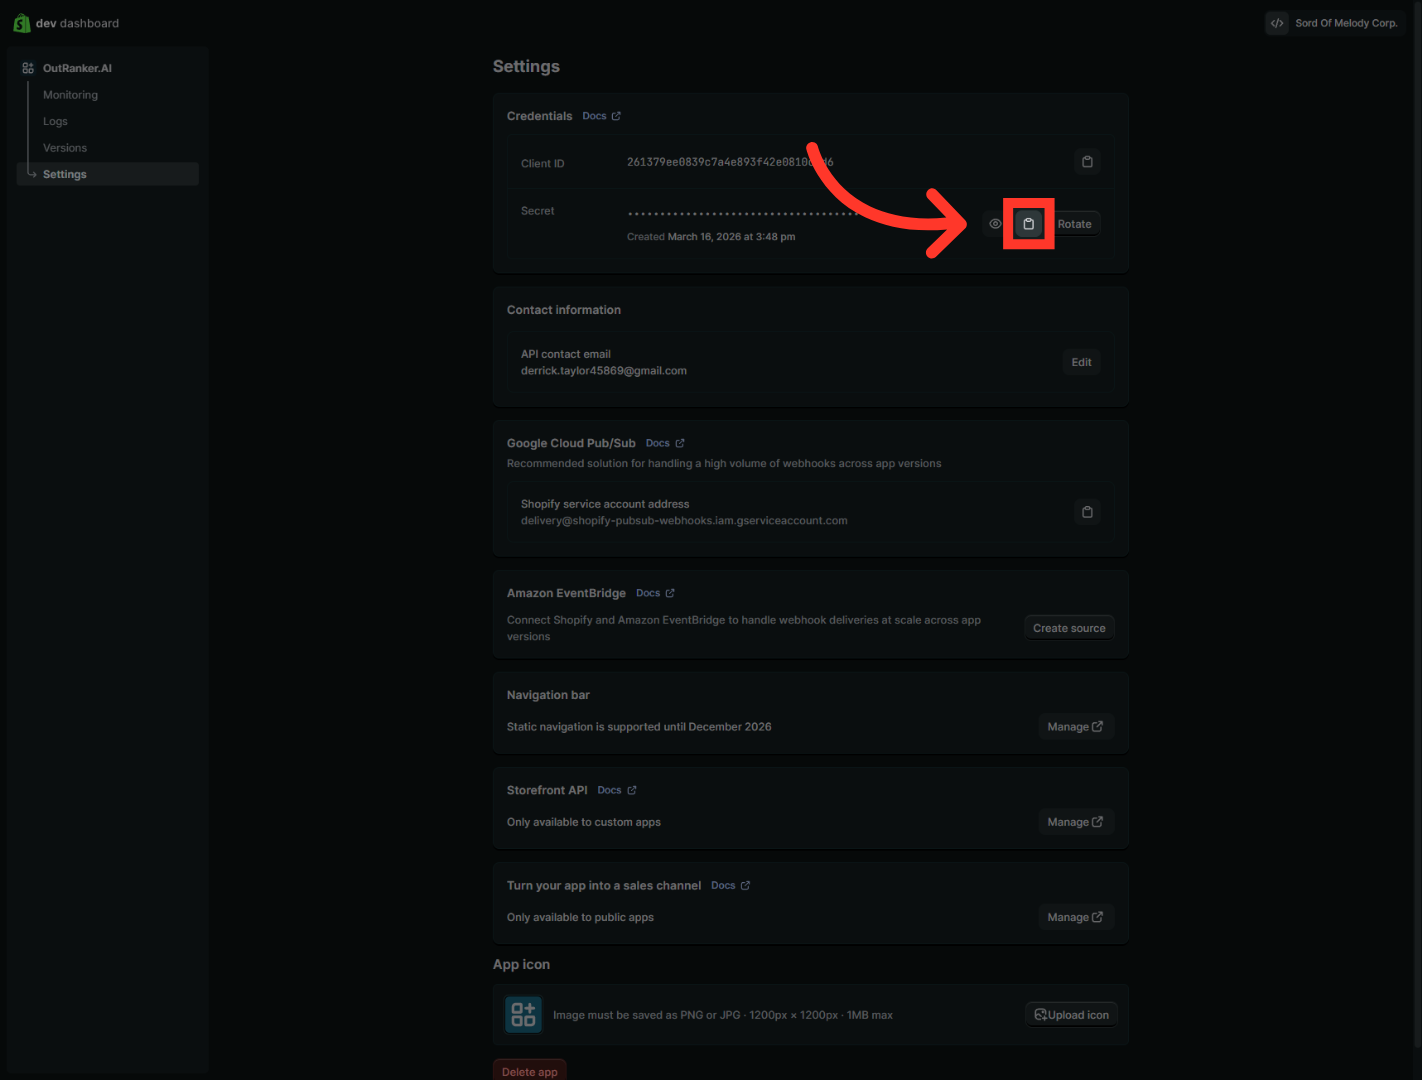
22. Continue Configuration
“Next, copy the Client Secret from Shopify. Return to Outranker and paste it into the matching field. Be careful with this value, since it is part of the secure connection between Shopify and Outranker.”
23. Finalize Shopify Connection
“Once the store URL, client ID, and client secret are all in place, click Connect to Shopify. This completes the integration request.” “After connecting, check for confirmation that the integration is active. You can also review any status messages or notifications to make sure everything completed successfully.”
“You’ve now connected your Shopify store to the Outranker AI Platform step by step. Your app has been created, configured, given the correct permissions, and connected using your Shopify credentials. From here, you’re ready to start using Shopify with Outranker in your content and optimization workflows.”
