
This process walks you through connecting your own SMTP provider (example: SendGrid) to your Outranker agency white label so that all outgoing emails are sent from your own domain and email address.
Go to www.outranker.ai
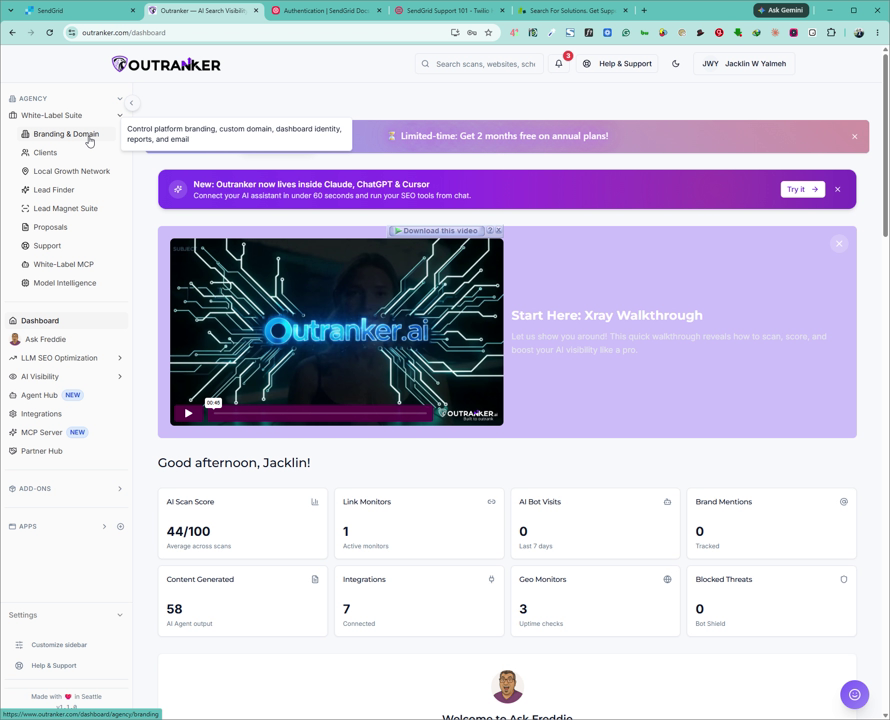
1. Access the White Label Branding & Domain Settings
Log in to your Outranker account.
In the left-hand menu, click on Agency.
Under Agency, click on White Label Suite.
Within White Label Suite, locate Branding and Domain and click on it.
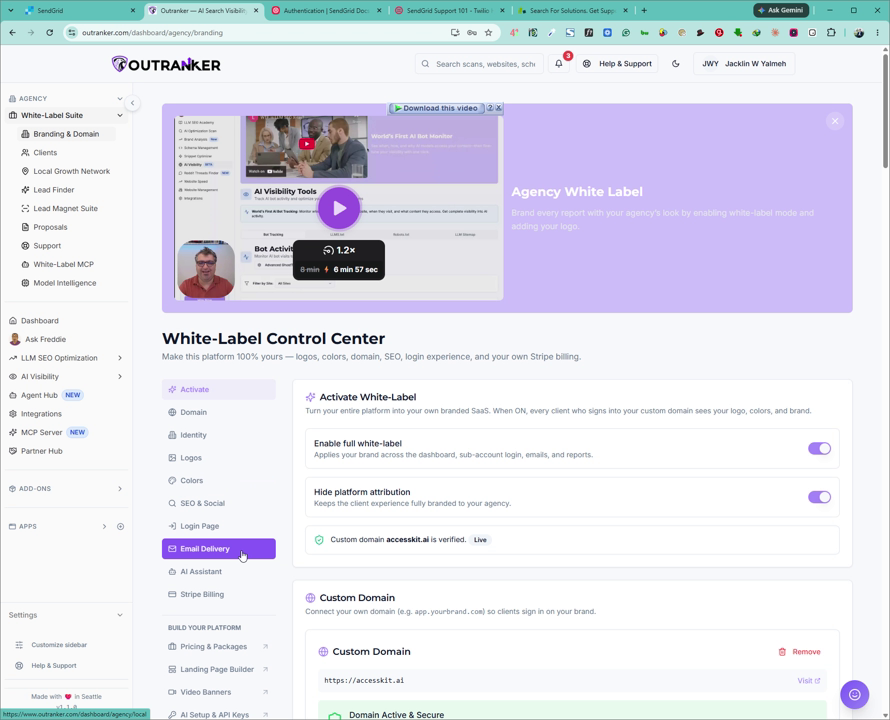
2. Open the Email Delivery (SMTP) Section
In the Branding and Domain area, click on Email Delivery to open the SMTP configuration section.
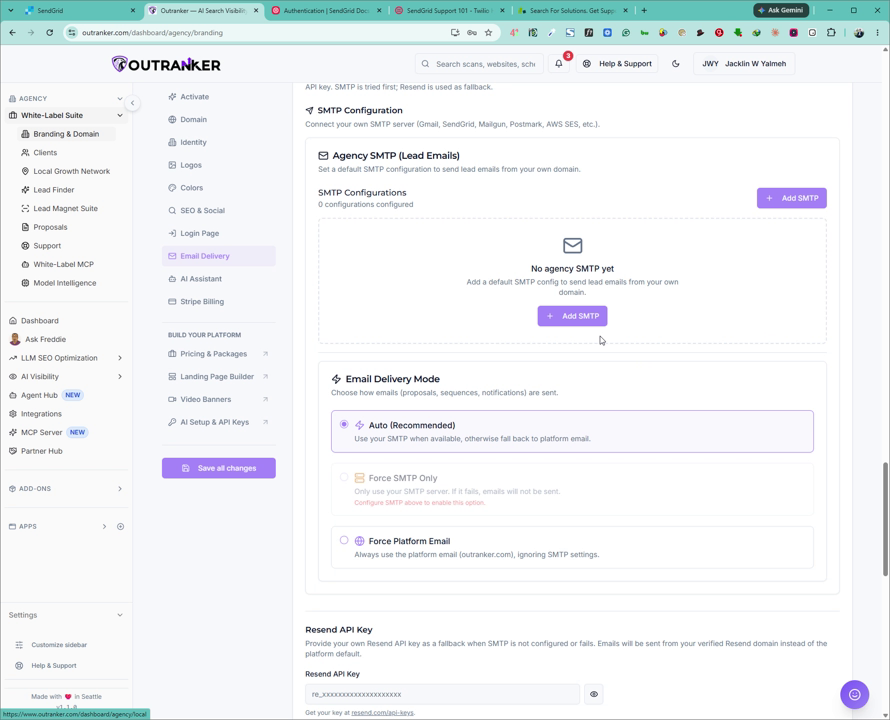
3. Add a New SMTP Configuration
In the SMTP section, click on Add SMTP to create a new SMTP profile.
Note: If you are using Gmail or Google Workspace, you must generate and use an App Password instead of your normal account password.
For this example, select or decide to use SendGrid as your SMTP provider.
4. Enter Basic SendGrid SMTP Details in Outranker
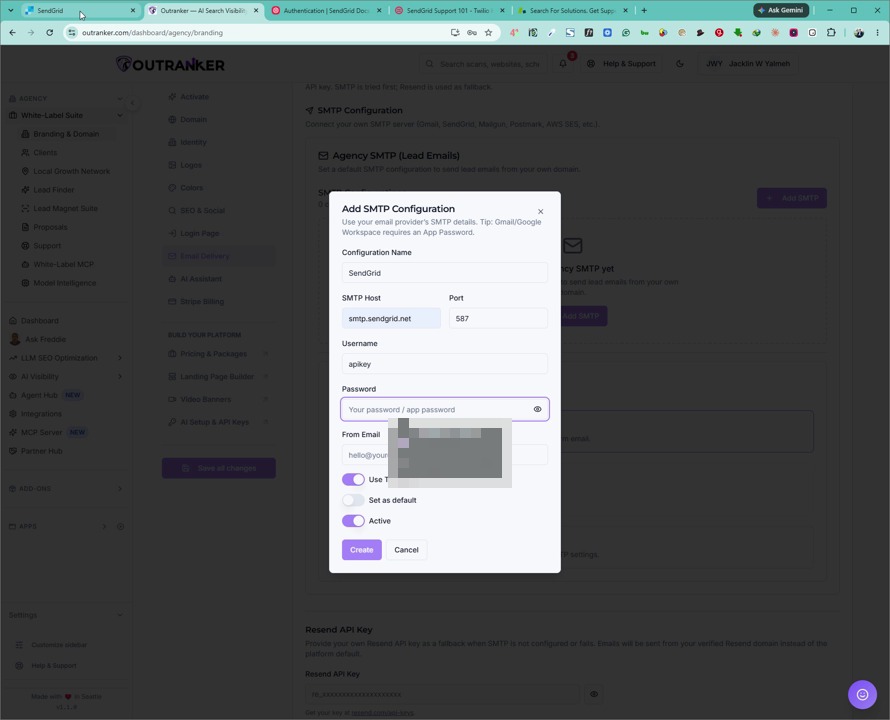
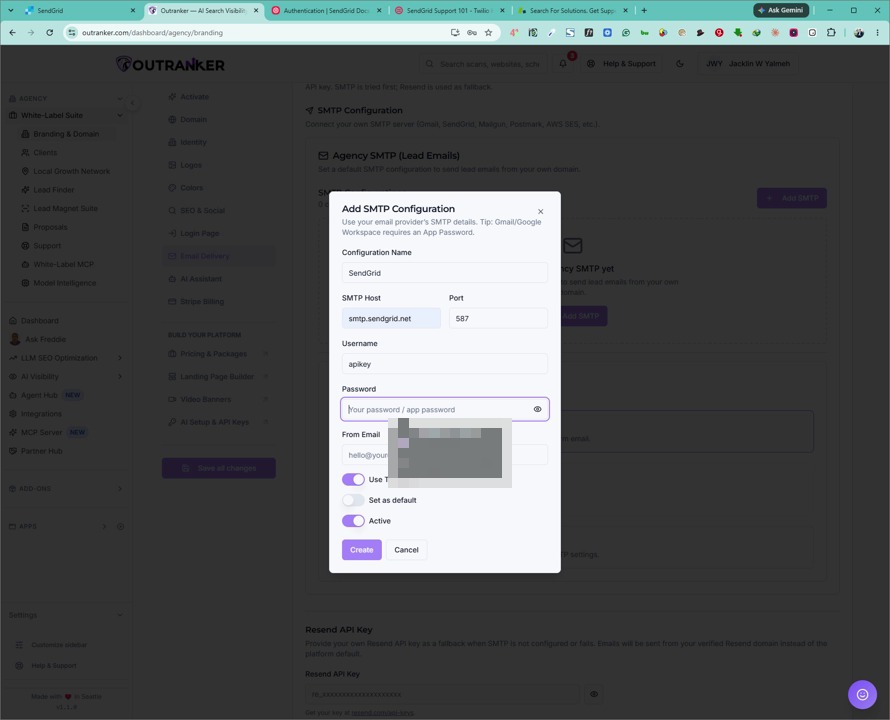
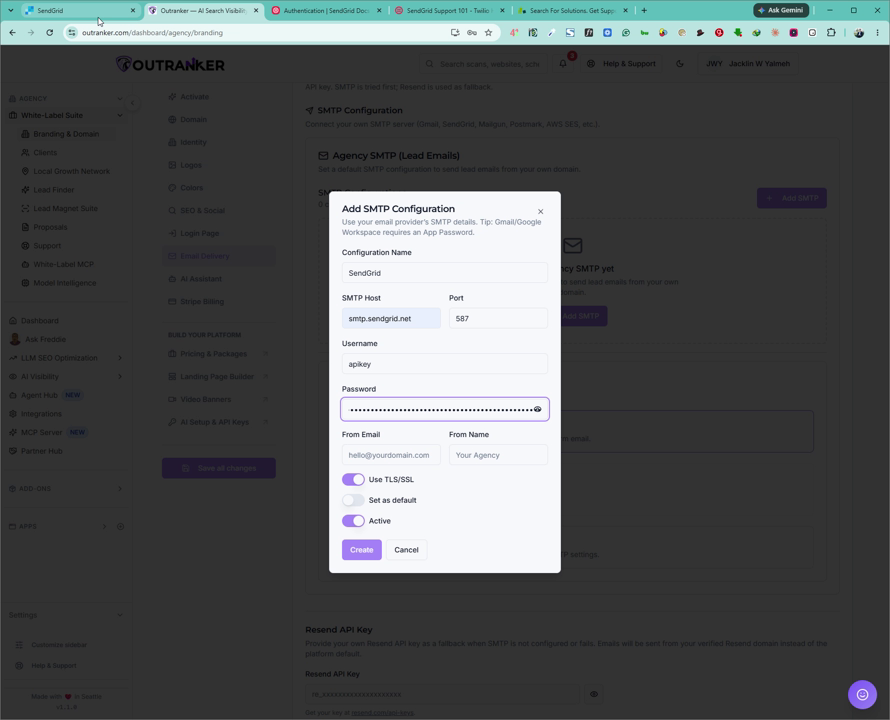
In the Add SMTP form, give your SMTP a recognizable name, e.g., SendGrid.
Set the SMTP Host to
smtp.sendgrid.net.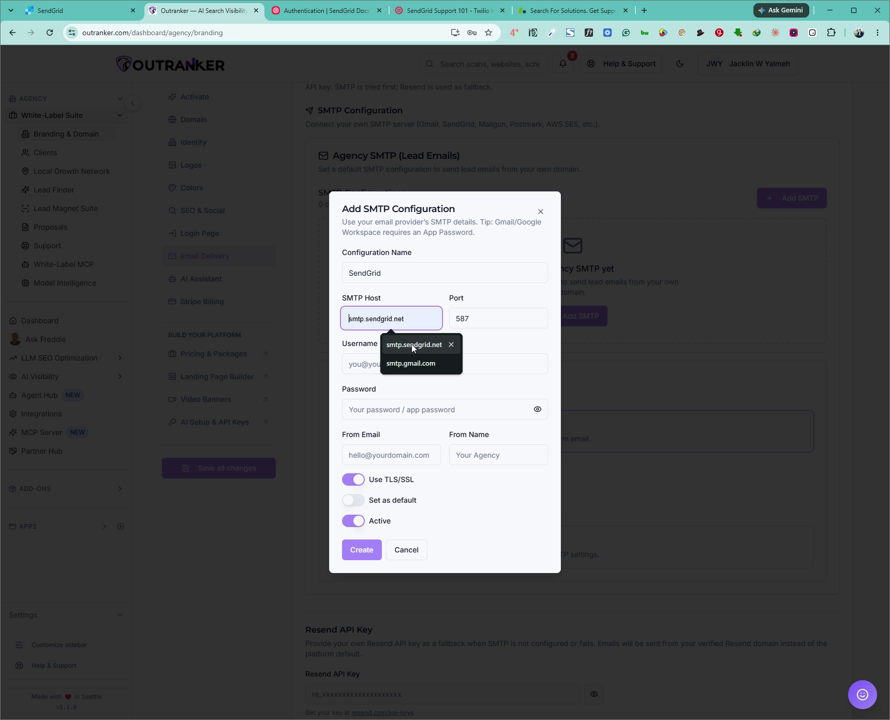
Set the Port to
587.For Username, use the literal value:
apikey(this is required by SendGrid).Leave the Password field empty for now; you will fetch it from SendGrid in the next steps.
5. Log In to SendGrid and Navigate to API Keys
Open a new tab and log in to your SendGrid account.
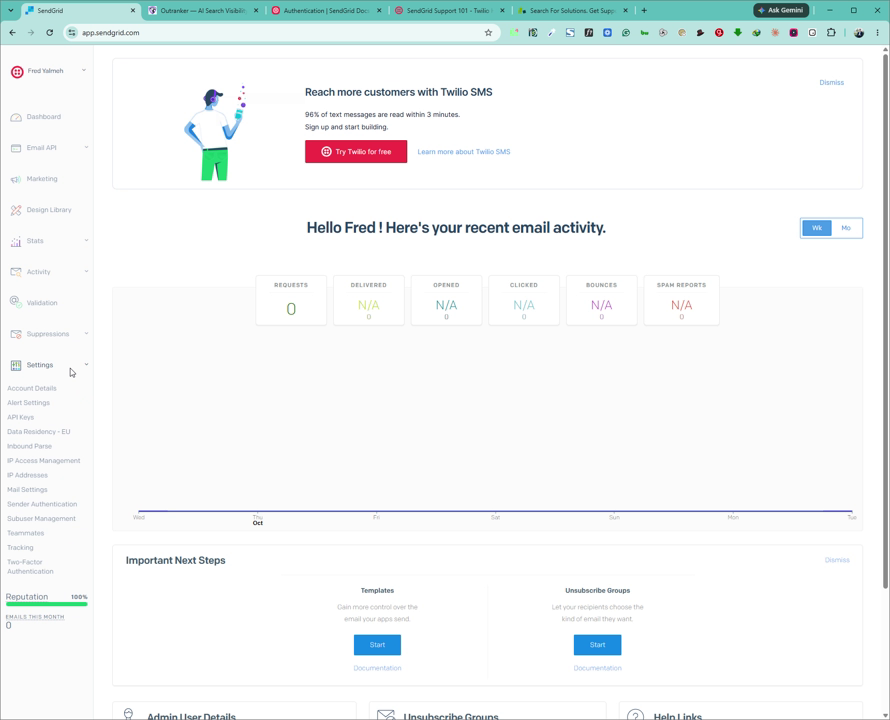
In the SendGrid left menu, click on Settings.
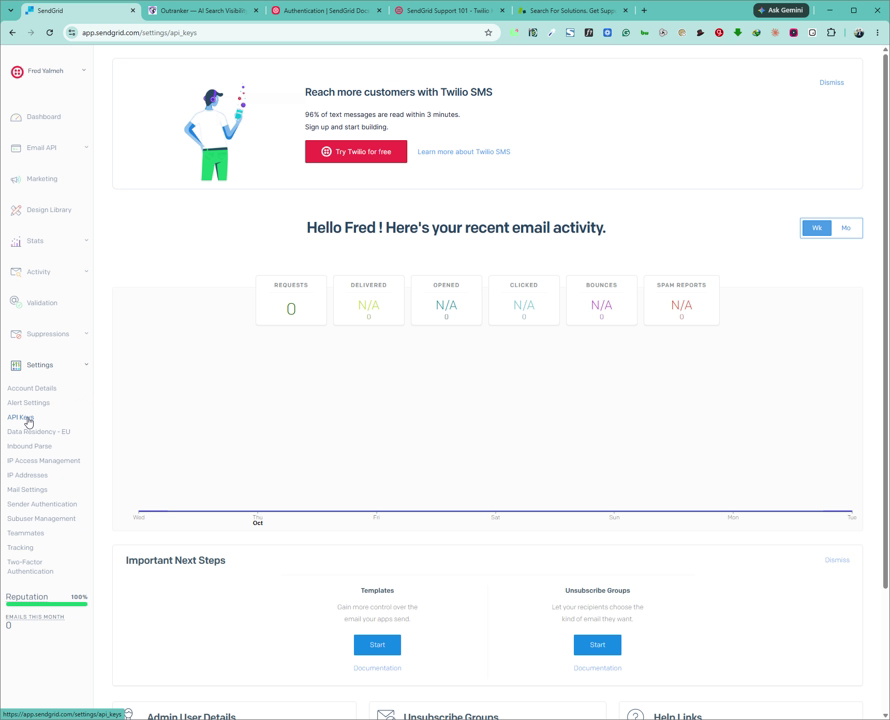
Under Settings, click on API Keys.
6. Create a New SendGrid API Key
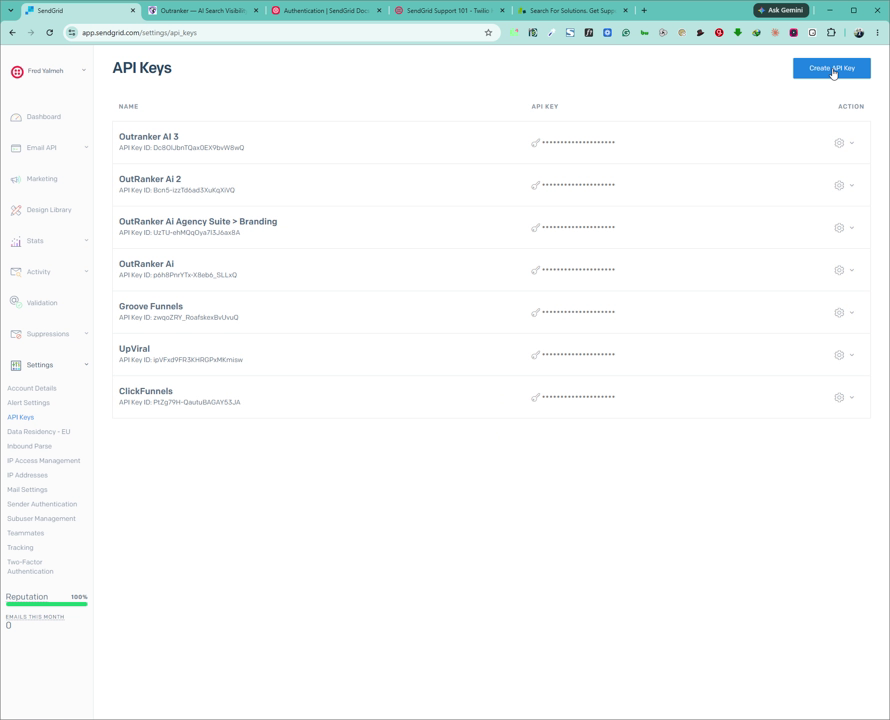
On the API Keys page, click on Create New API Key.
Set API Key Permissions to Full Access (or adjust according to your security policy if you know the exact scopes needed).
Name the key something descriptive, such as Outranker AI.
Click on Create & View to generate the key.
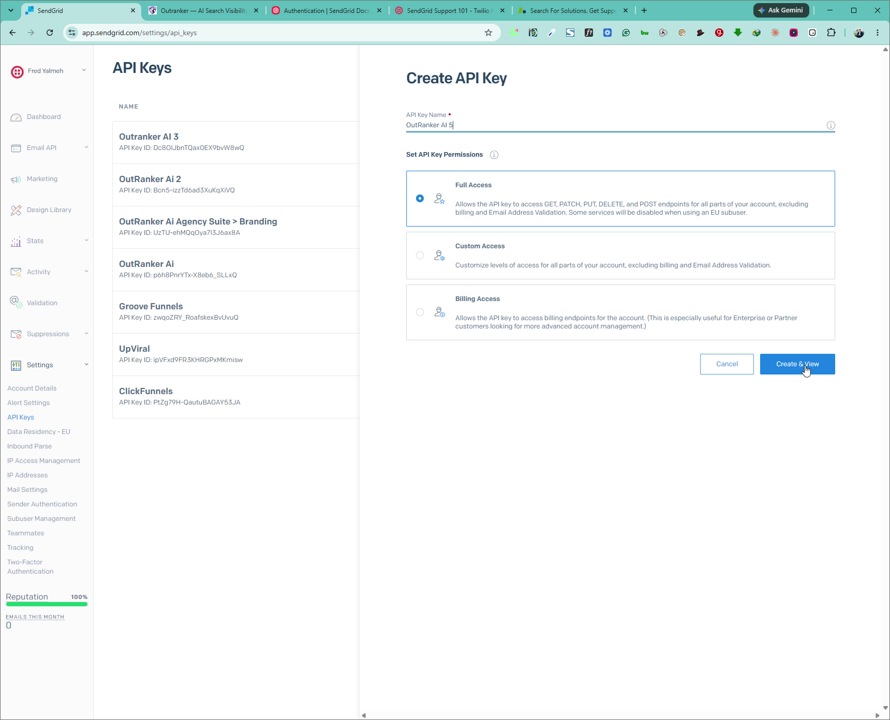
7. Copy the API Key and Add It as SMTP Password in Outranker
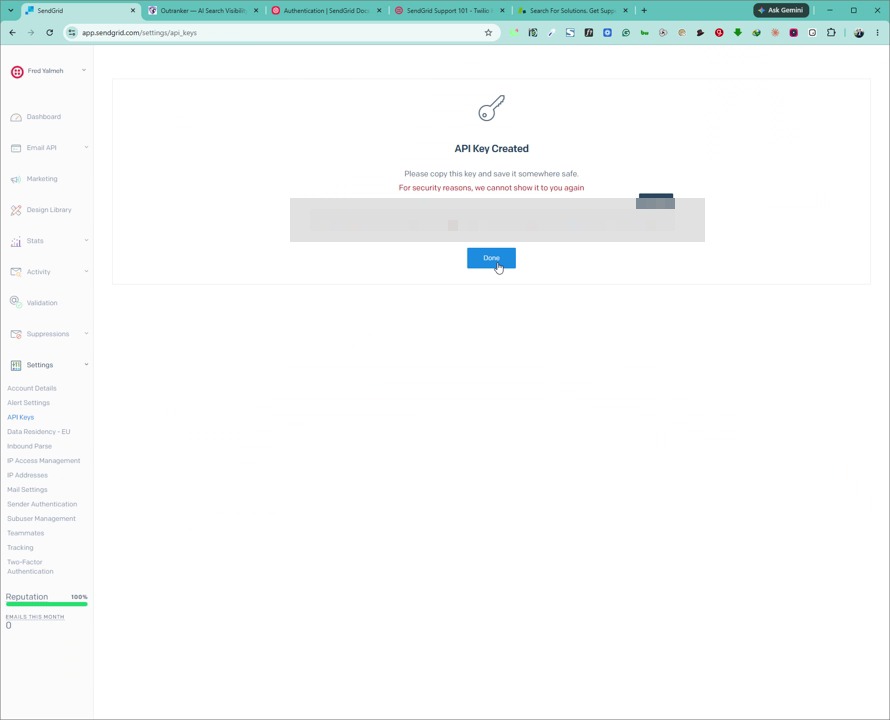
When the API key is shown, click on it to copy the key to your clipboard.
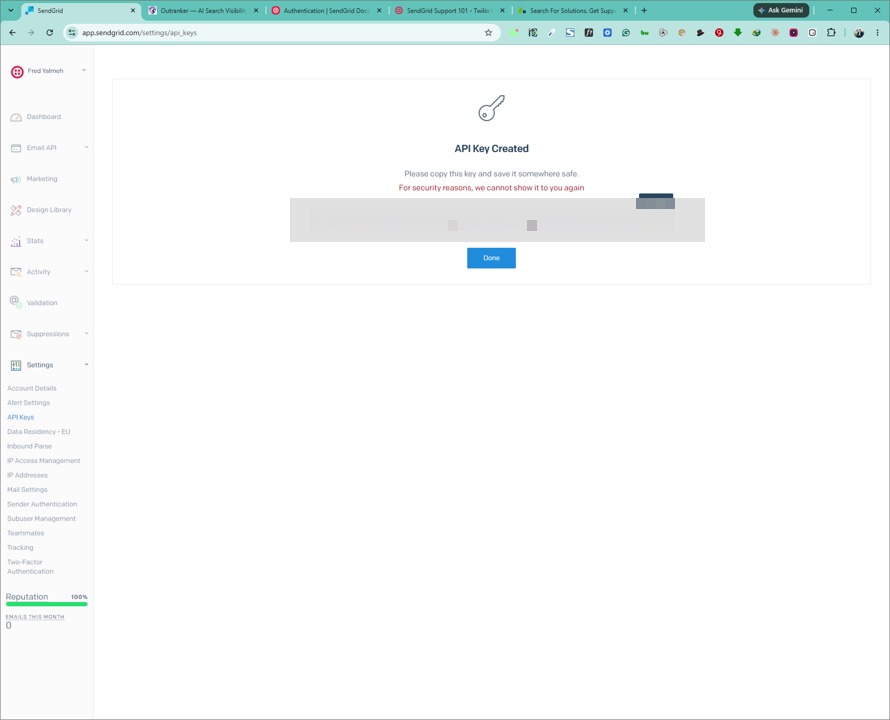
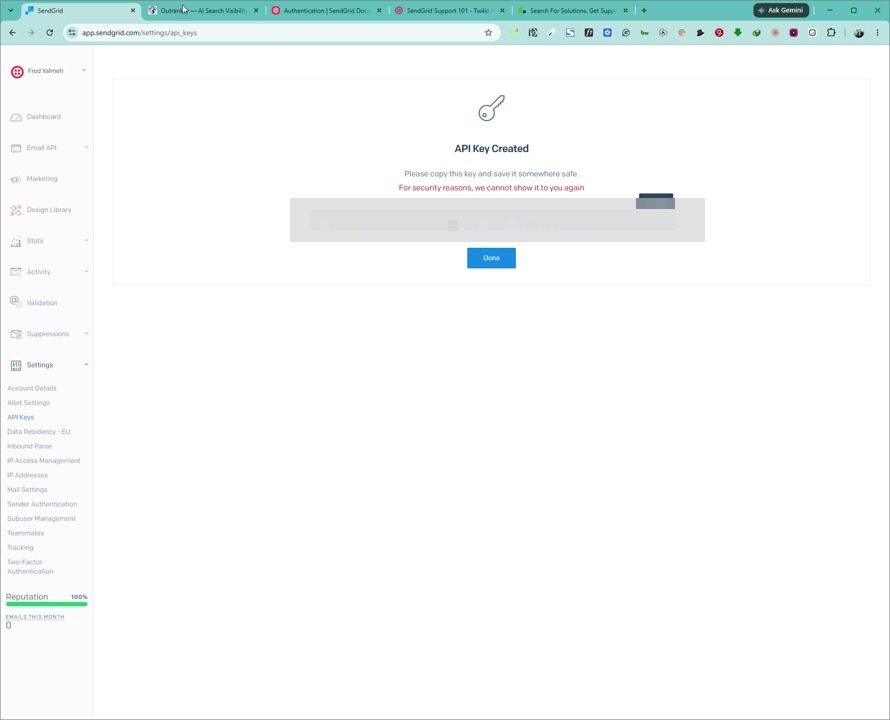
Confirm that the API key has been copied.
Return to your Outranker SMTP configuration tab and paste the copied API key into the Password field.
8. Finalize API Key Creation in SendGrid
Go back to your SendGrid tab.
Click on Done to complete the API key creation process.
9. Obtain and Configure the “From” Email Address
In SendGrid, navigate to Sender Authentication.
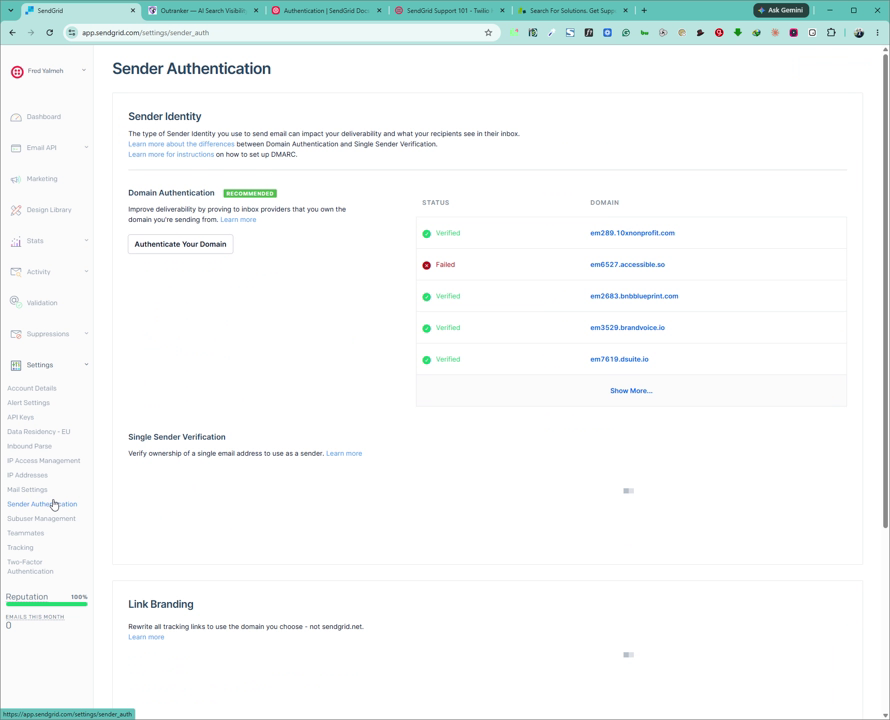
If you do not already have a verified sending domain in SendGrid:
Click on Authenticate Your Domain.
Follow SendGrid’s instructions to authenticate your domain for sending emails.
For this example, select an existing verified domain to use as your sending domain.
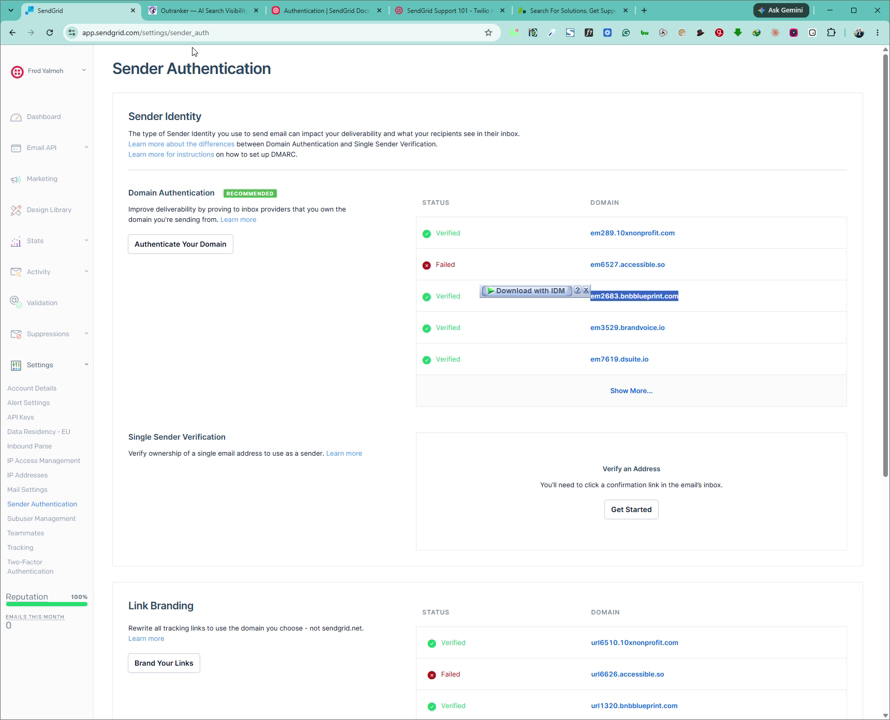
Copy the domain name you will use as your sender domain.
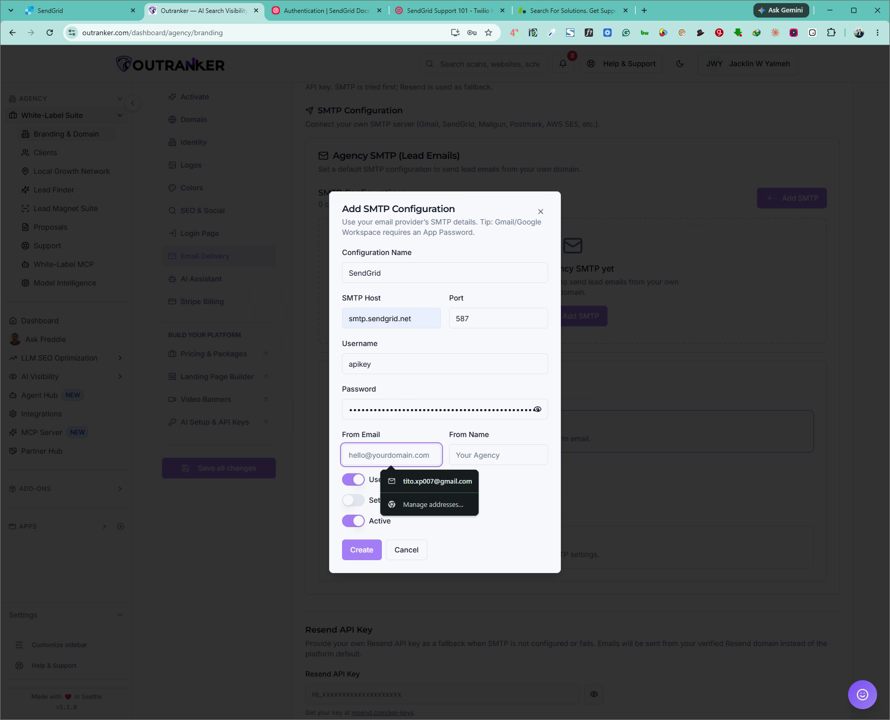
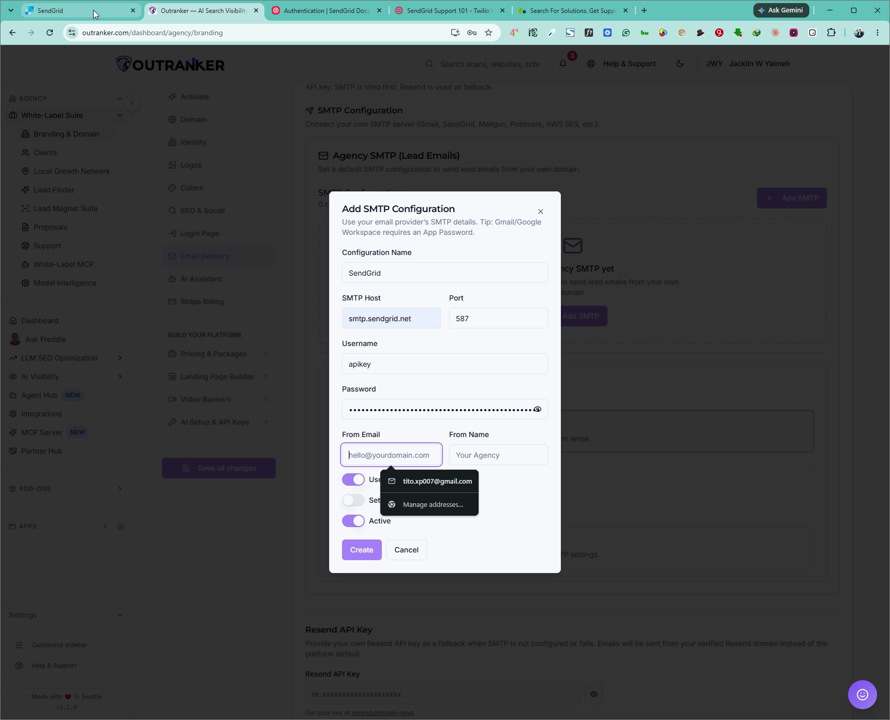
In Outranker, set the From Email using that domain, e.g.,
support@yourdomain.com:Replace
yourdomain.comwith the domain you copied.You can also use addresses like
info@yourdomain.comor any other prefix you prefer.
10. Set the From Name, Security, and Save the SMTP Profile
In Outranker, set the From Name (e.g., your agency name). For this example, use Funnel Savvy.
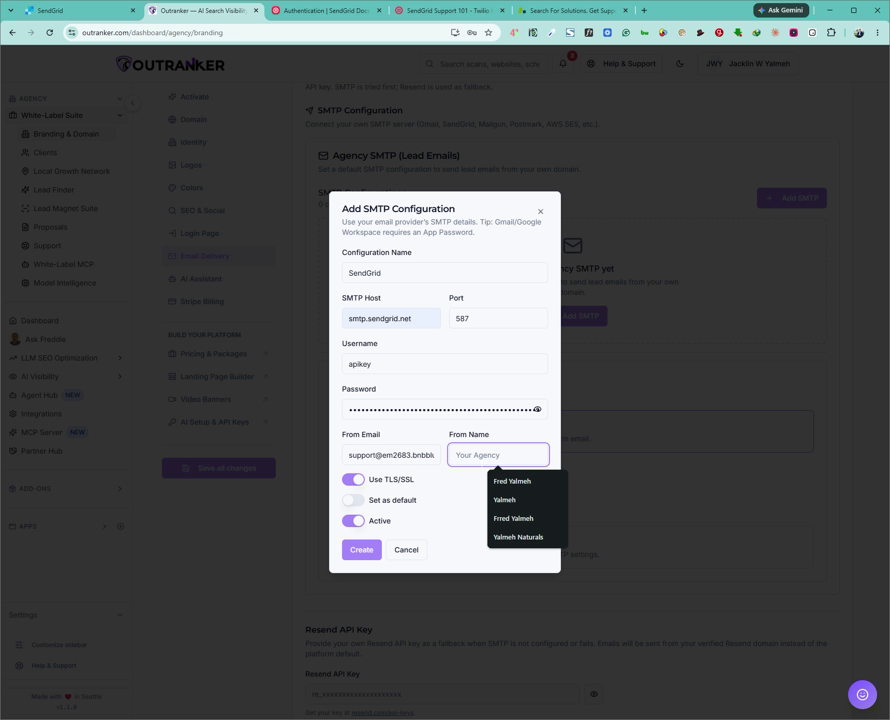
Ensure Use TLS/SSL (or similar encryption option) is turned On.
Optionally, set this SMTP profile to Active and mark it as Default if you want all outgoing emails to use this connection by default.
Click on Create to save and connect your SendGrid SMTP with Outranker.
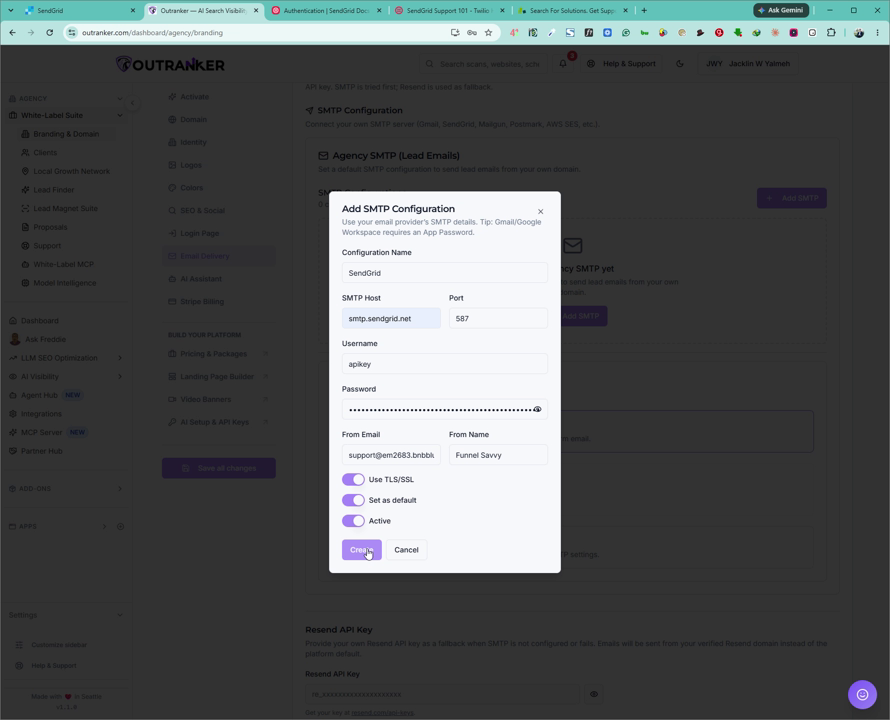
Once these steps are completed, your Outranker agency white label will send outgoing emails using your configured domain and email address through SendGrid.
