This tutorial guides you through configuring your domain and setting up funnels using the Outranker platform and associated services. You will learn how to manage DNS settings, connect domains, and update funnel configurations for optimal performance.
Go to www.outranker.com
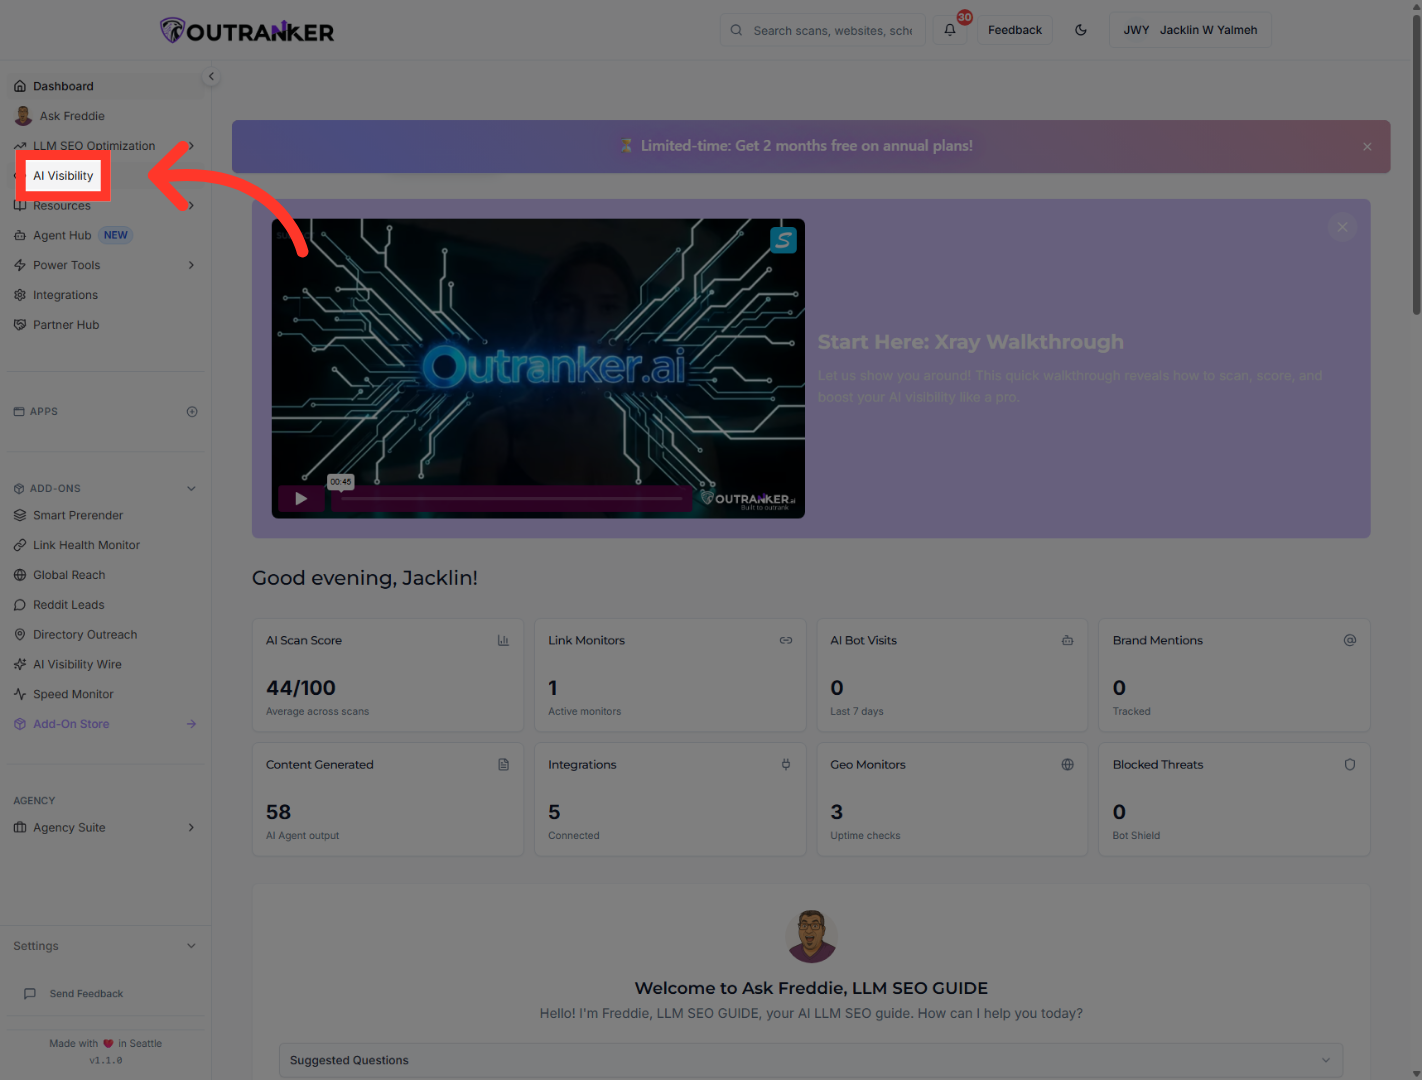
1. Access AI Visibility Settings
"In this video, you’ll learn how to configure your domain inside Outranker, connect it through Cloudflare, update your DNS settings in Namecheap, and then finish the funnel setup in ClickFunnels. We’ll go step by step so you can complete the setup clearly and avoid missing any of the required pieces."
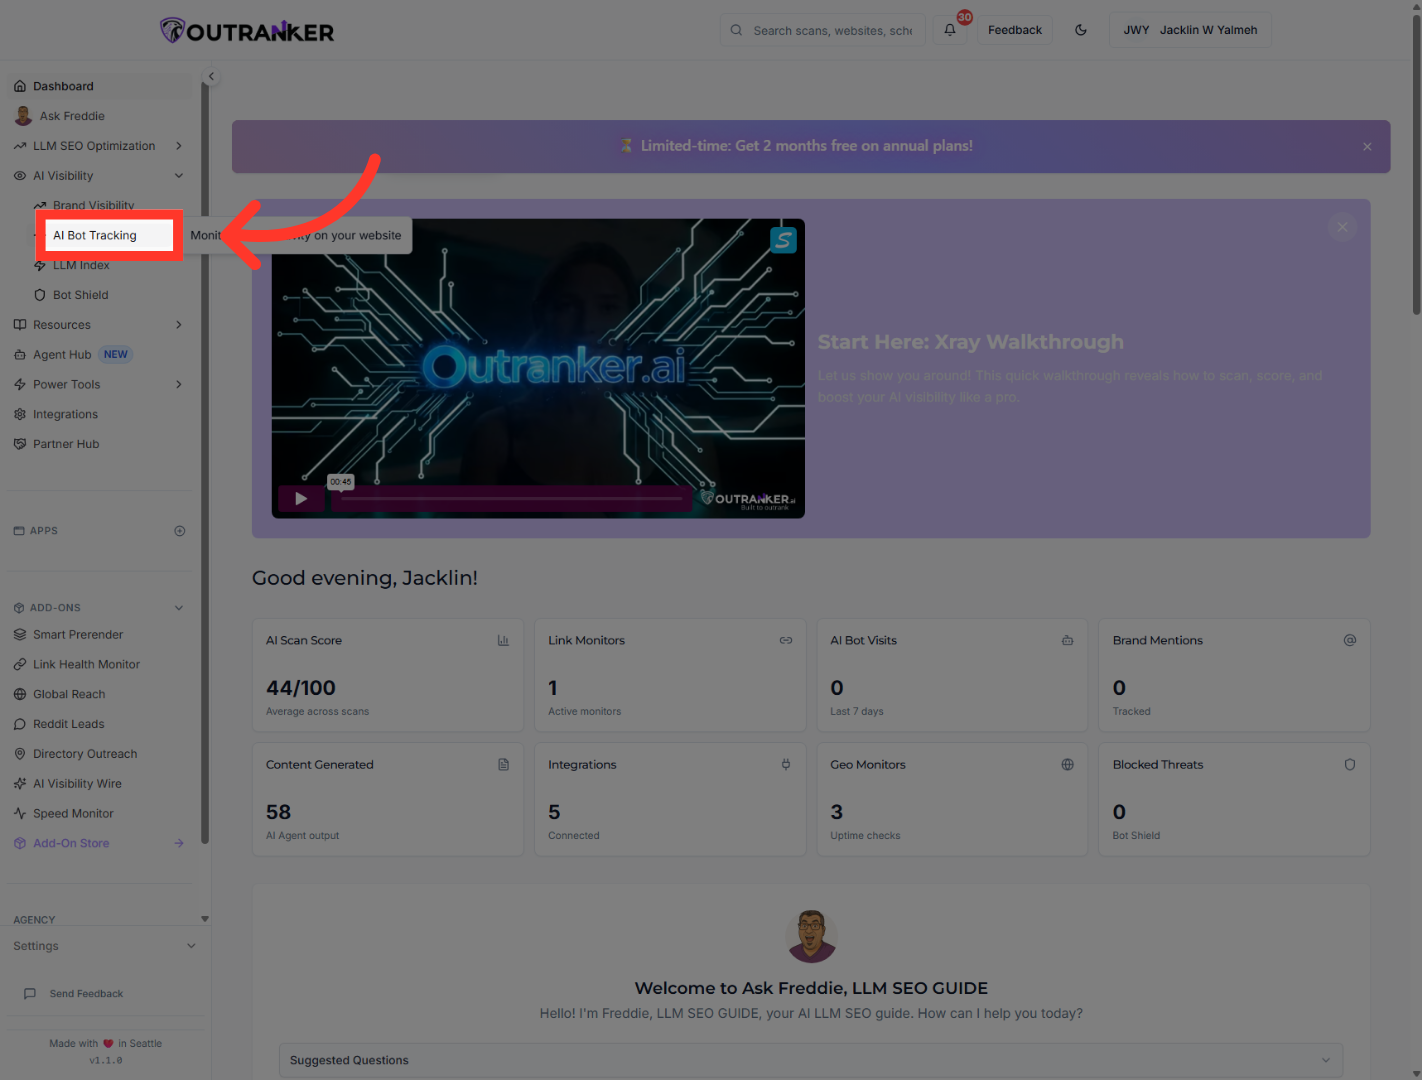
2. Open AI Bot Tracking
"Start by logging in to Outranker. From the left menu, open AI Visibility, then go into AI Bot Tracking. This is where you’ll manage the domain connection and setup process."
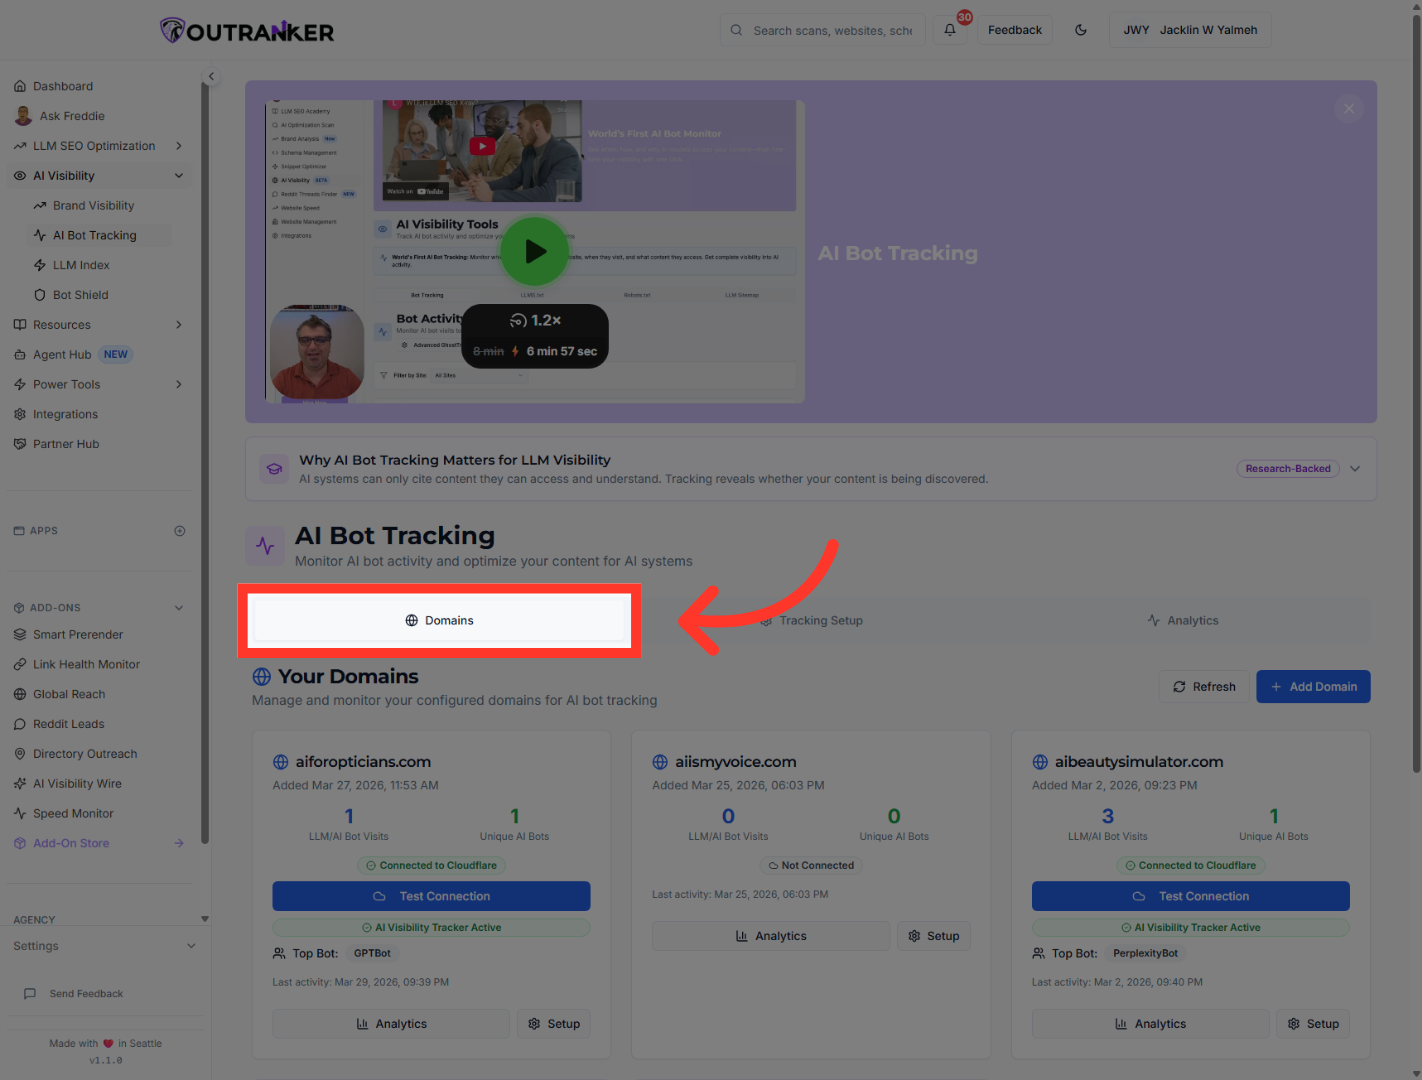
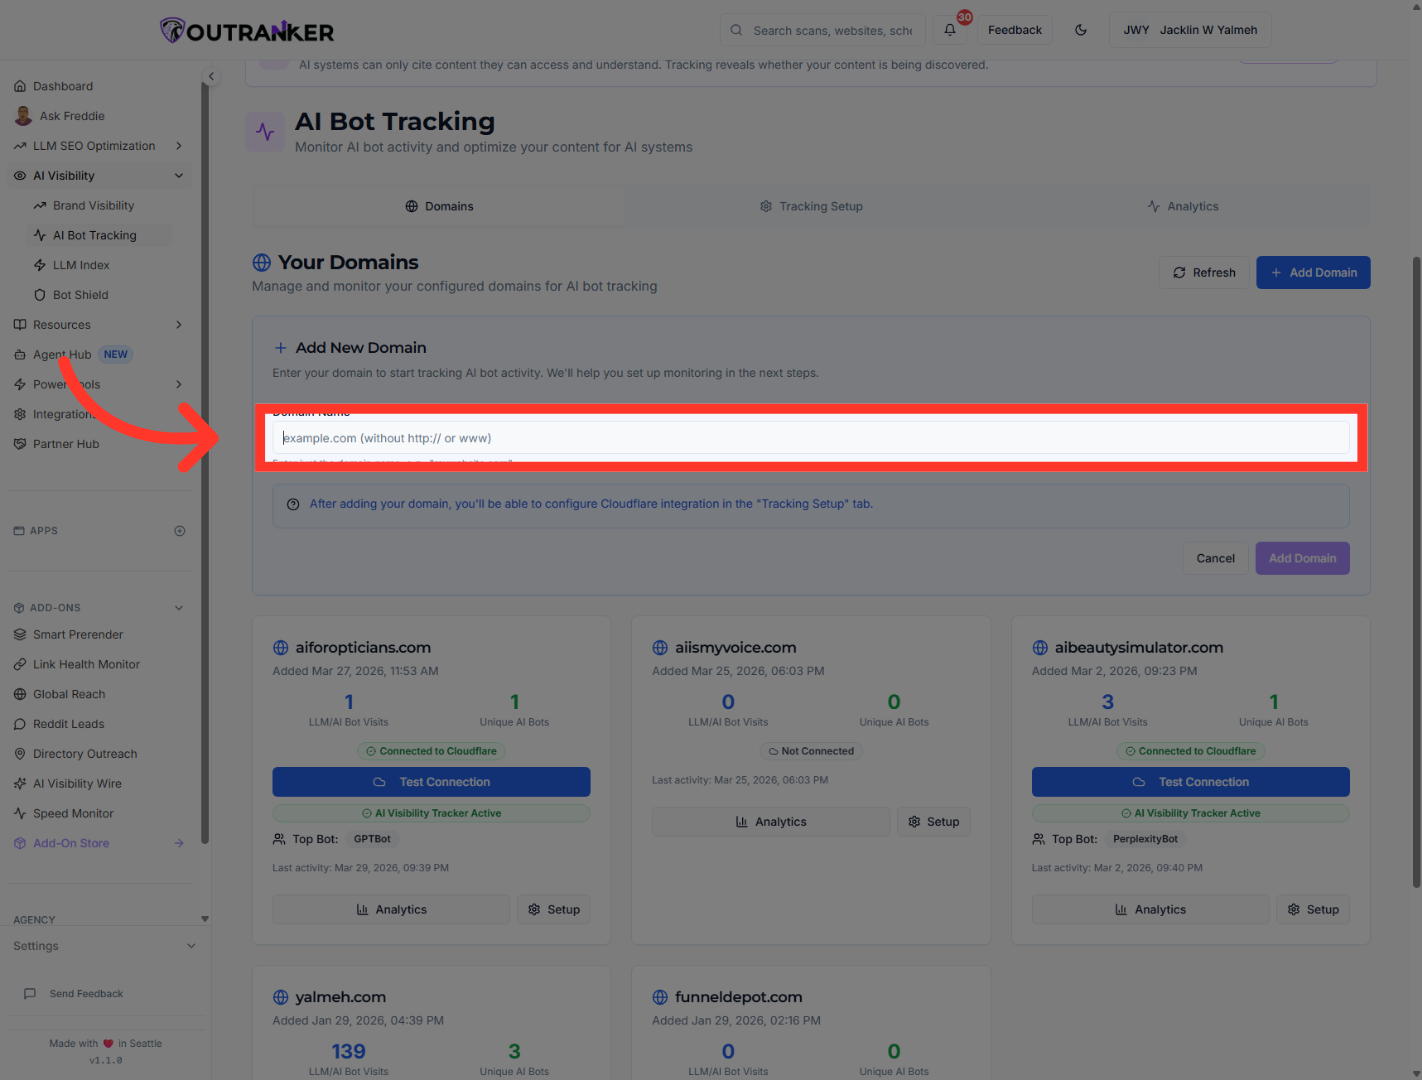
3. Navigate to Domains Section
"Inside AI Bot Tracking, open the Domains tab. This is where you can view your existing domains and add a new one."
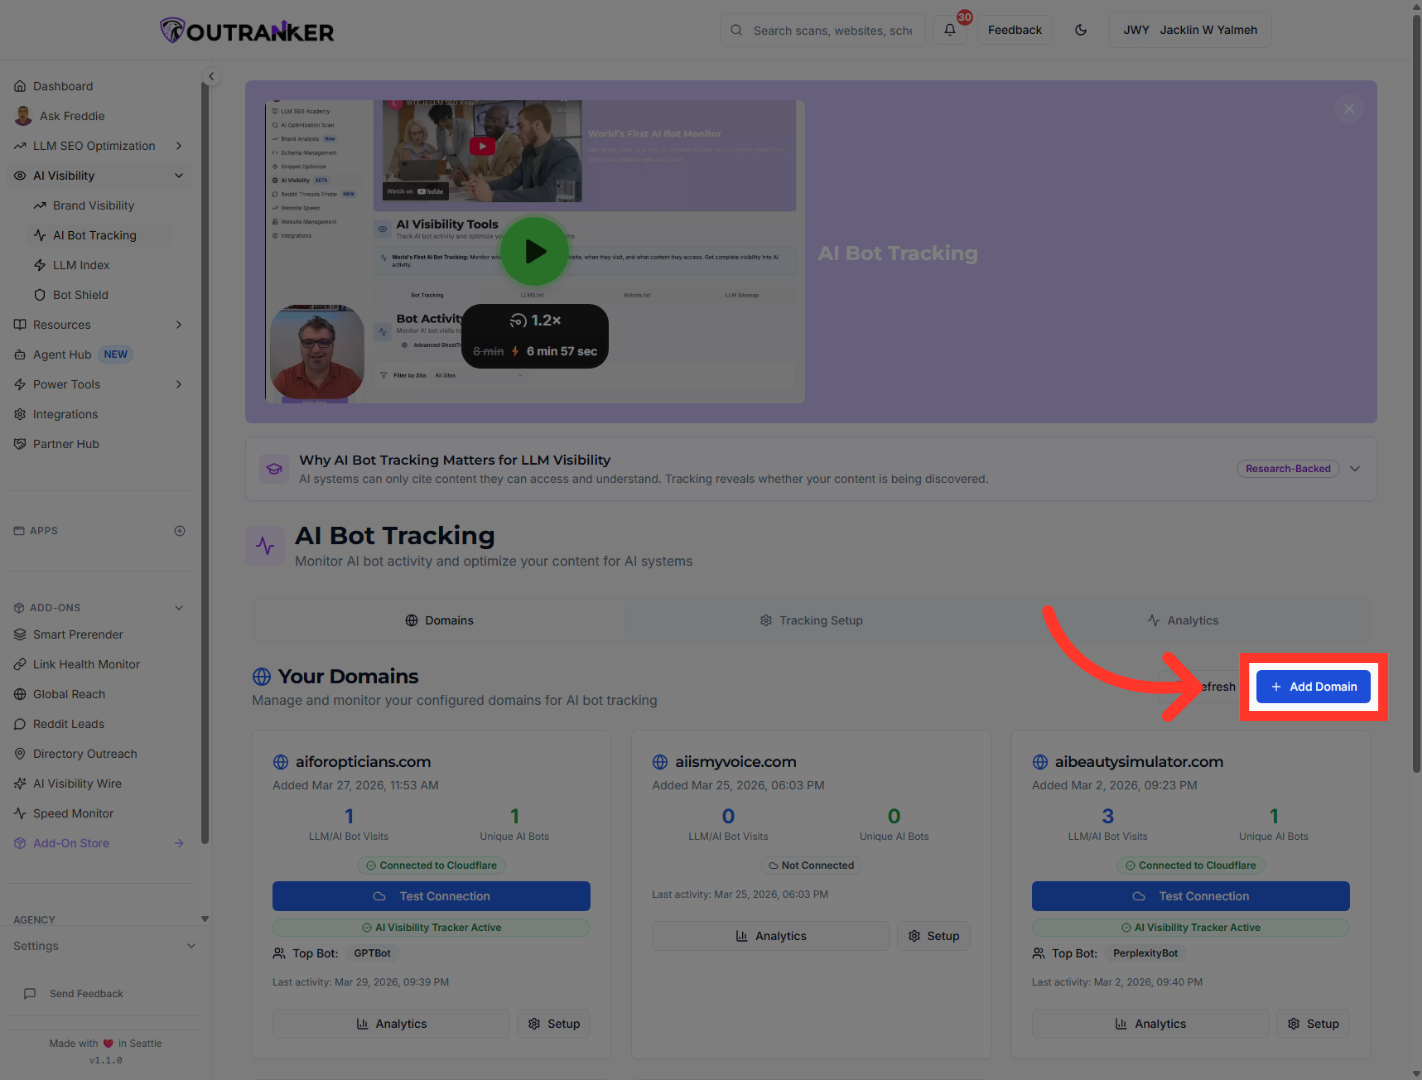
4. Initiate Adding New Domain
"Click Add Domain to begin adding the domain you want to use in this setup."
5. Access Domain Name Settings
Add your domain name without https or www.
6. Add Another Domain
Click "Add Domain" to add an additional domain to your Outranker account.

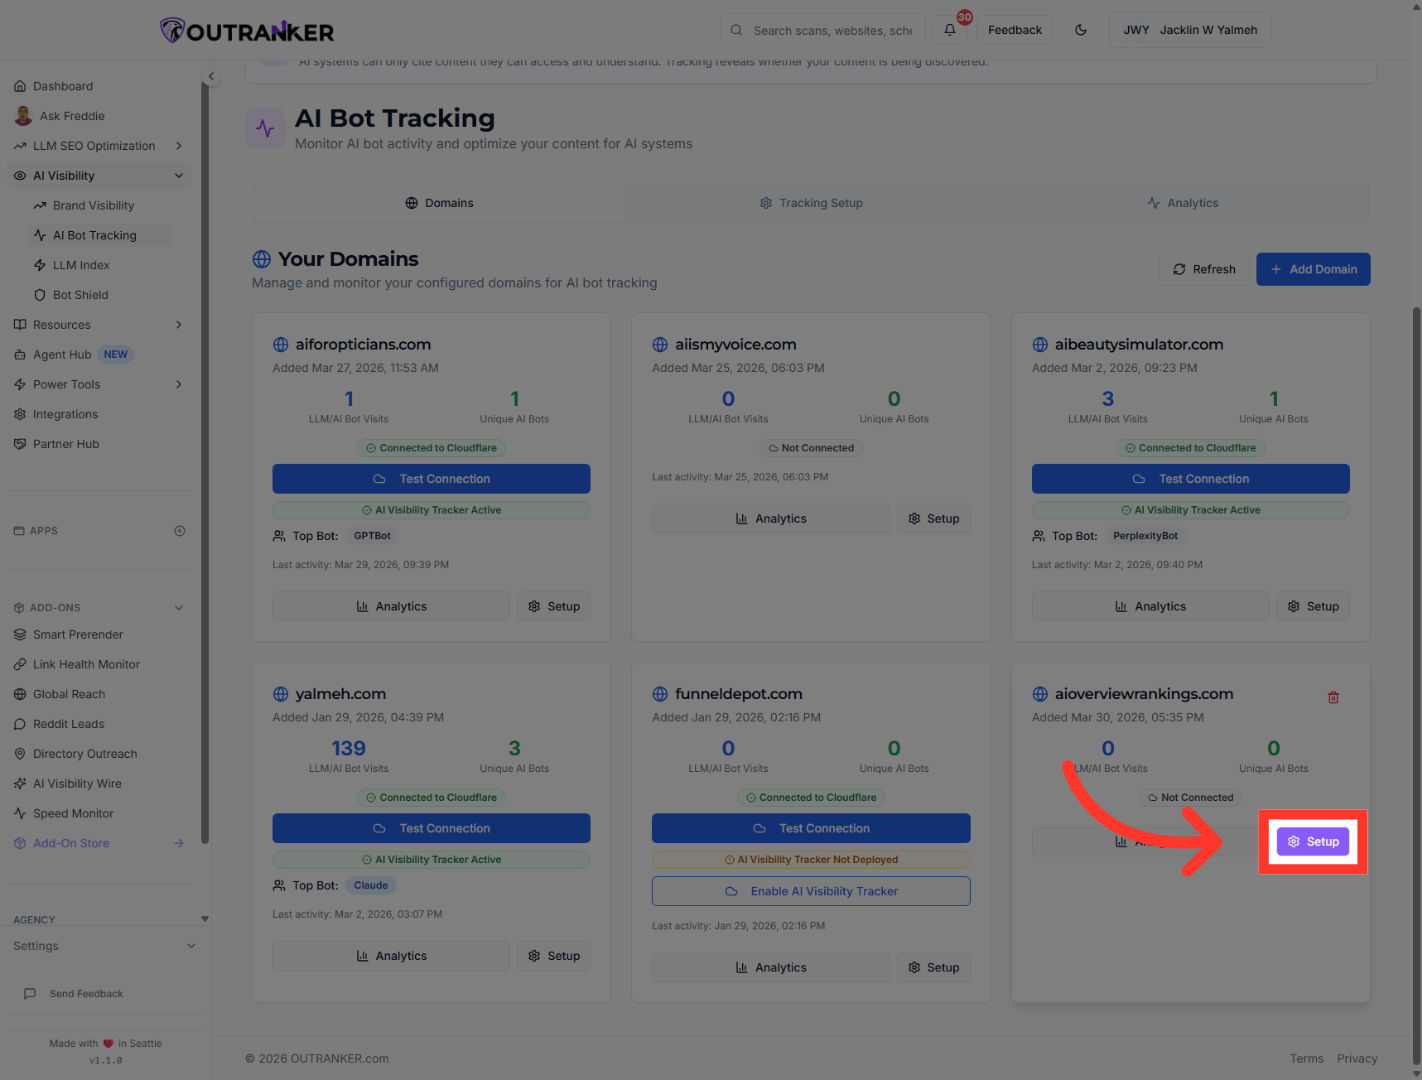
7. Open Setup Options
The domain will be added to your domain section. Now, you can start the setup process. Start by clicking on "Setup" button
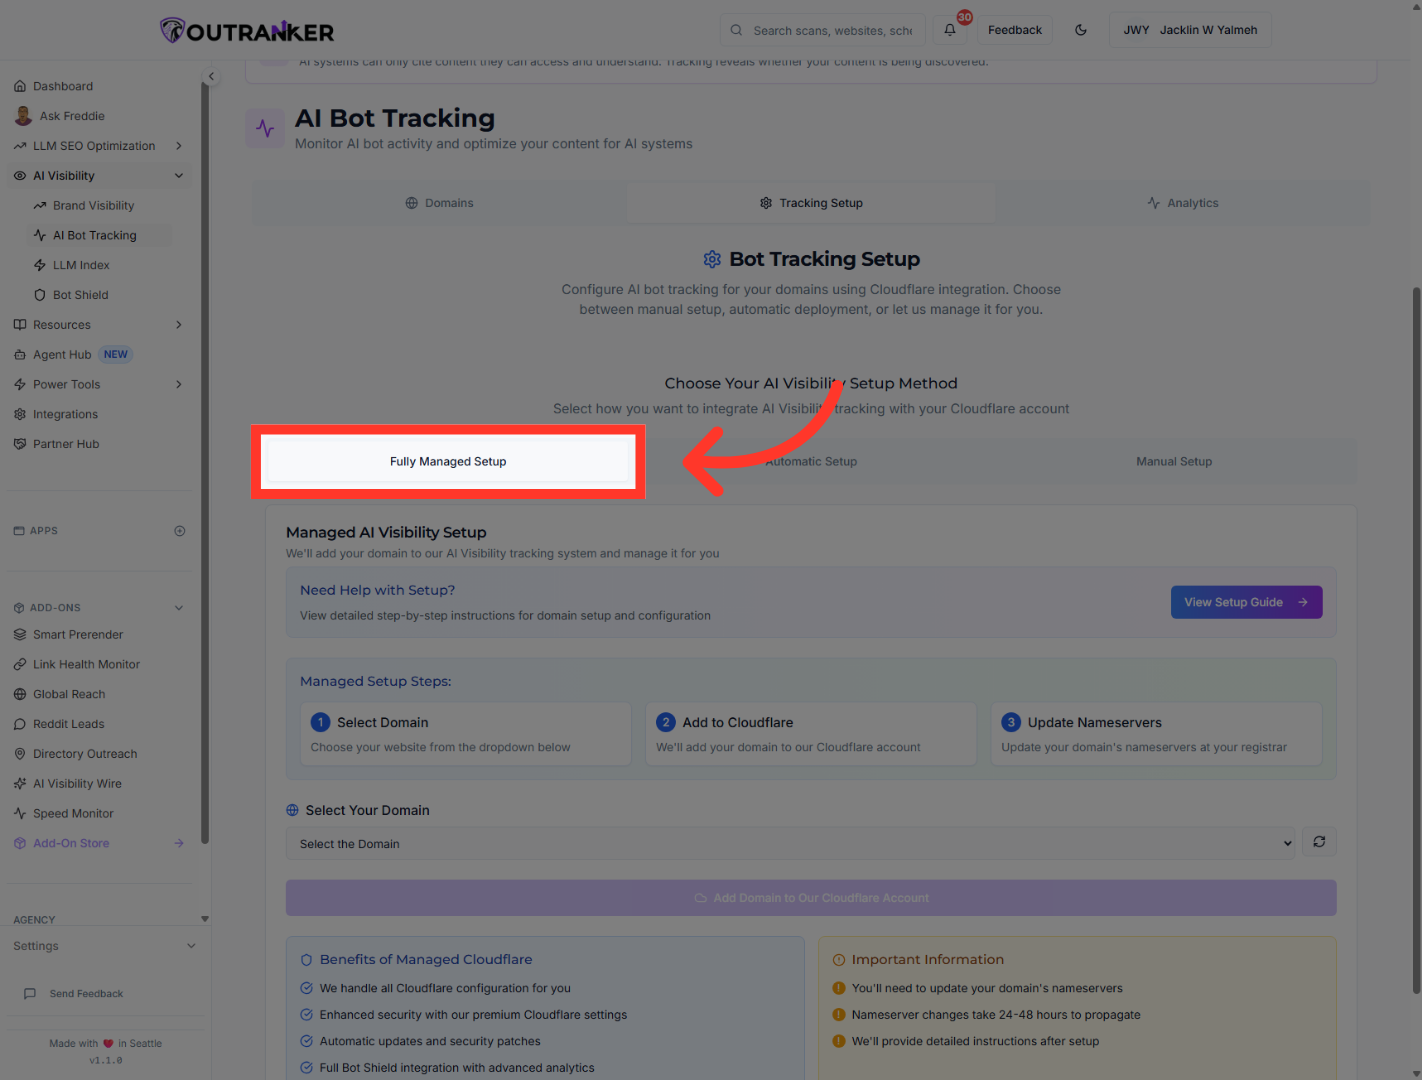
8. Choose Fully Managed Setup
"After opening the setup screen, choose Fully Managed Setup. This option lets Outranker handle the Cloudflare connection and guide you through the remaining steps."
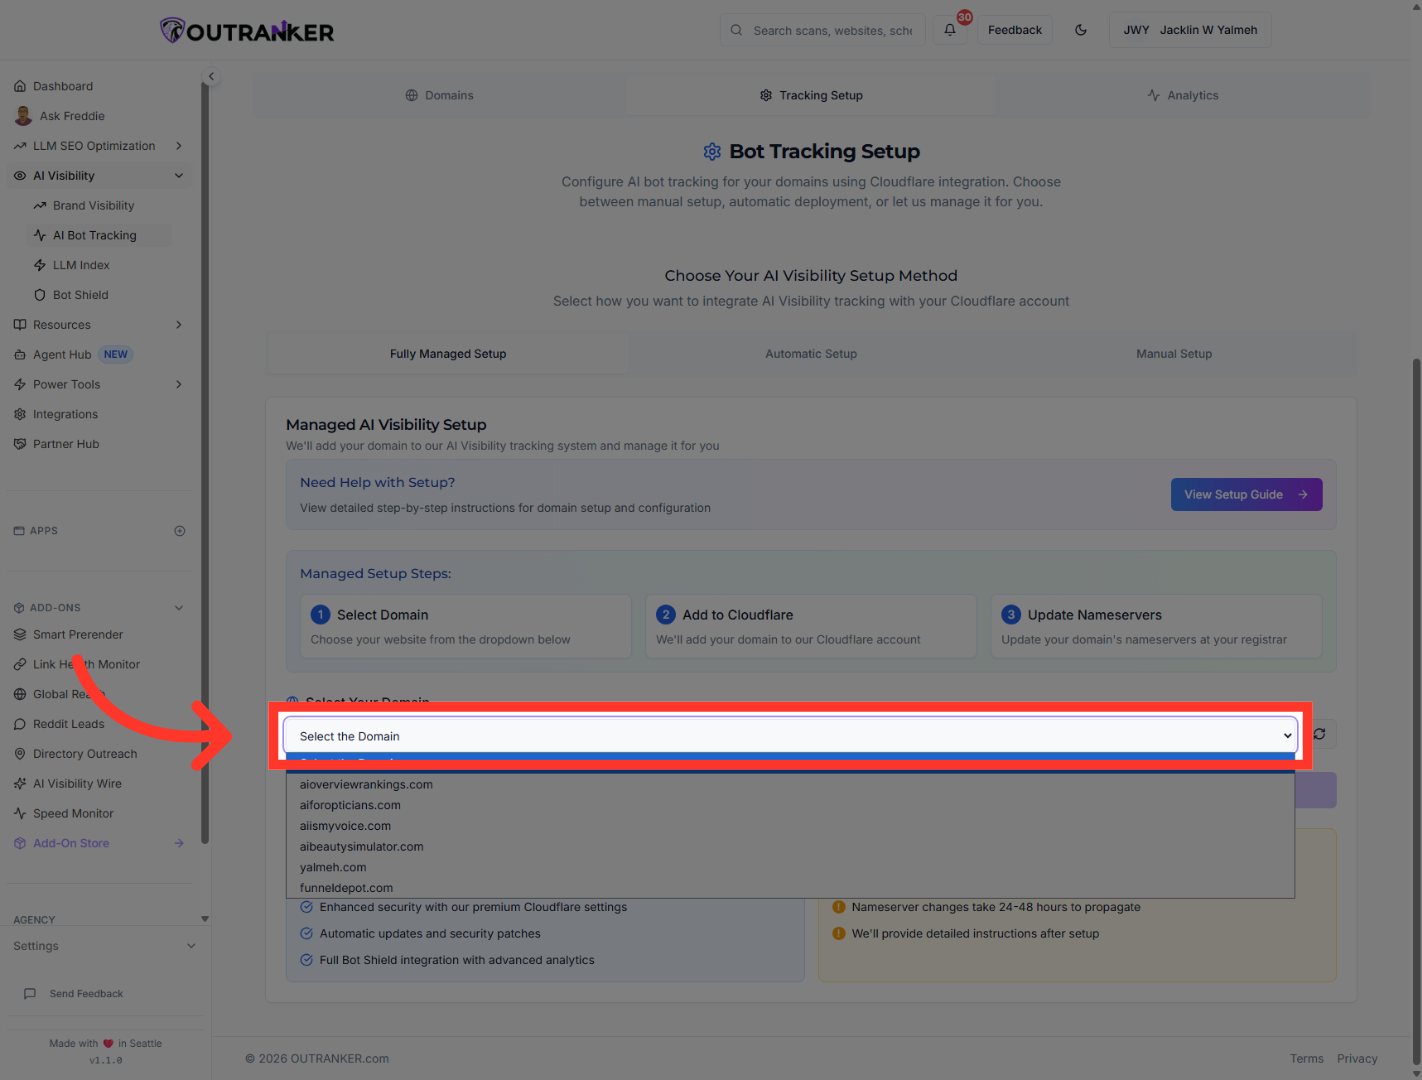
9. Select Domain for Setup
"From the domain list, select the domain you want to set up. In this example, the selected domain is aioverviewrankings.com."
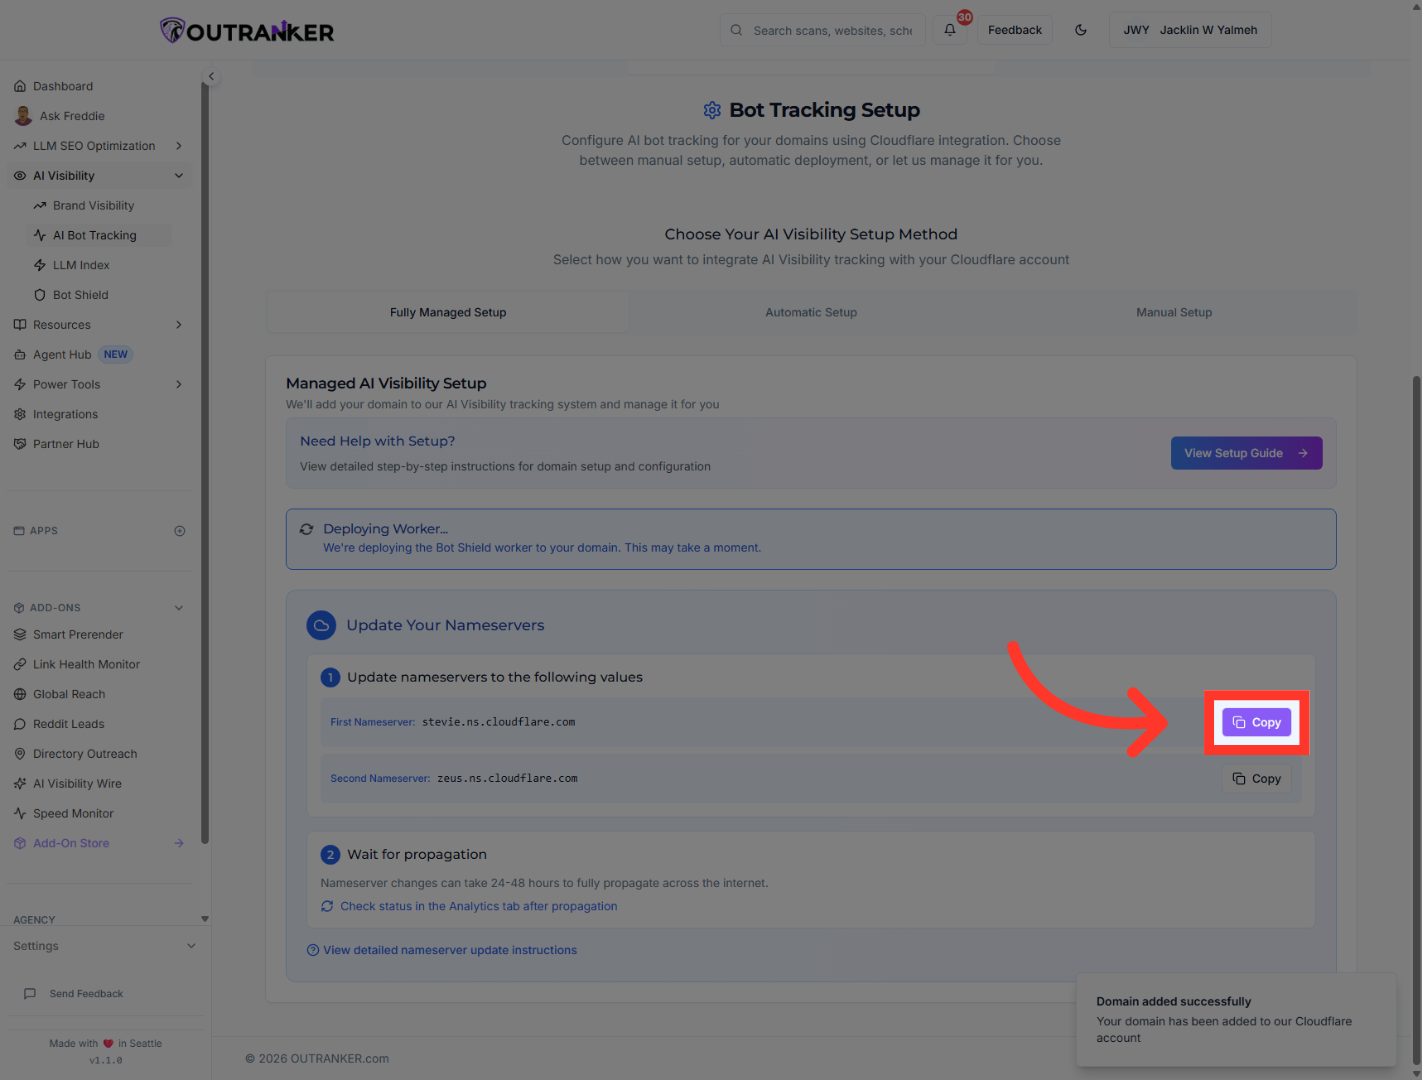
10. Add Domain to Cloudflare
"Once the correct domain is selected, click Add Domain to Our Cloudflare Account. Outranker will start connecting the domain and preparing the deployment."

11. Copy Setup Information
"When the setup information appears, copy the nameserver values provided by Outranker. You’ll use these in your domain registrar to point the domain to Cloudflare."
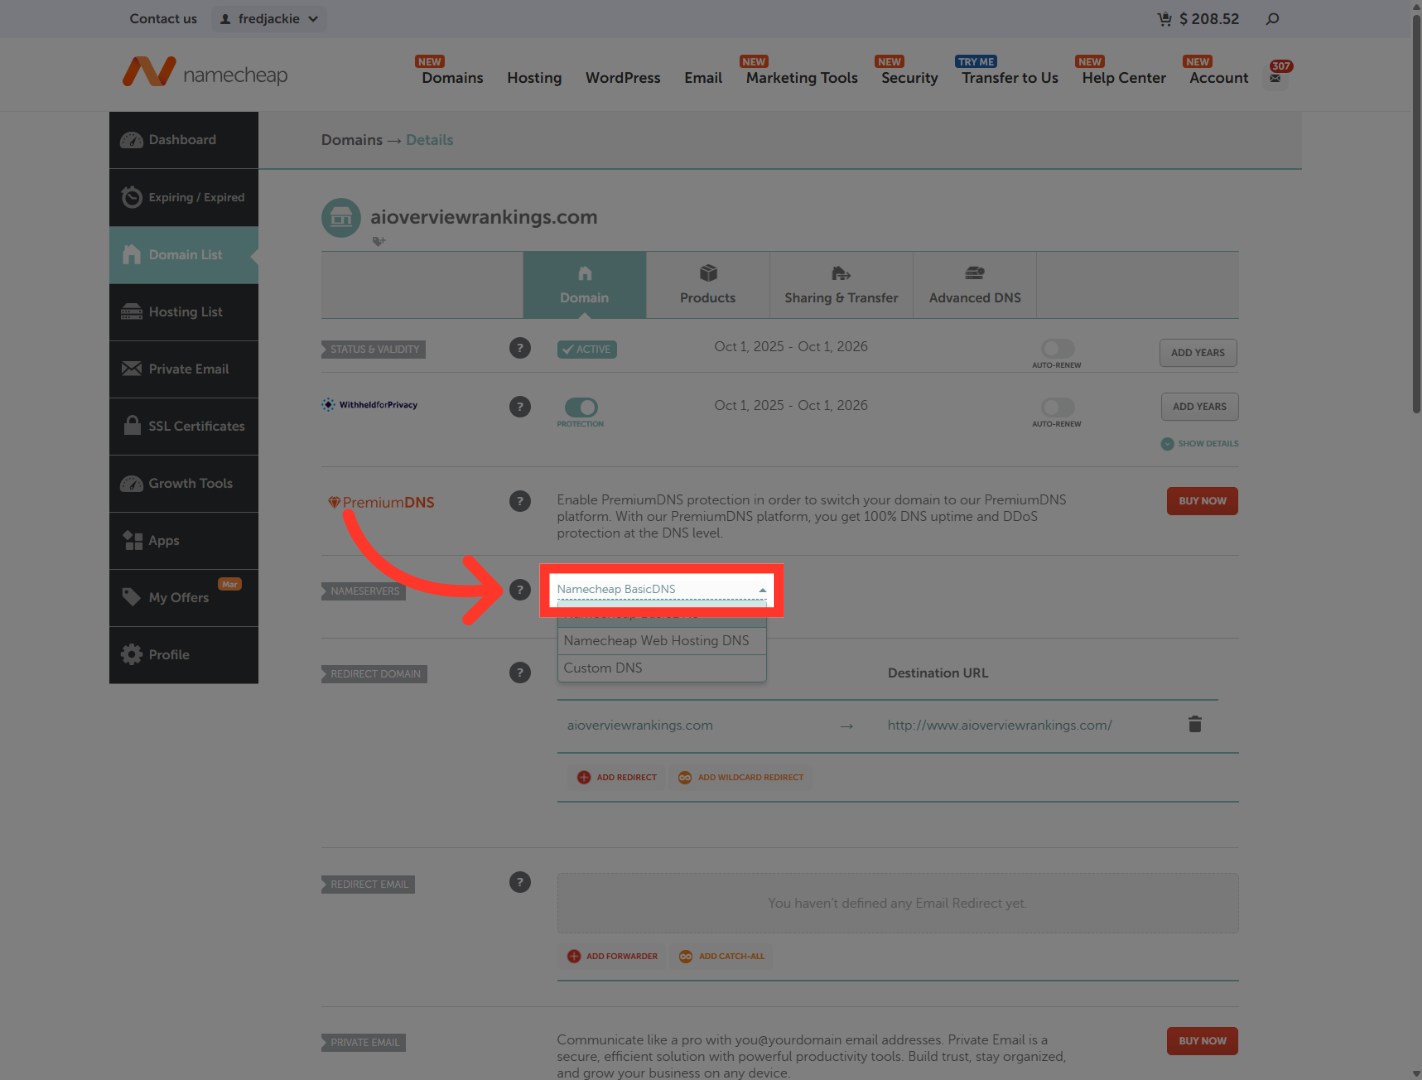
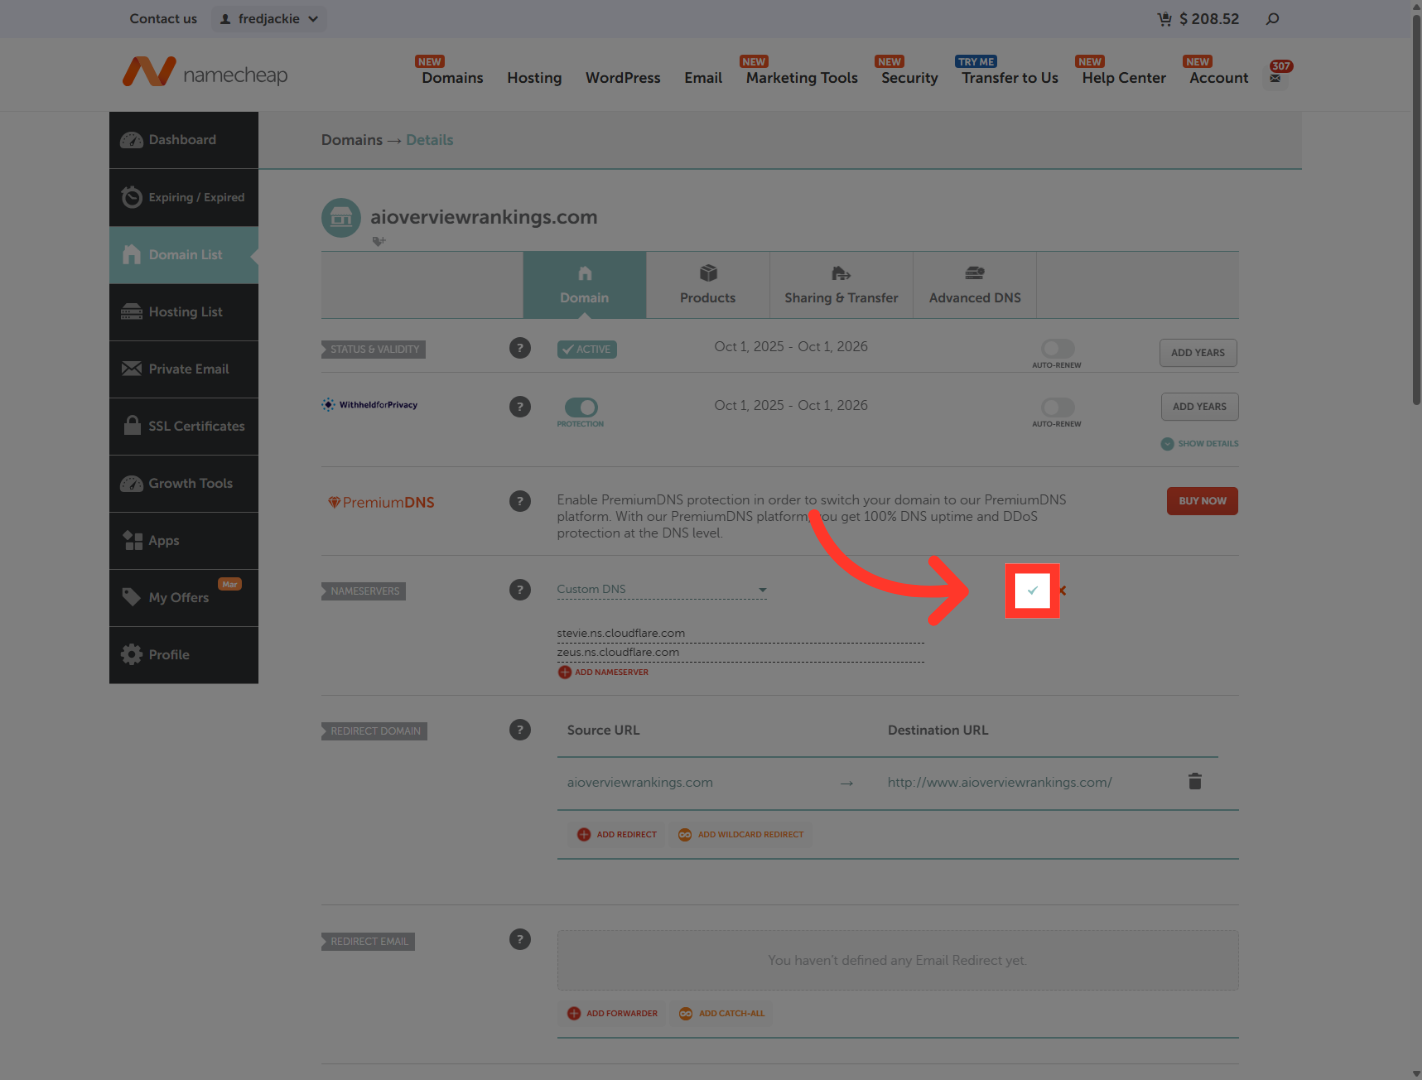
12. Select Basic DNS Option
"In the domain provider, change the nameserver setting from the default option to Custom DNS. This allows you to enter the Cloudflare nameservers provided by Outranker."
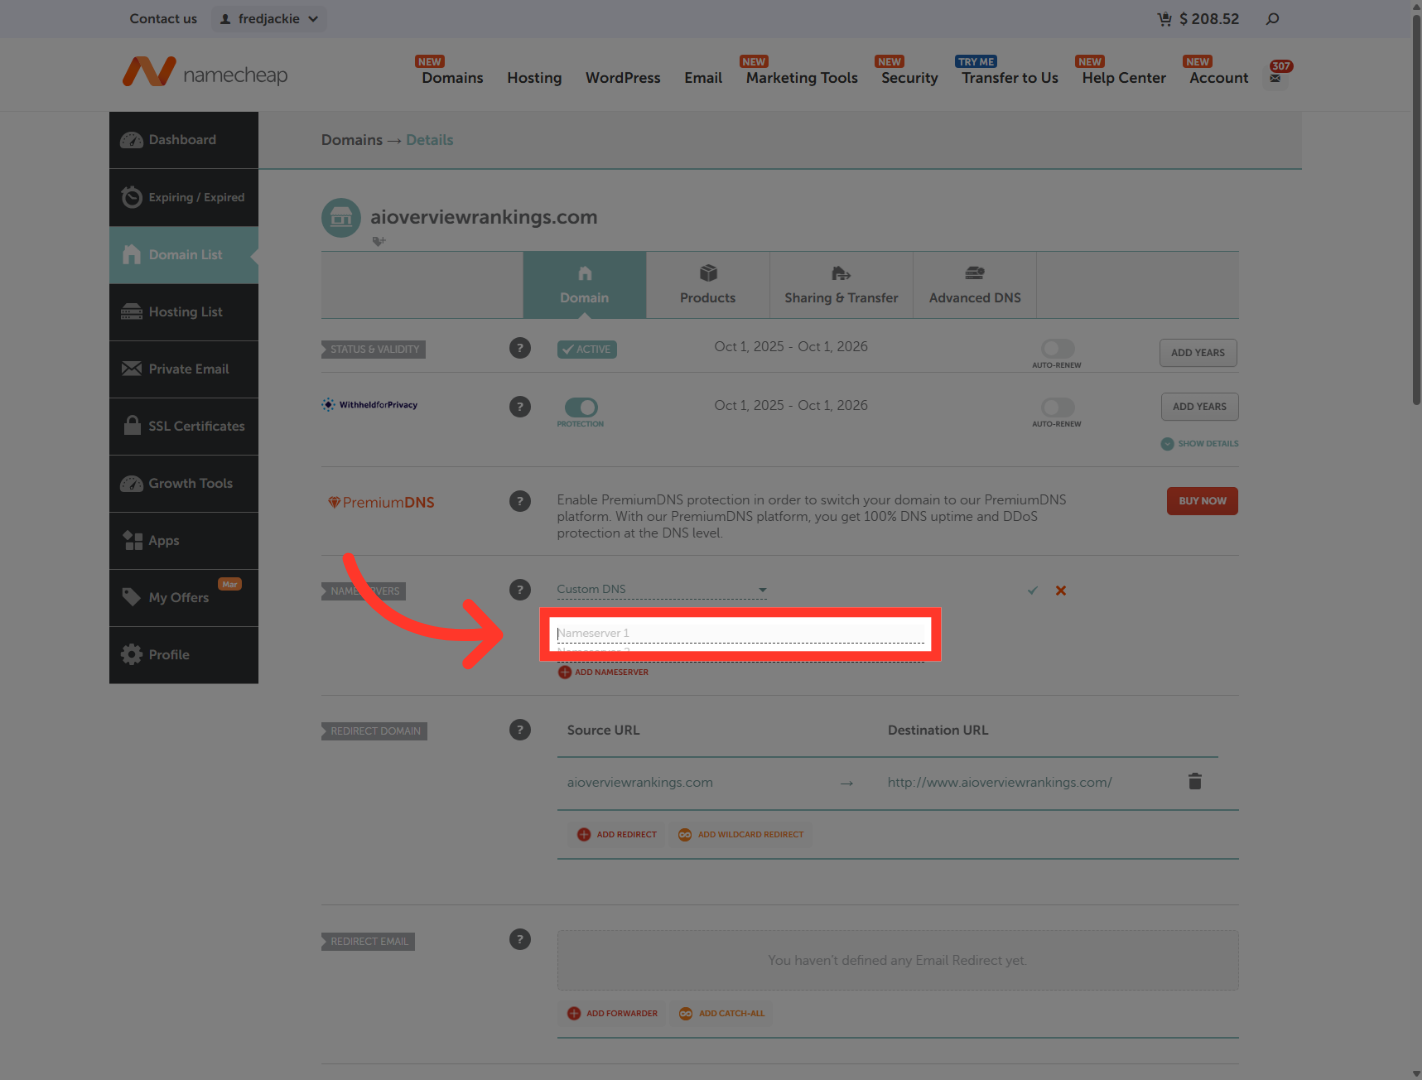
13. Edit Nameserver 1
"In the first nameserver field, paste the first Cloudflare nameserver. In this walkthrough.
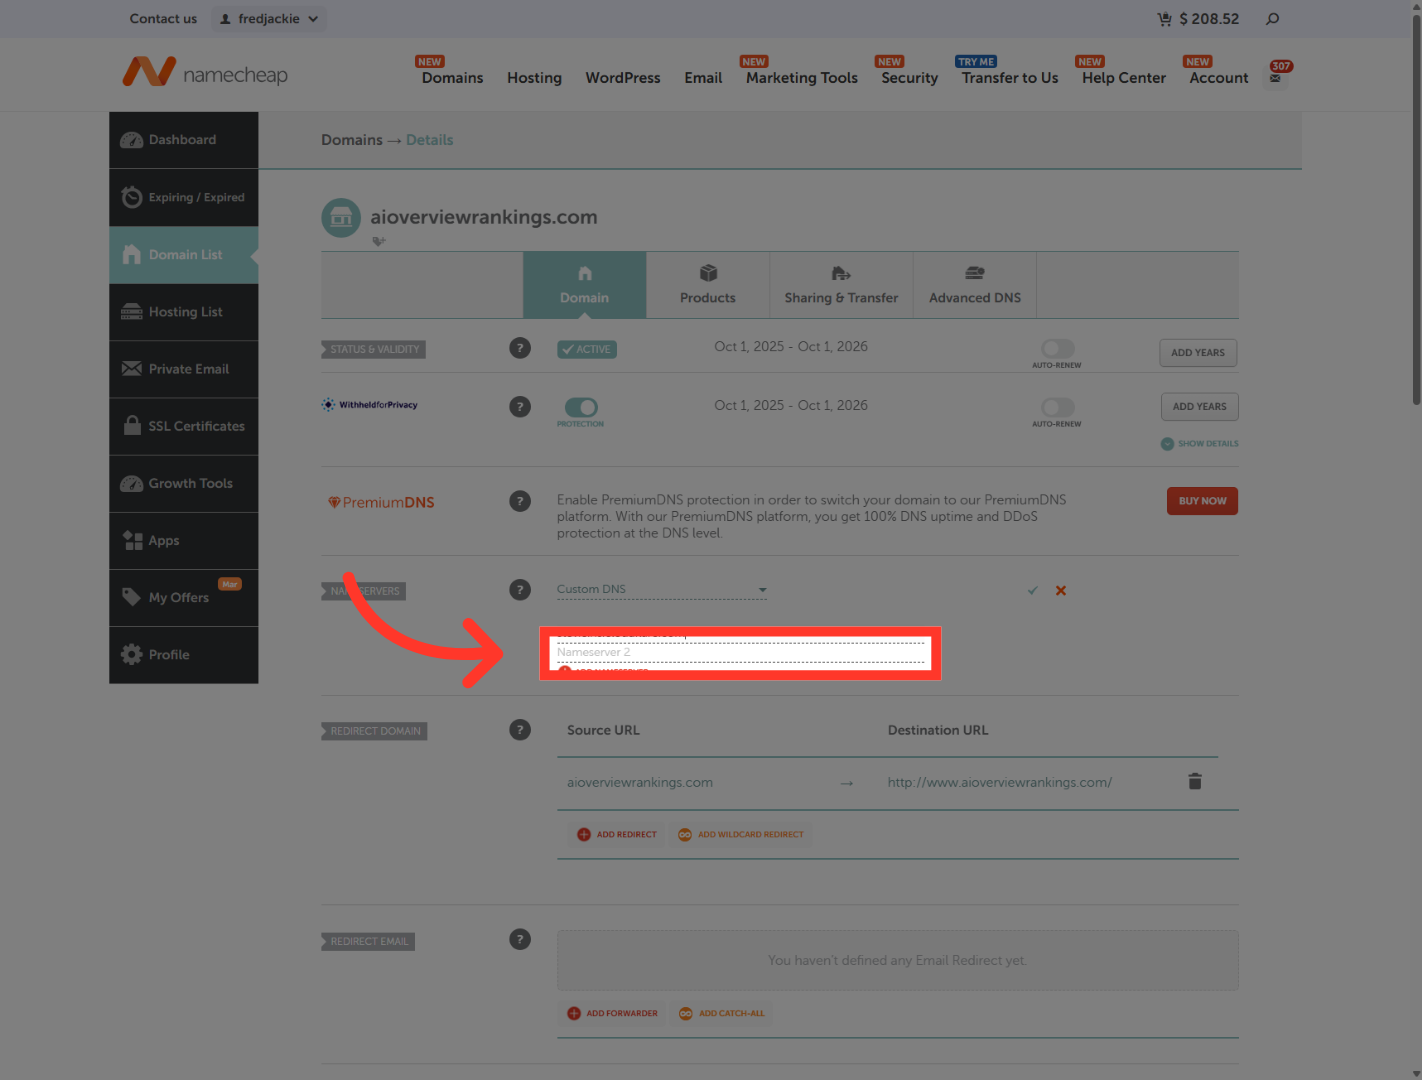
14. Edit Nameserver 2
"Next, paste the second Cloudflare nameserver into the second field."
15. Save DNS Changes
"After both nameservers are entered, save the changes in Domain provider. At this point, the domain is pointed to Cloudflare, and propagation can begin."
16. Proceed to Deployment Setup
"Go back to Outranker. Once the setup screen confirms the domain was added and the worker was deployed successfully, click Next: Setup Deployment Configuration to continue." Please note: Name server changes may take between 5 minutes and 24 hours for this to fully work. It's recommended to wait at least 15 minutes in this state.

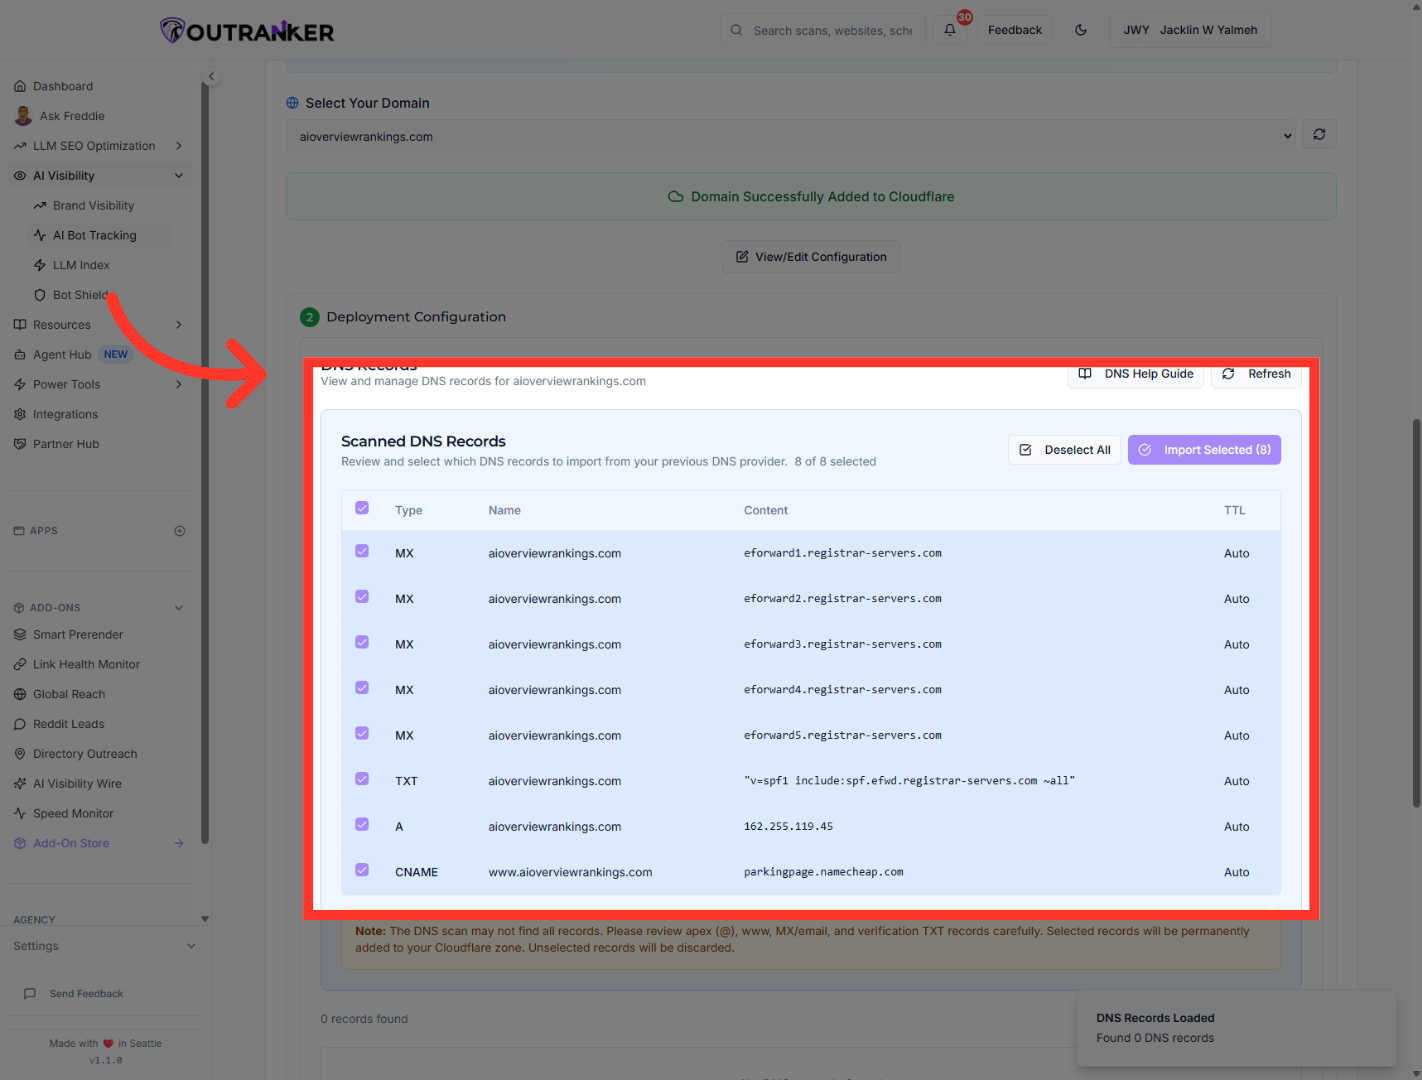
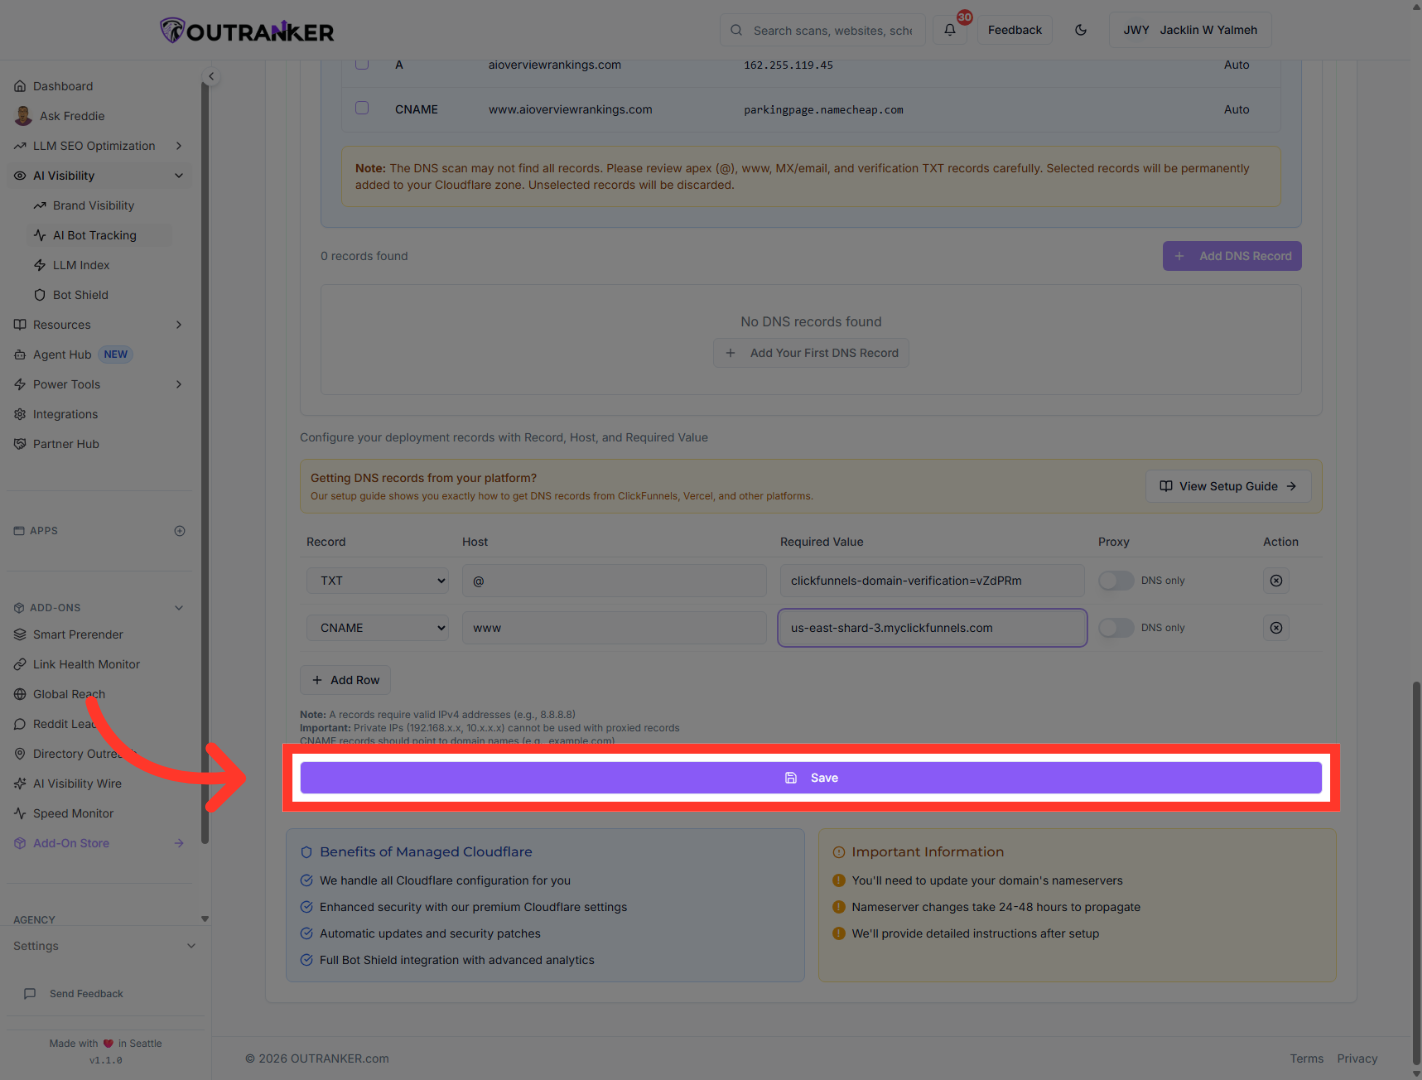
17. Manage DNS Records
"In the deployment configuration area, open DNS Records. Review the scanned records and keep the ones you want to import into the Cloudflare zone. This step helps preserve the records your domain already needs."
18. Access ClickFunnels Workspace
"We will be using Clickfunnels for this example, as it's a new website. If your website is old, you can simply import your existing records, and you should be good to go. These additional steps will not be necessary for an already existing website." "Next, switch to ClickFunnels and open your workspace settings. From there, go to Domains so you can connect the domain to your funnel workspace."
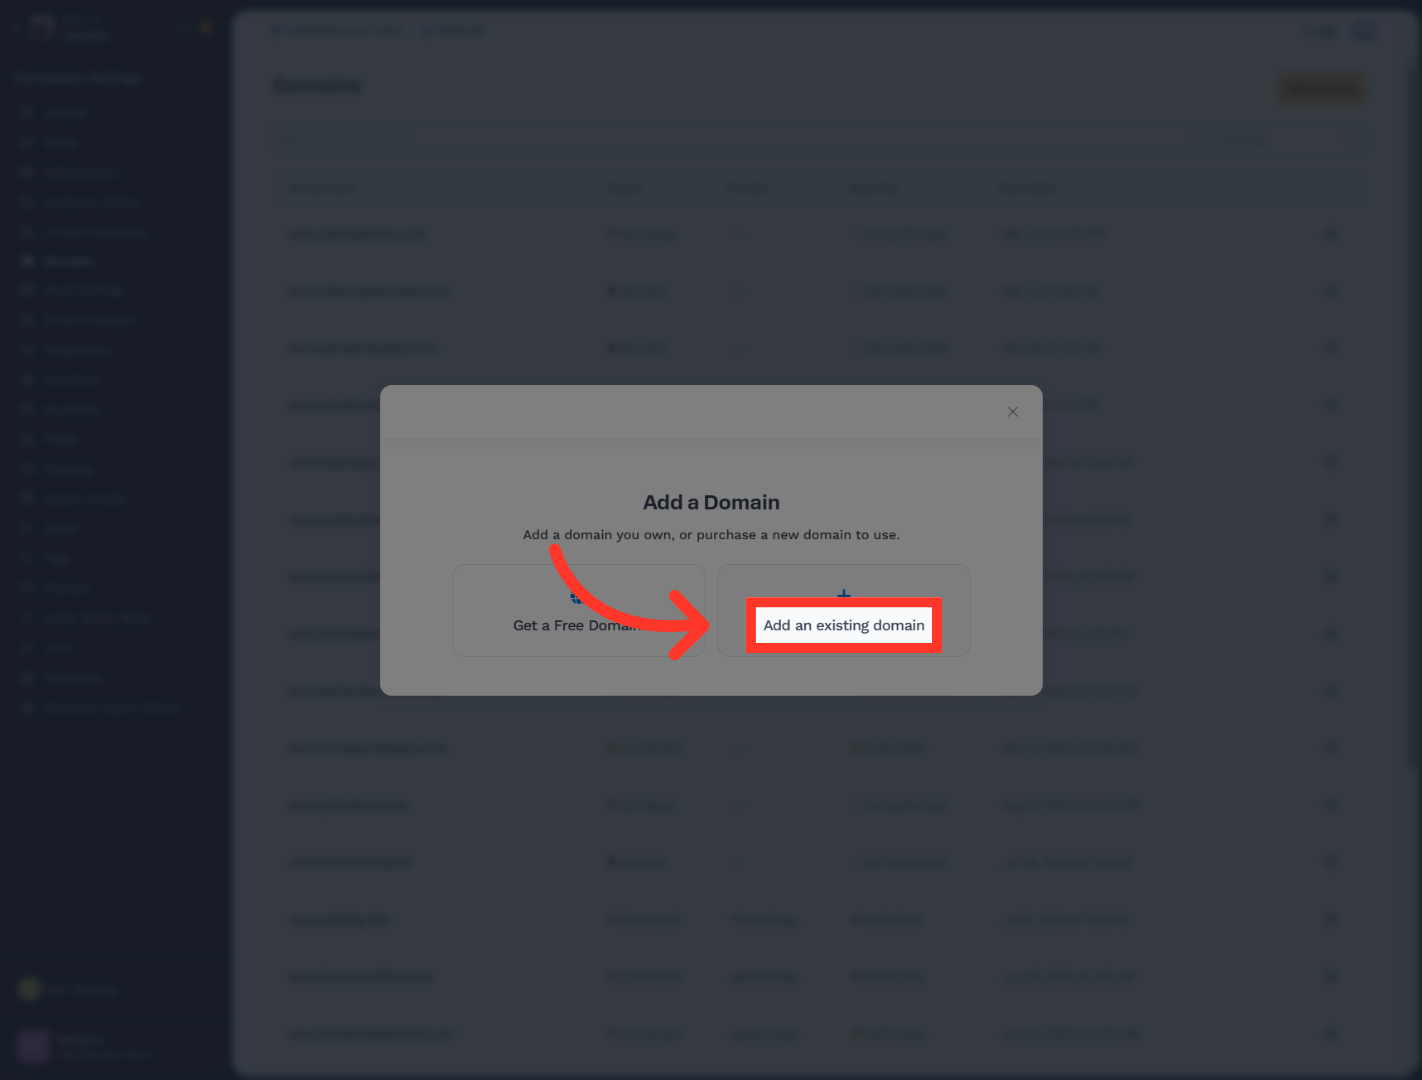
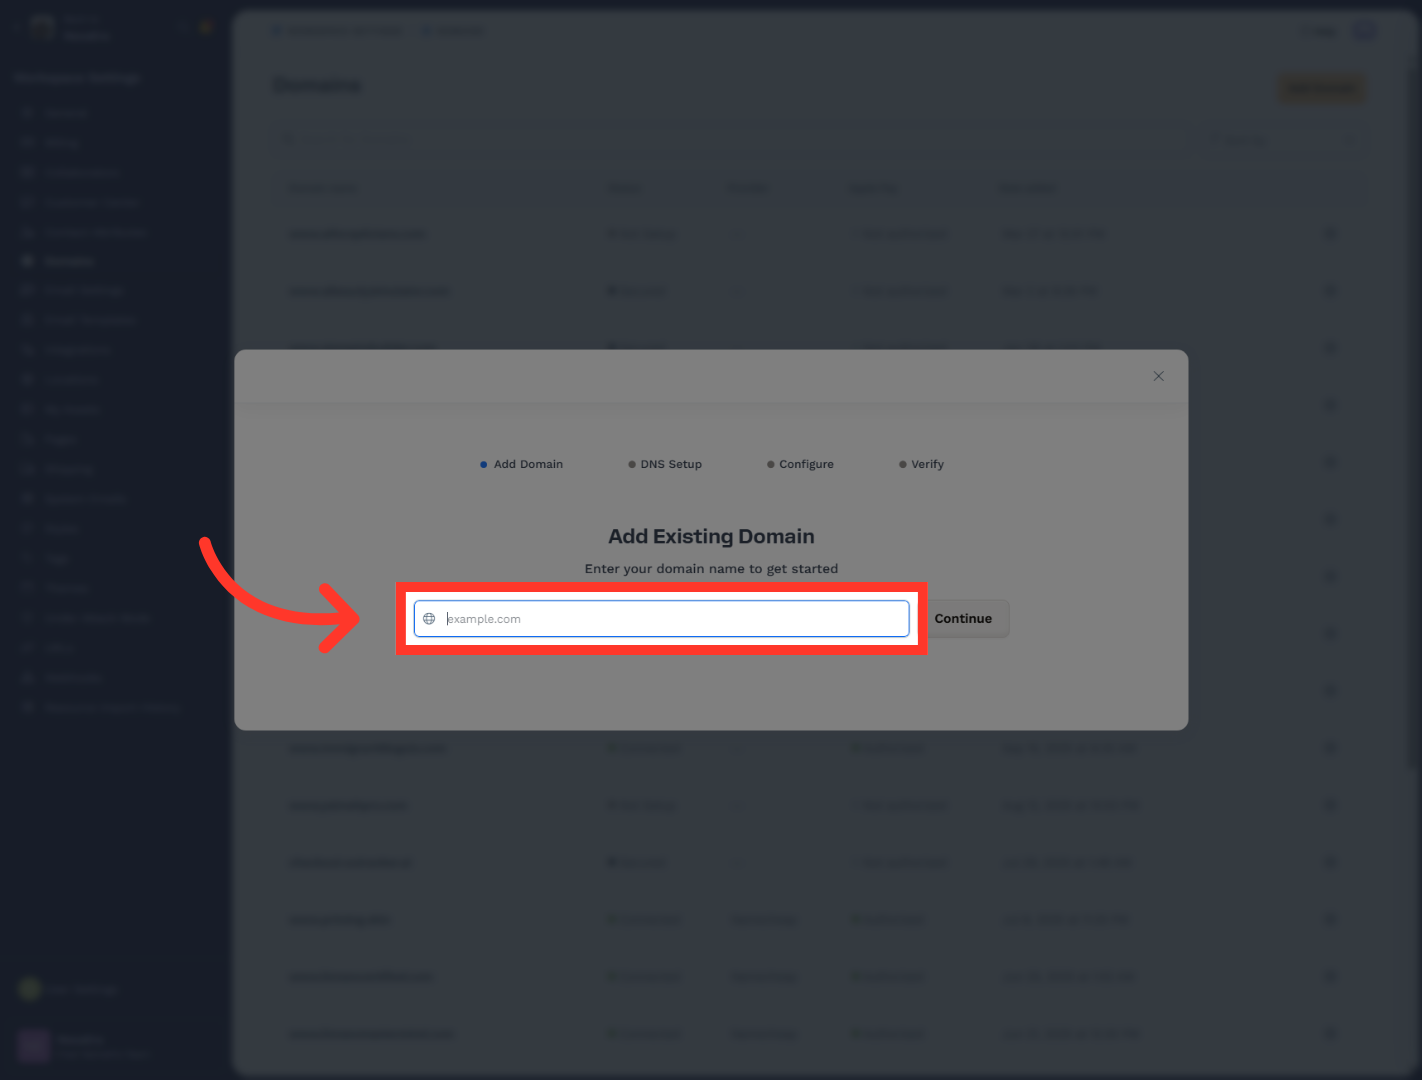
19. Add Existing Domain
"Click Add Domain, then choose Add an existing domain. This is the option you’ll use when the domain is already registered somewhere else, like Namecheap."
20. Select Domain Name Field
"Type the domain name you want to connect. In this example, that domain is aioverviewrankings.com. Then click Continue to move to the next step."
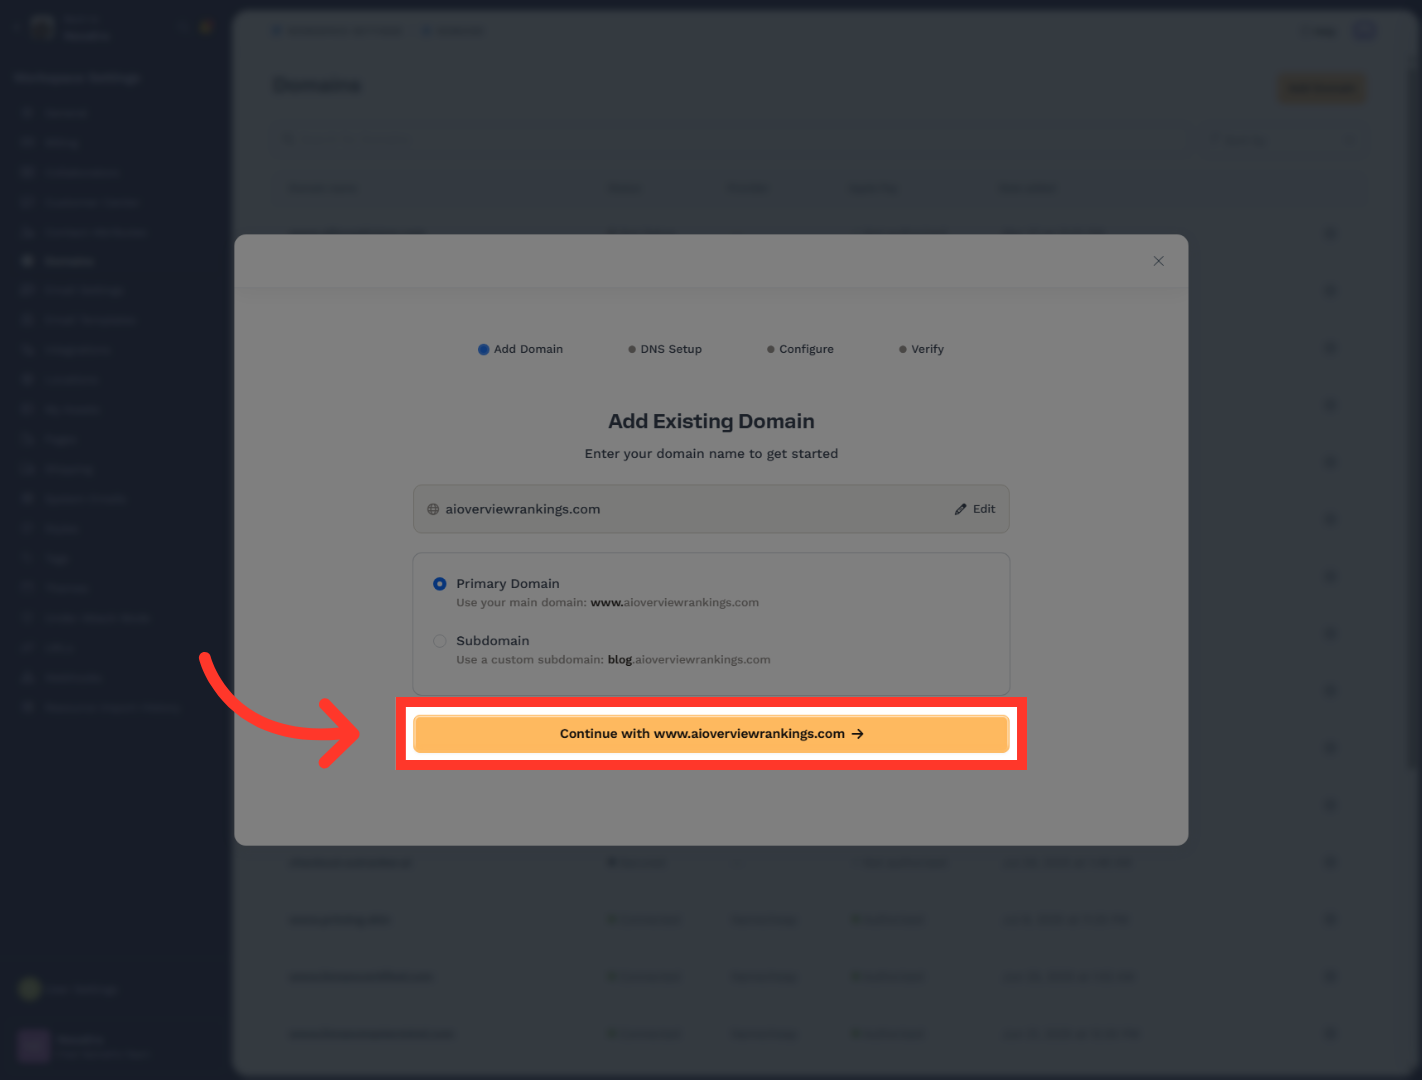
21. Confirm Domain with WWW
"When ClickFunnels asks how you want to use the domain, continue with the www version if that matches your setup. This makes the domain ready for funnel use inside the workspace."
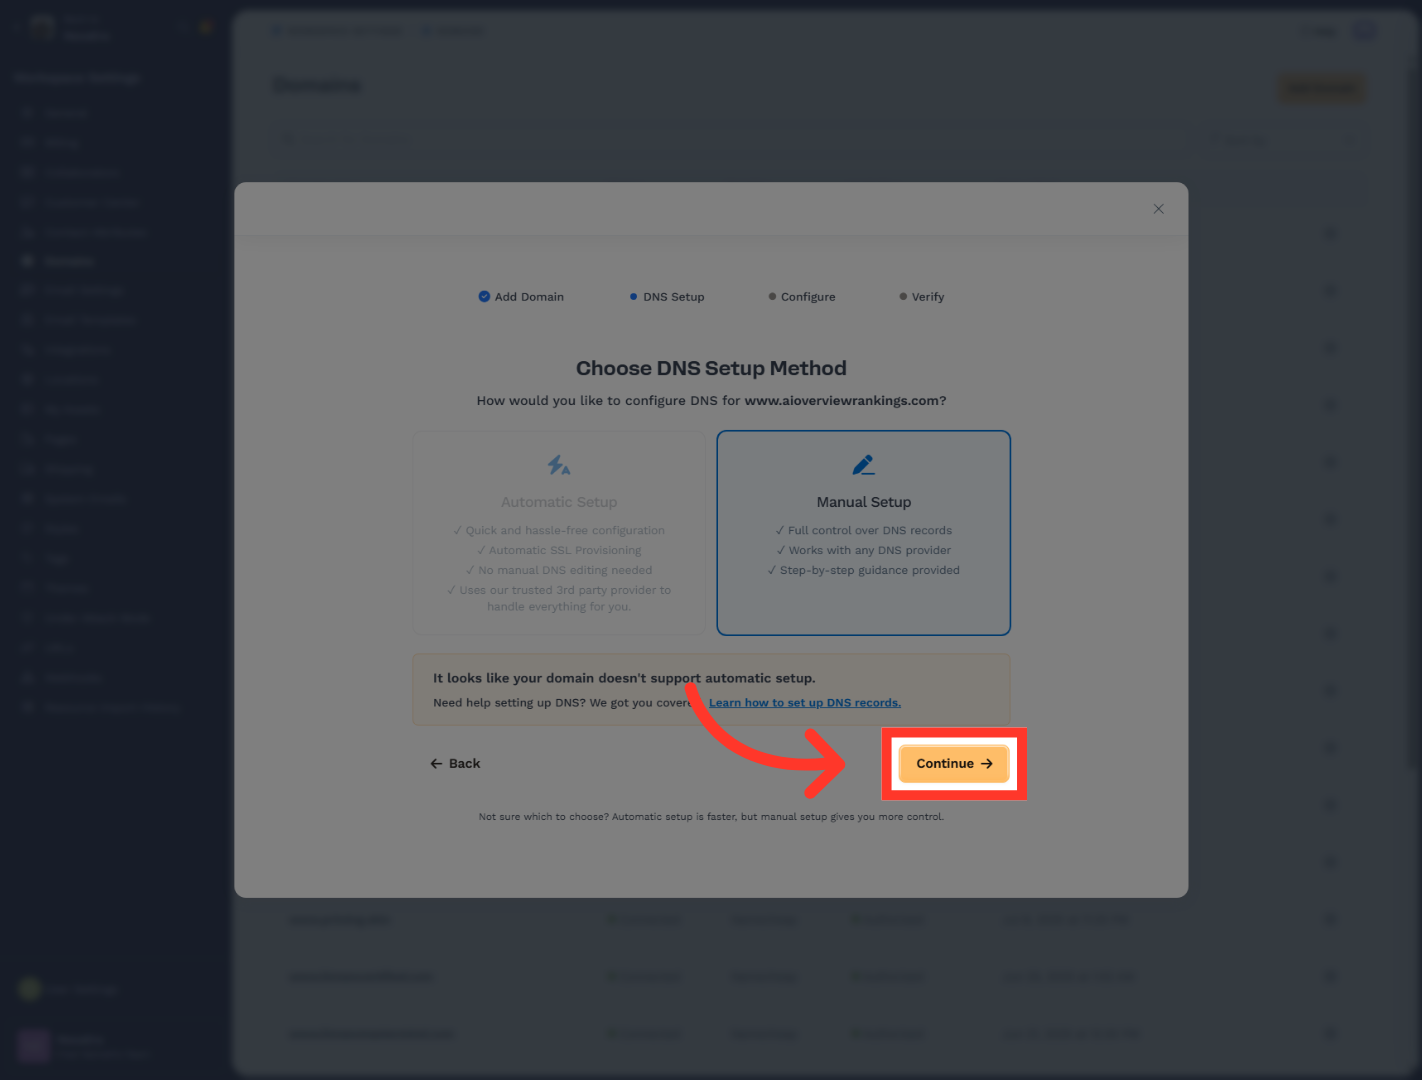
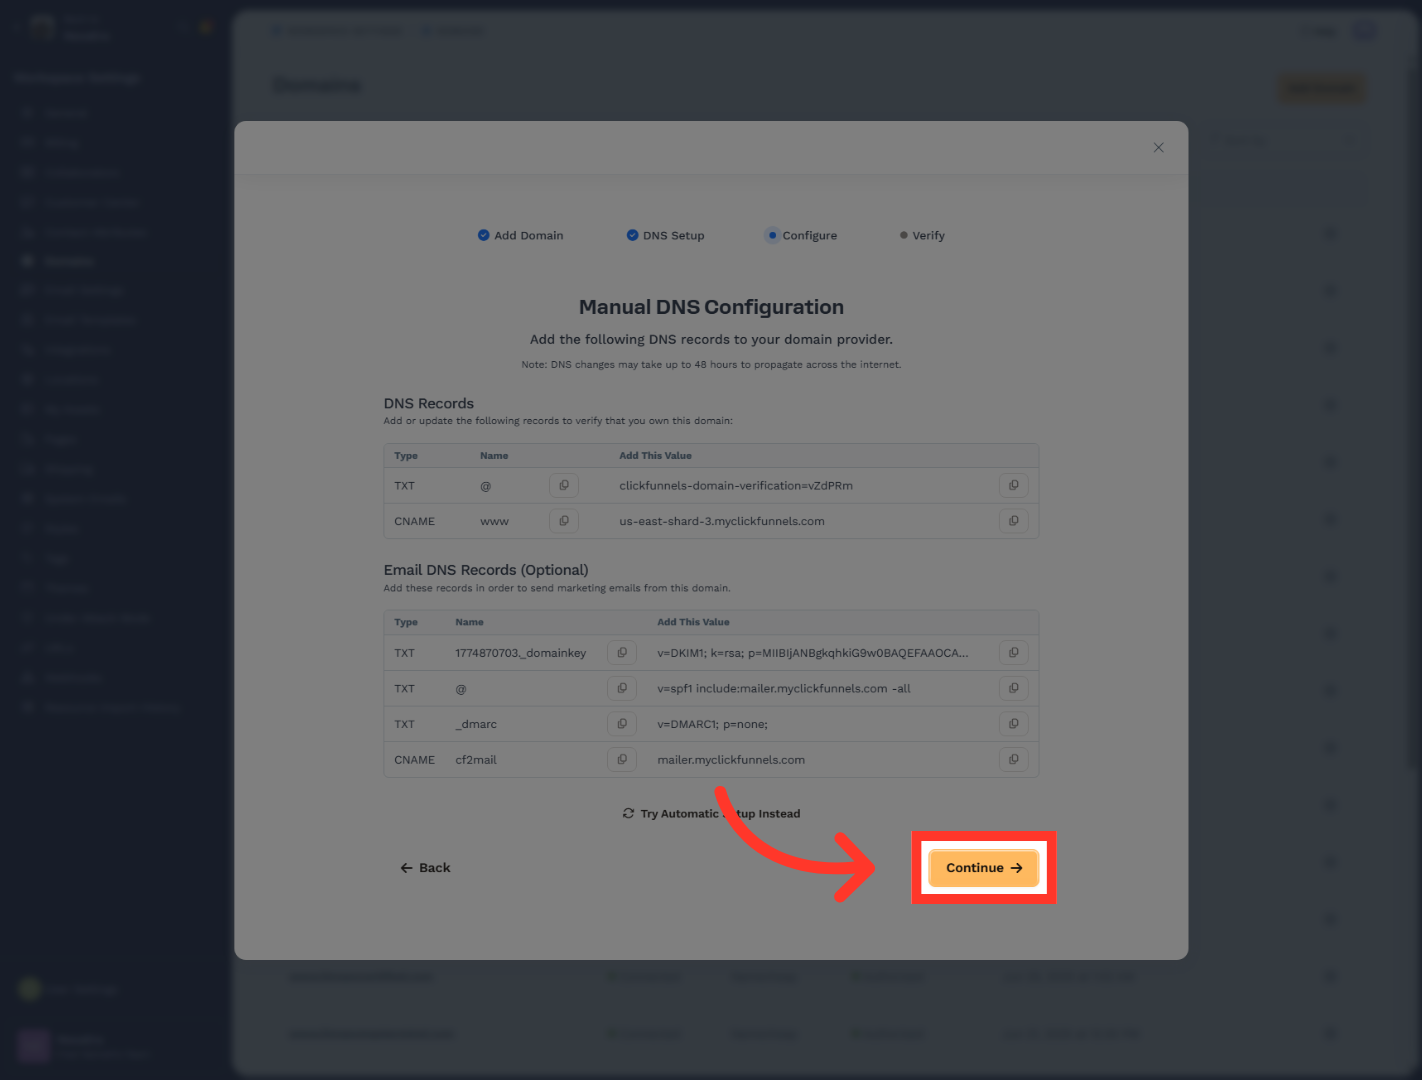
22. Proceed with Domain Setup
"ClickFunnels then walks you into DNS setup. If automatic setup is not available, continue with the manual configuration steps."
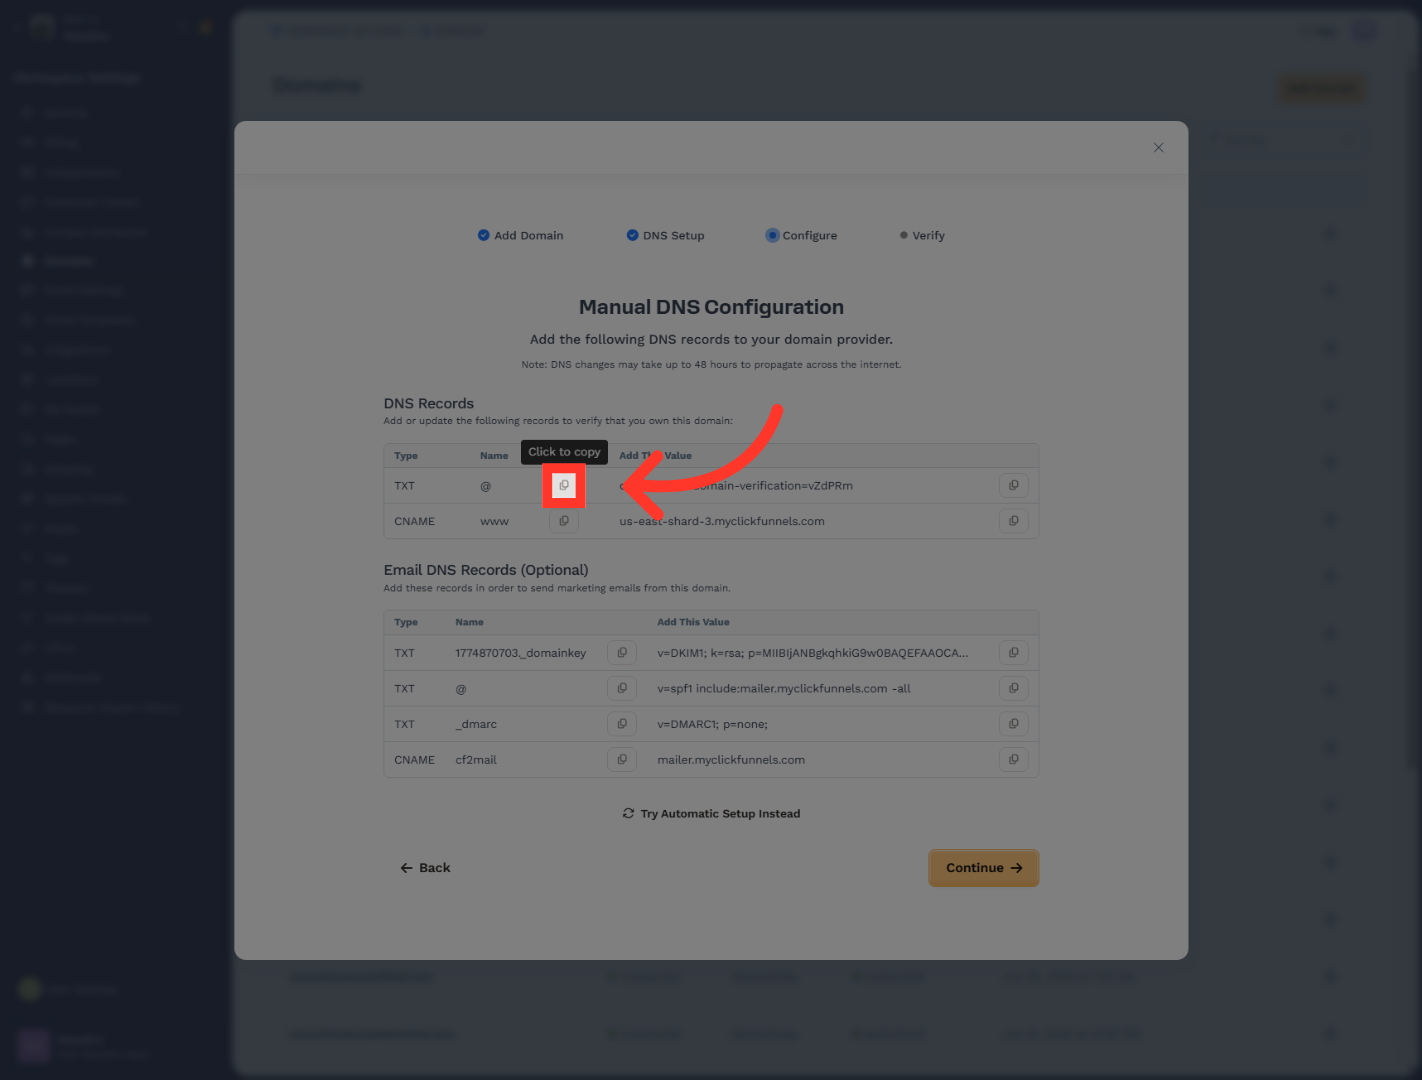
23. Click to Proceed
"Follow the ClickFunnels instructions to add the required DNS records. This includes selecting the correct record type, entering the record values, and using the correct host or subdomain where needed."
24. Save DNS Configuration
Once all the necessary DNS records are added properly on Outranker.Ai Click "Save" to apply the DNS record changes in Outranker.
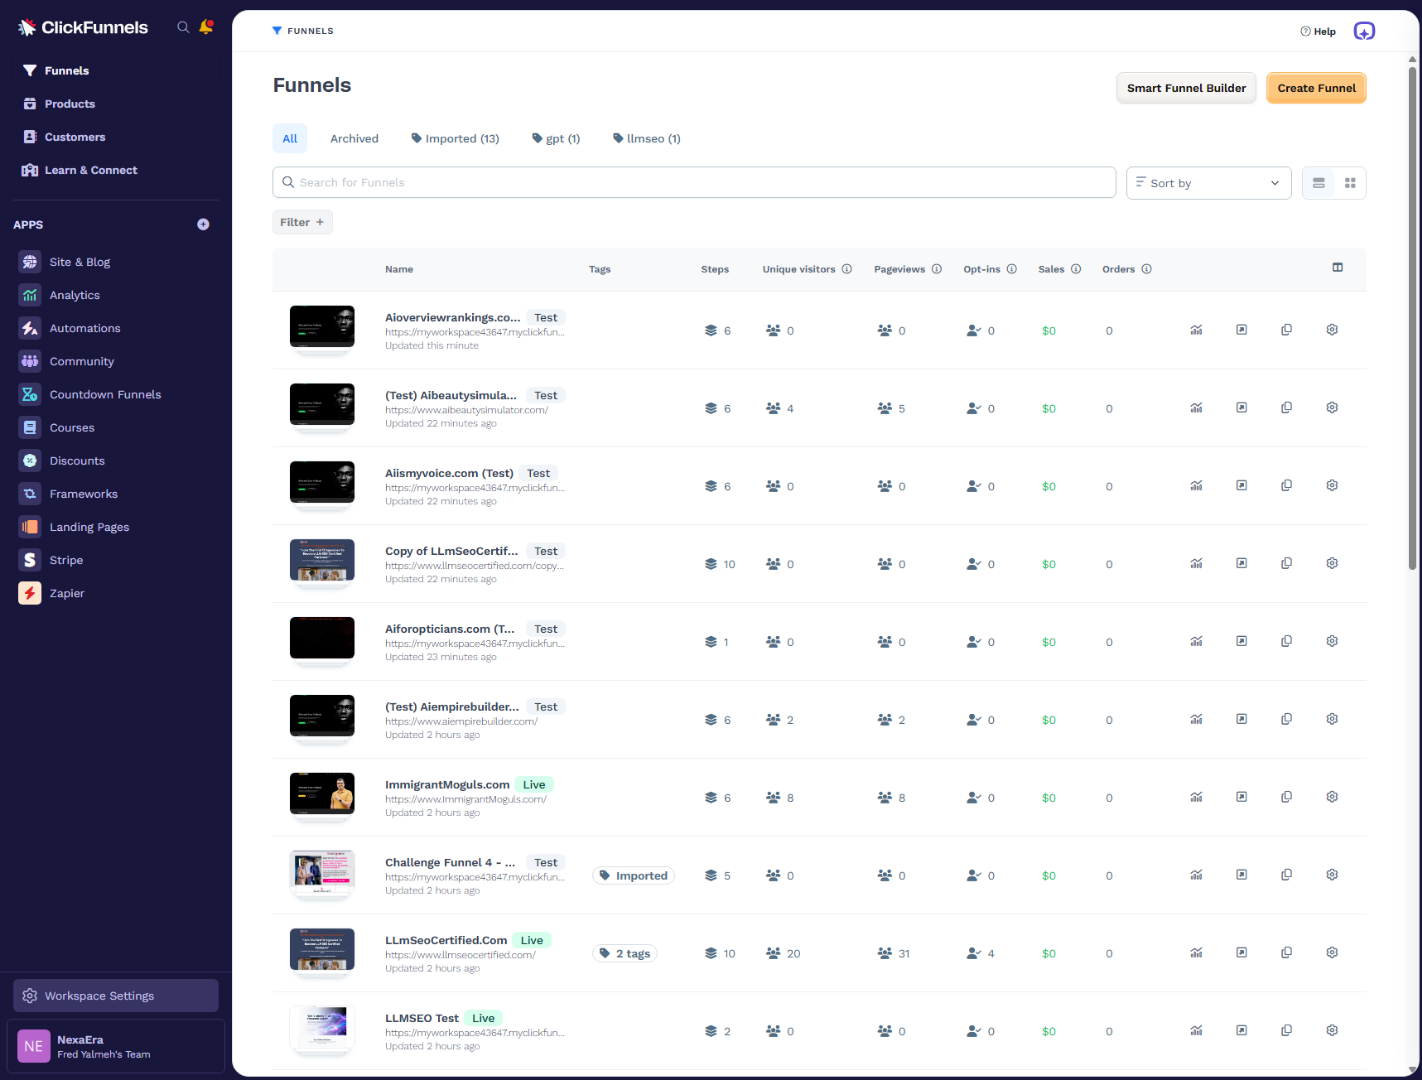
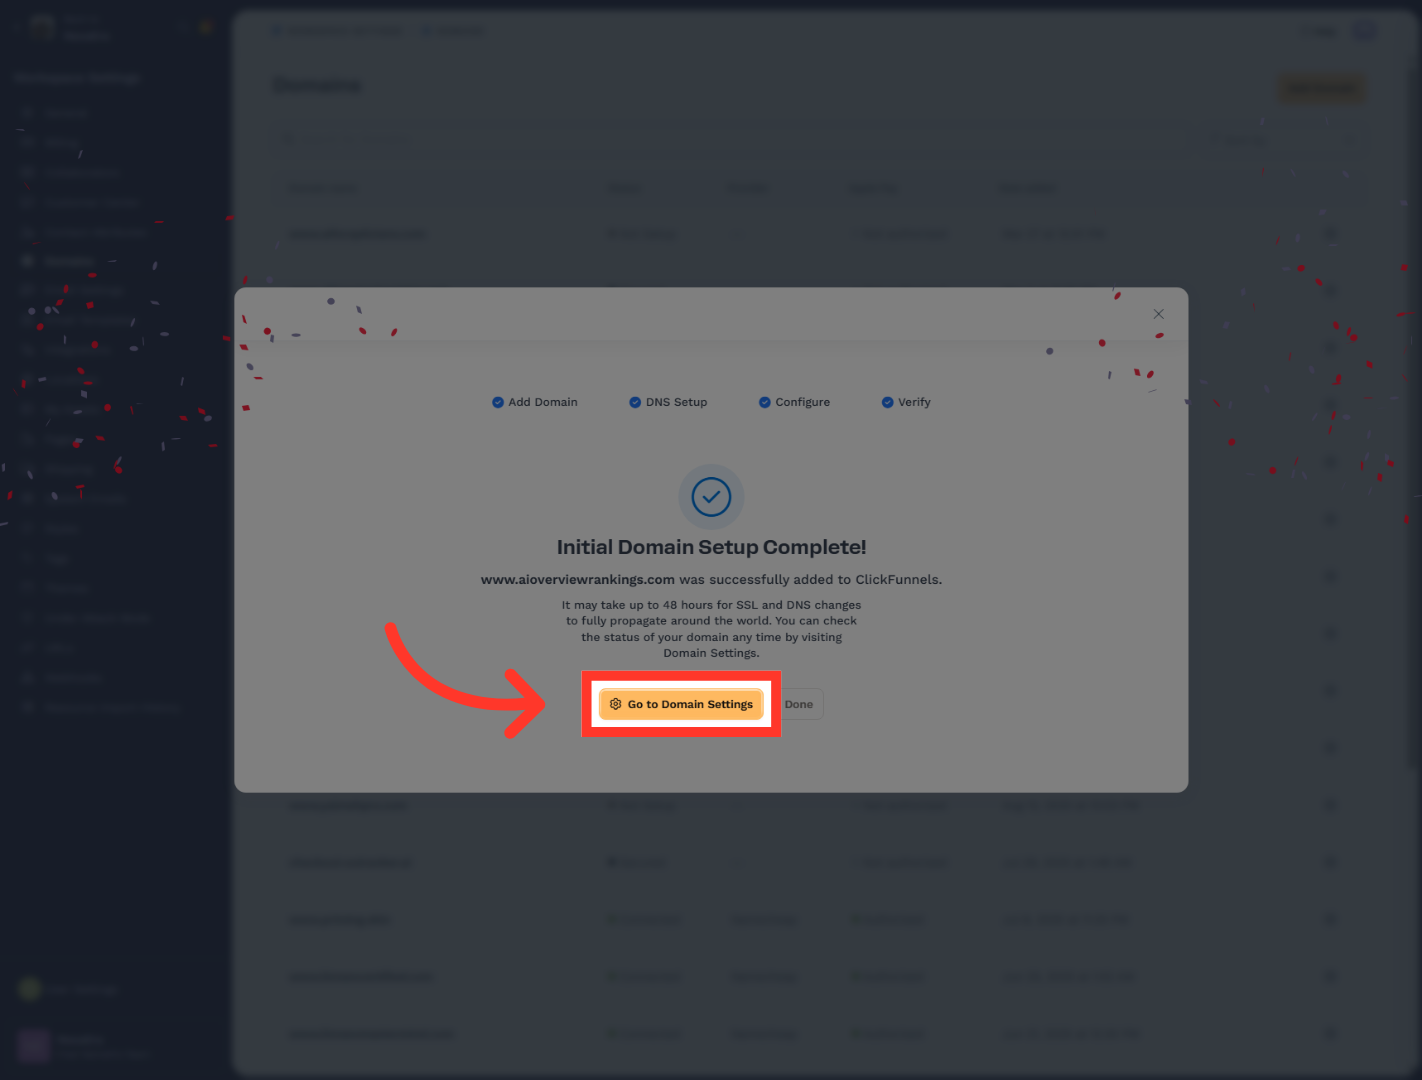
25. Continue Domain Setup
"Once the domain is ready, go to Funnels in ClickFunnels and open the funnel you want to update."
26. Open Domain Settings
"In the funnel settings, open the Domain dropdown and select the site domain you want this funnel to use. This connects the funnel to the domain you just configured." "Finally, click Update Funnel to save the configuration. Your funnel is now connected to the selected domain."
"You’ve now completed the full domain and funnel setup by connecting the domain in Outranker, updating nameservers in Namecheap, finishing the domain setup in ClickFunnels, and assigning that domain to your funnel. From here, you can verify that the funnel loads correctly on the live domain and continue with any final testing or page updates."
