This tutorial guides you through setting up a personalized SMTP for your brand within the agency suite.
Go to www.outranker.ai
1. Introduction
“In this video, you’ll learn how to configure a personalized SMTP inside the Agency Suite.” “This allows all emails — proposals, notifications, and client communication — to be sent from your own domain instead of the platform.” “The result? Better deliverability, stronger branding, and more professional communication.”

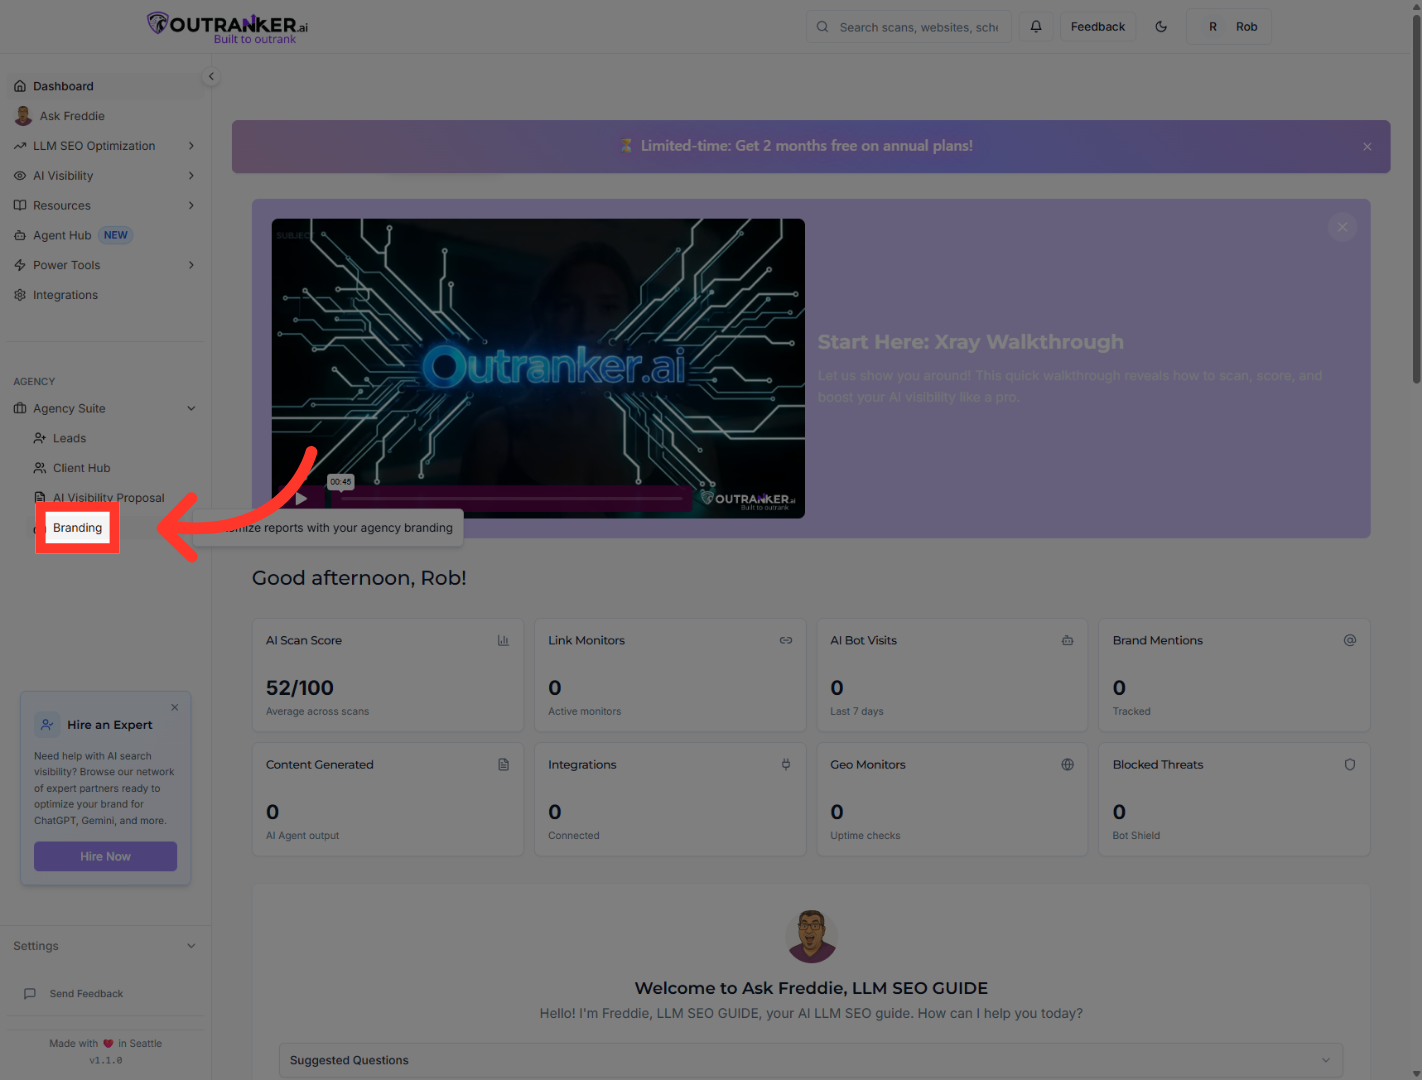
2. Access Branding Settings
“Start by logging into Outranker.ai.” “From the left menu, open Agency Suite, then click Branding.”
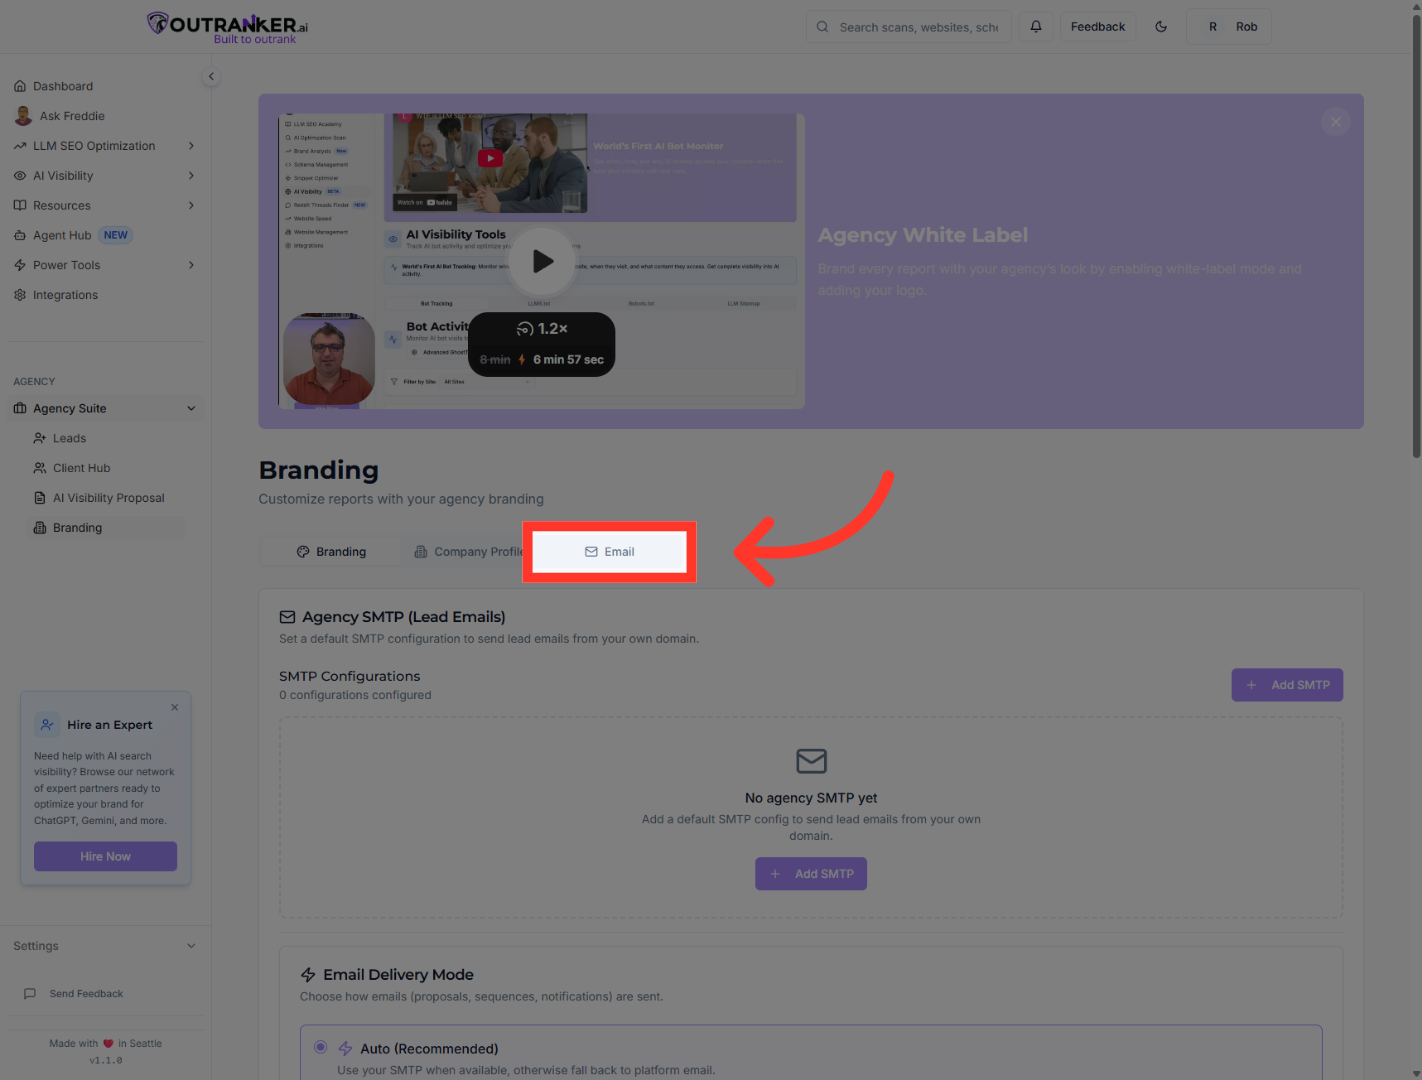
3. Open Email Settings
“Next, select the Email tab to access SMTP configurations.”
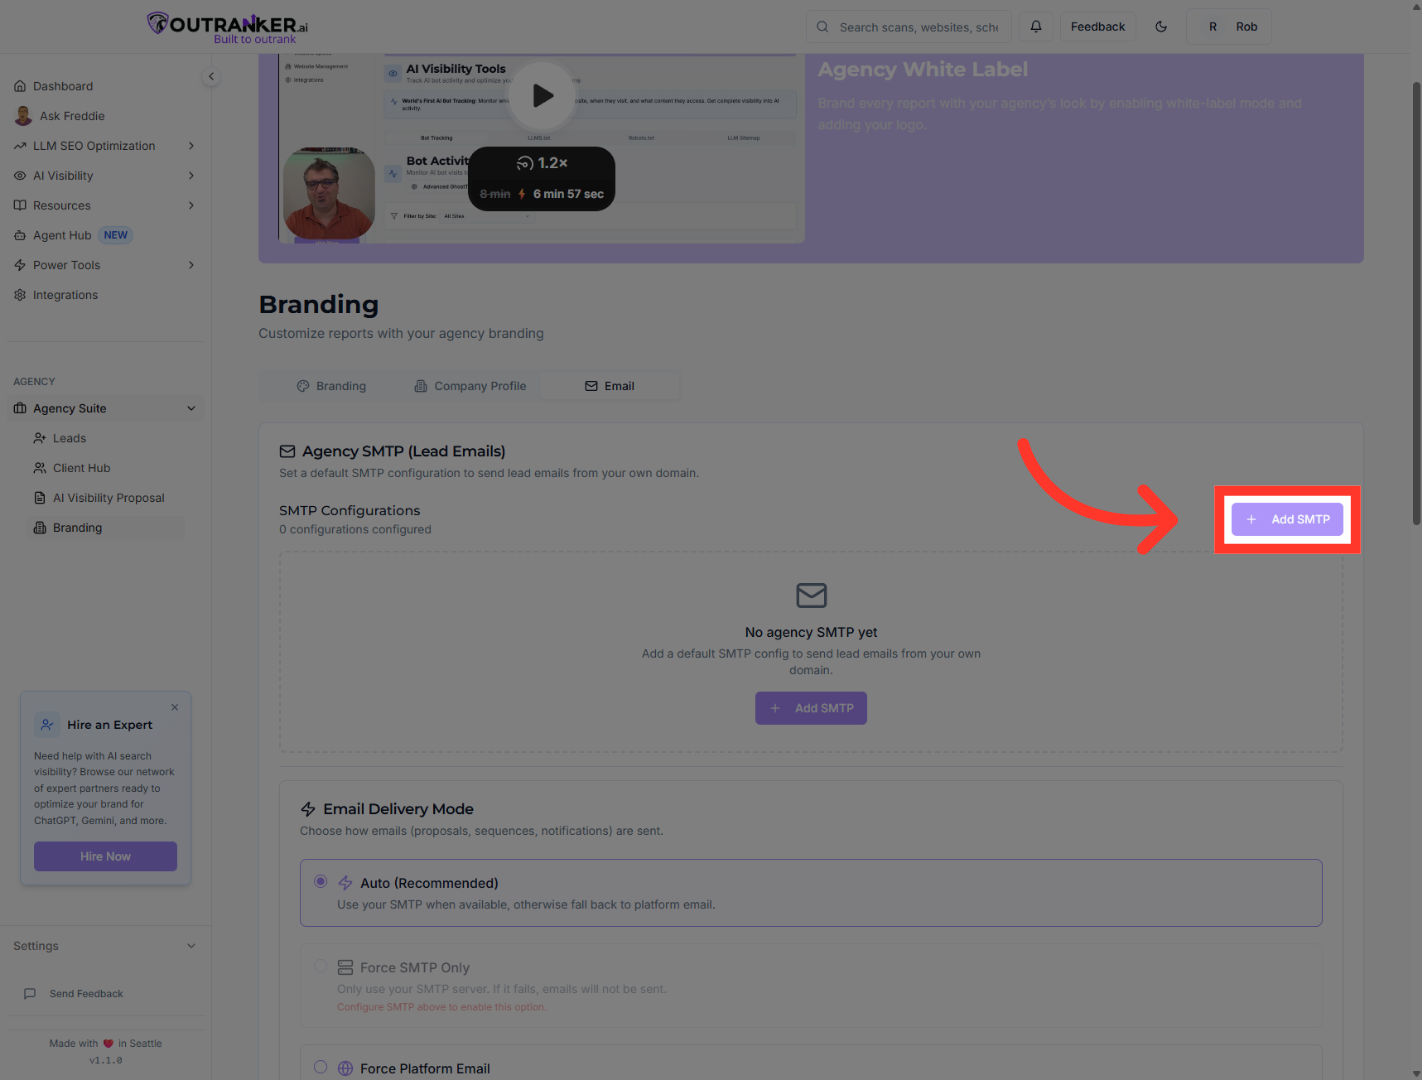
4. Add New SMTP Configuration
“Click Add SMTP to create a new configuration.”
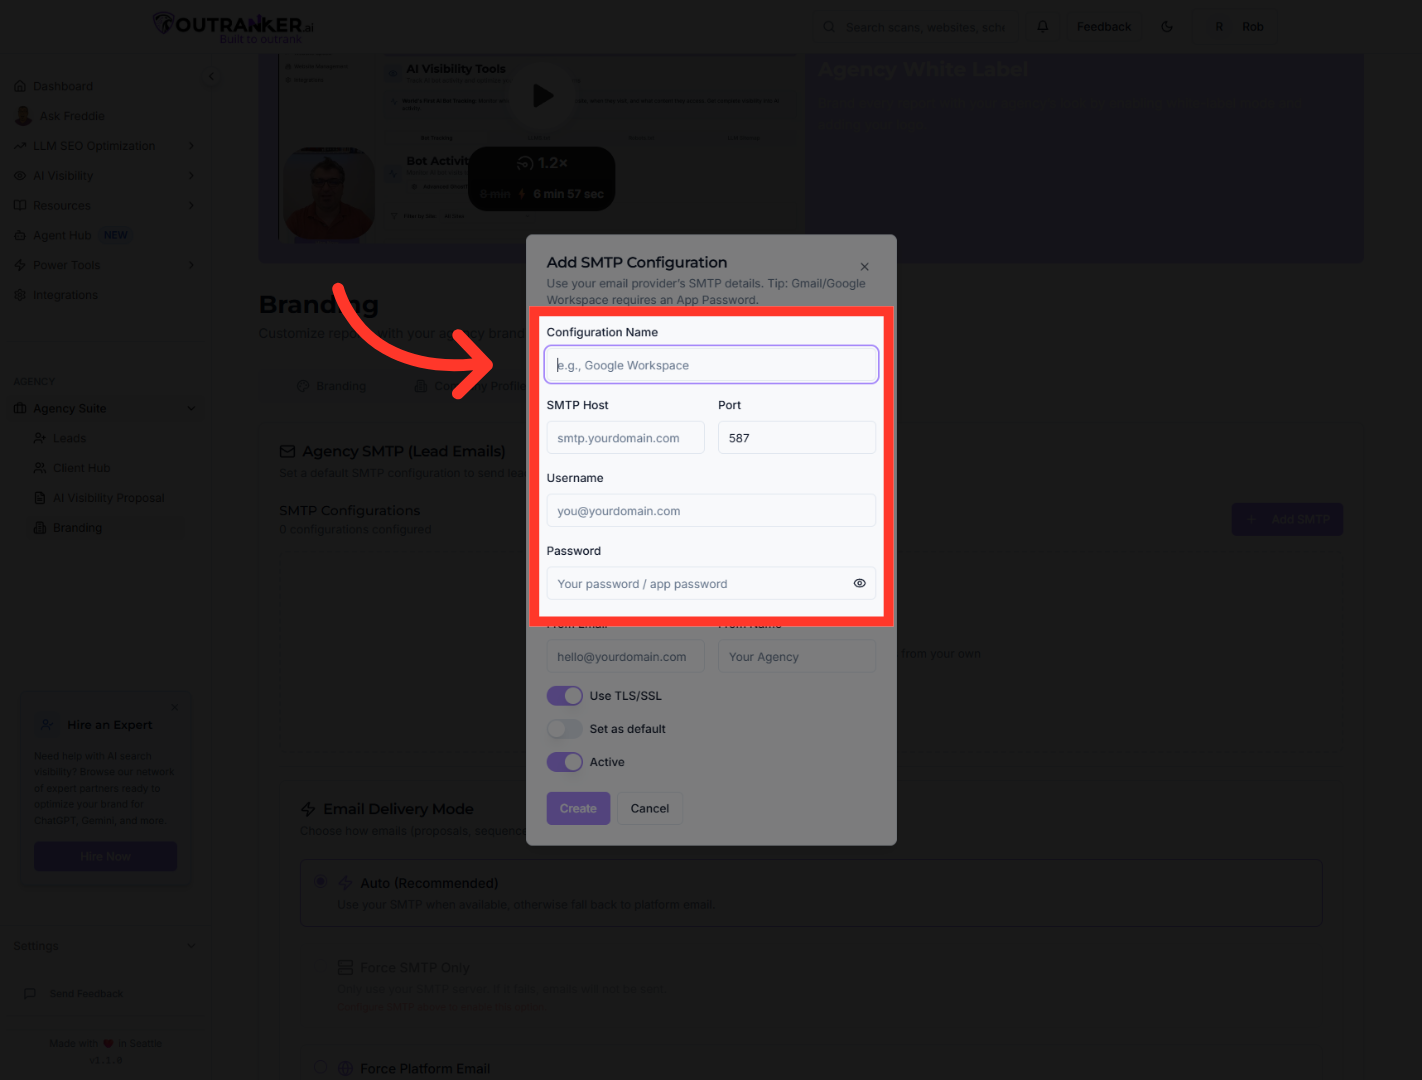
5. Select Configuration Name Field
“Give your configuration a name — for example, SendGrid or Gmail.” “Enter your SMTP host address — such as smtp.sendgrid.net.” “Then enter your SMTP username and password.”
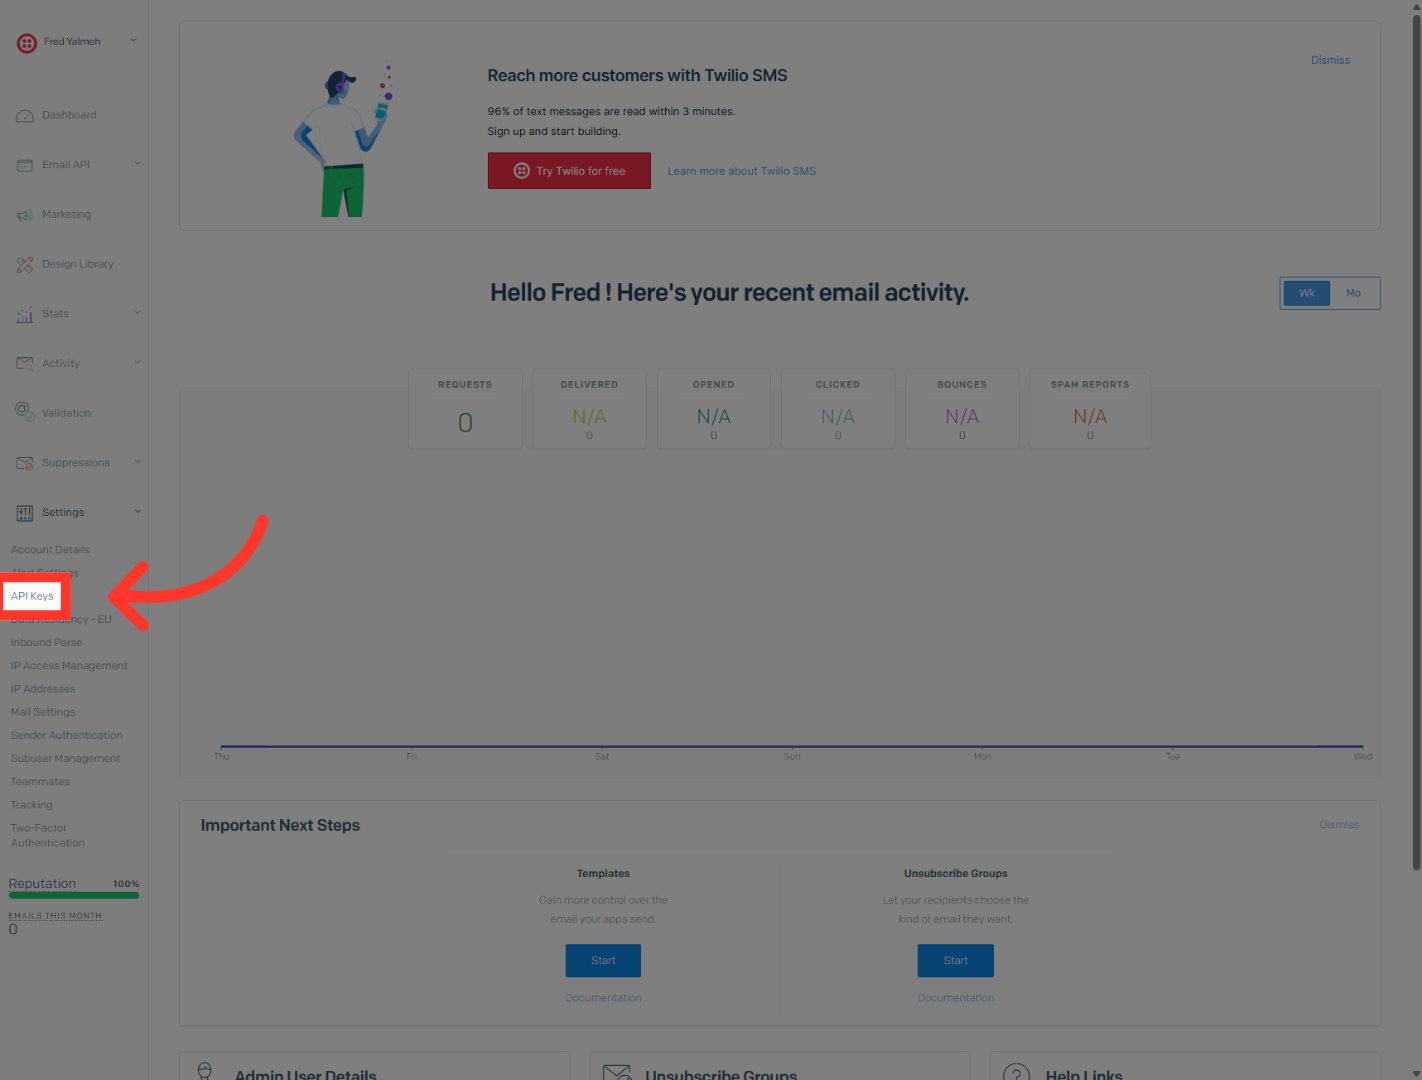
6. Open API Keys Section
“If you’re using SendGrid, you’ll need to generate an API key.” “Log into SendGrid, go to Settings, then open API Keys.”
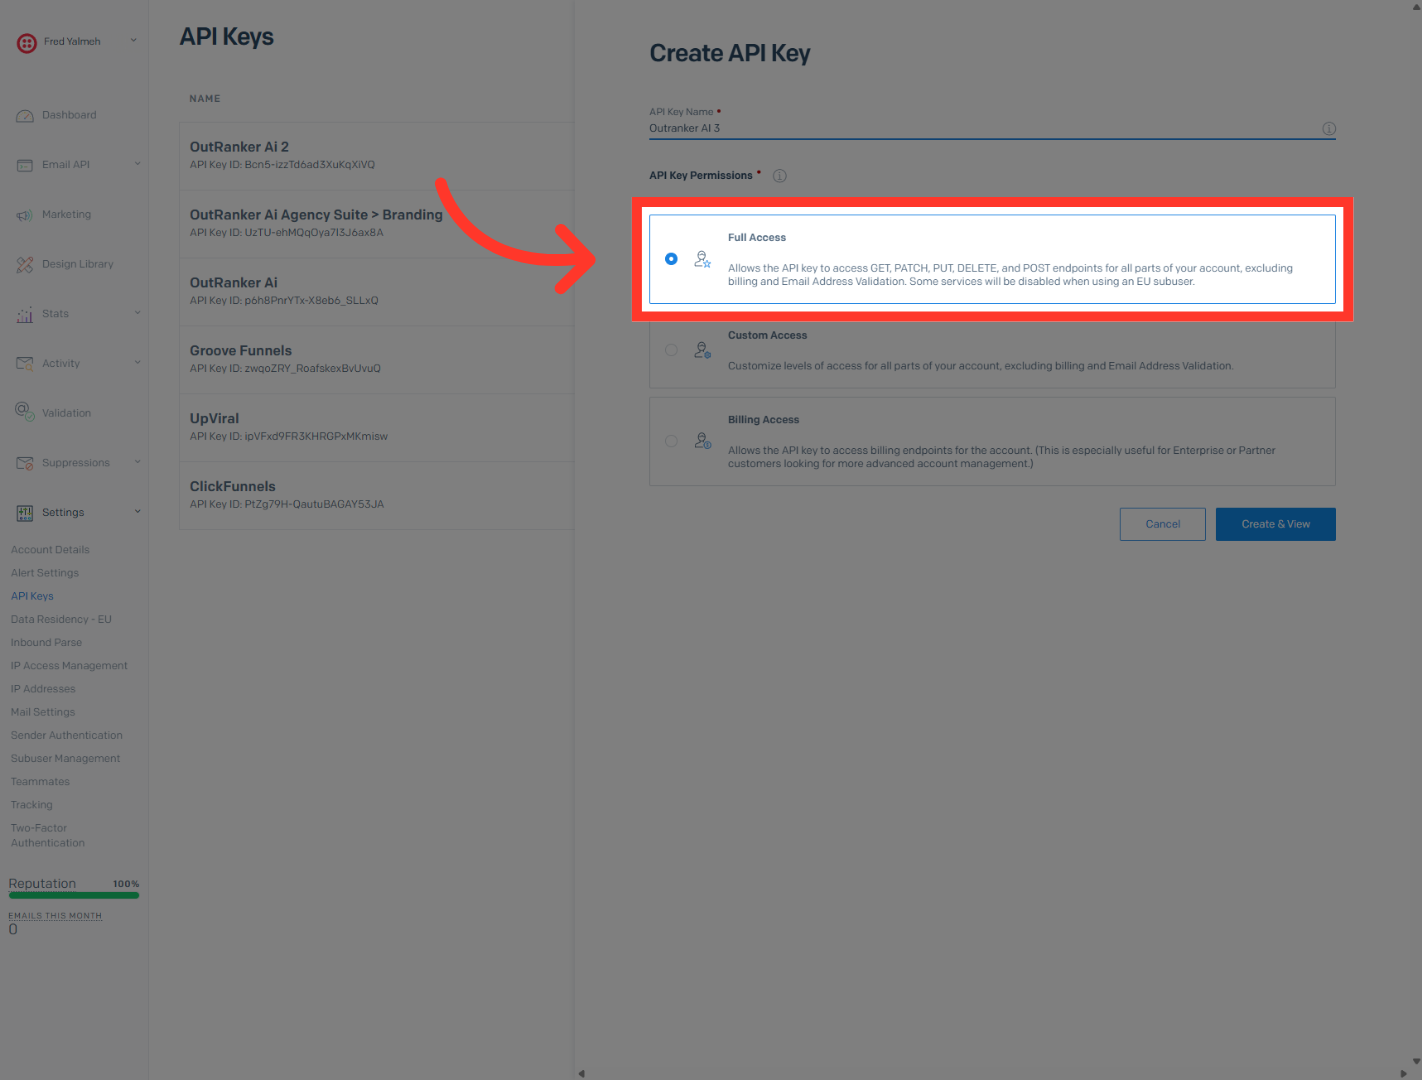
7. Set API Key Permissions
“Click Create API Key, assign it a name, and select Full Access.”
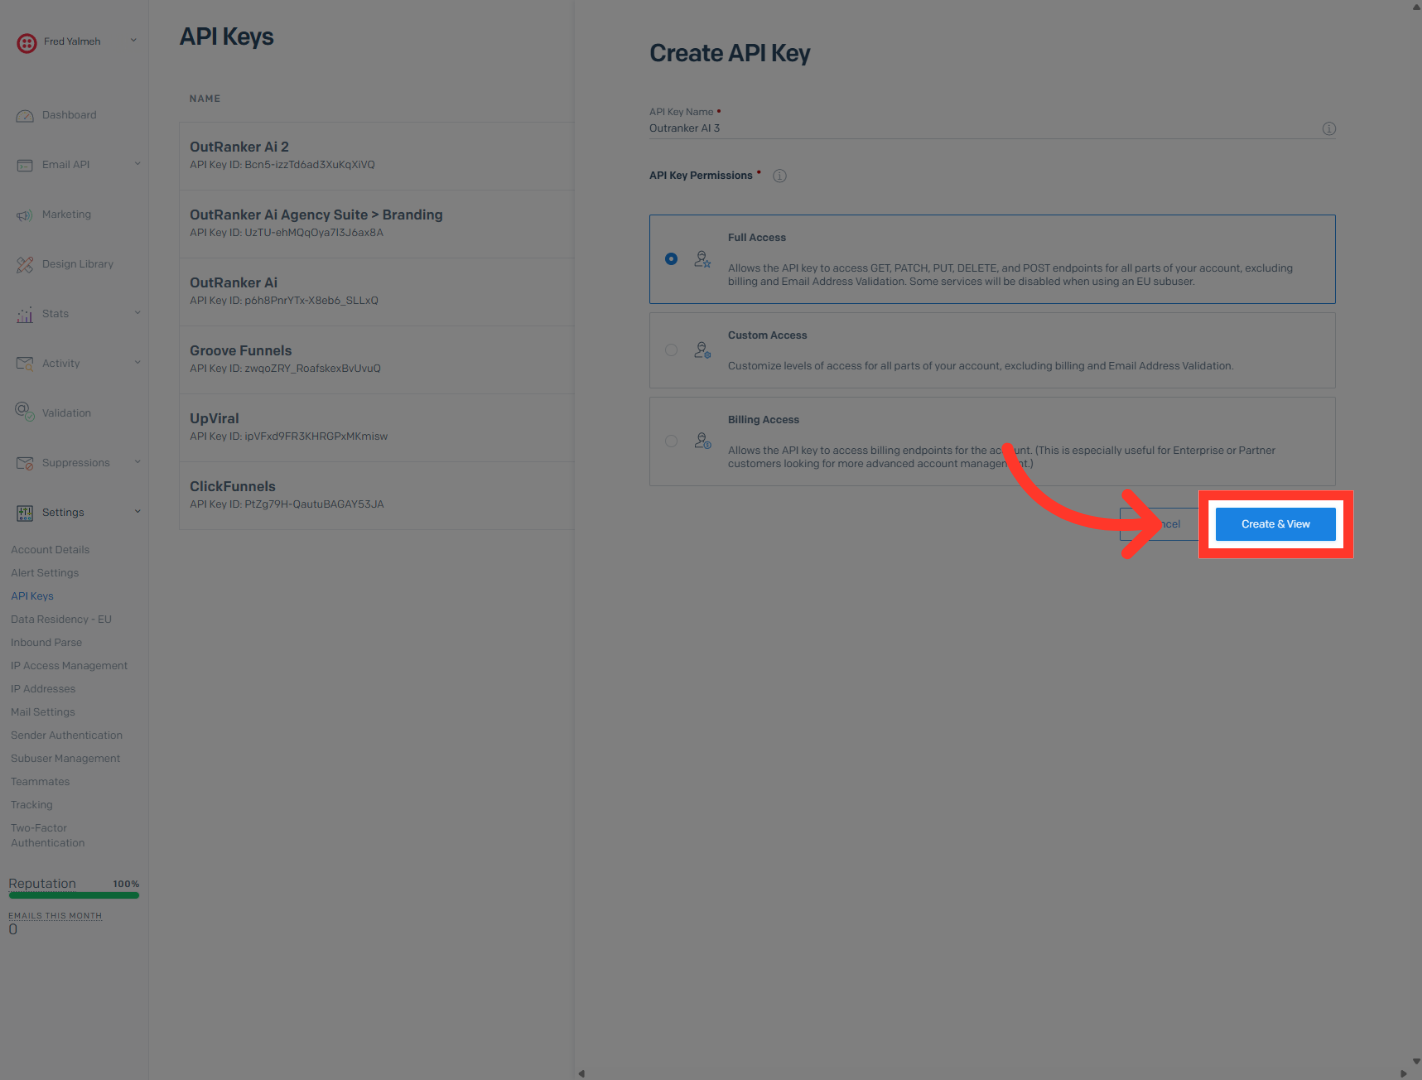
8. Create and View API Key
Click Create & View to generate the API key and display it for copying.
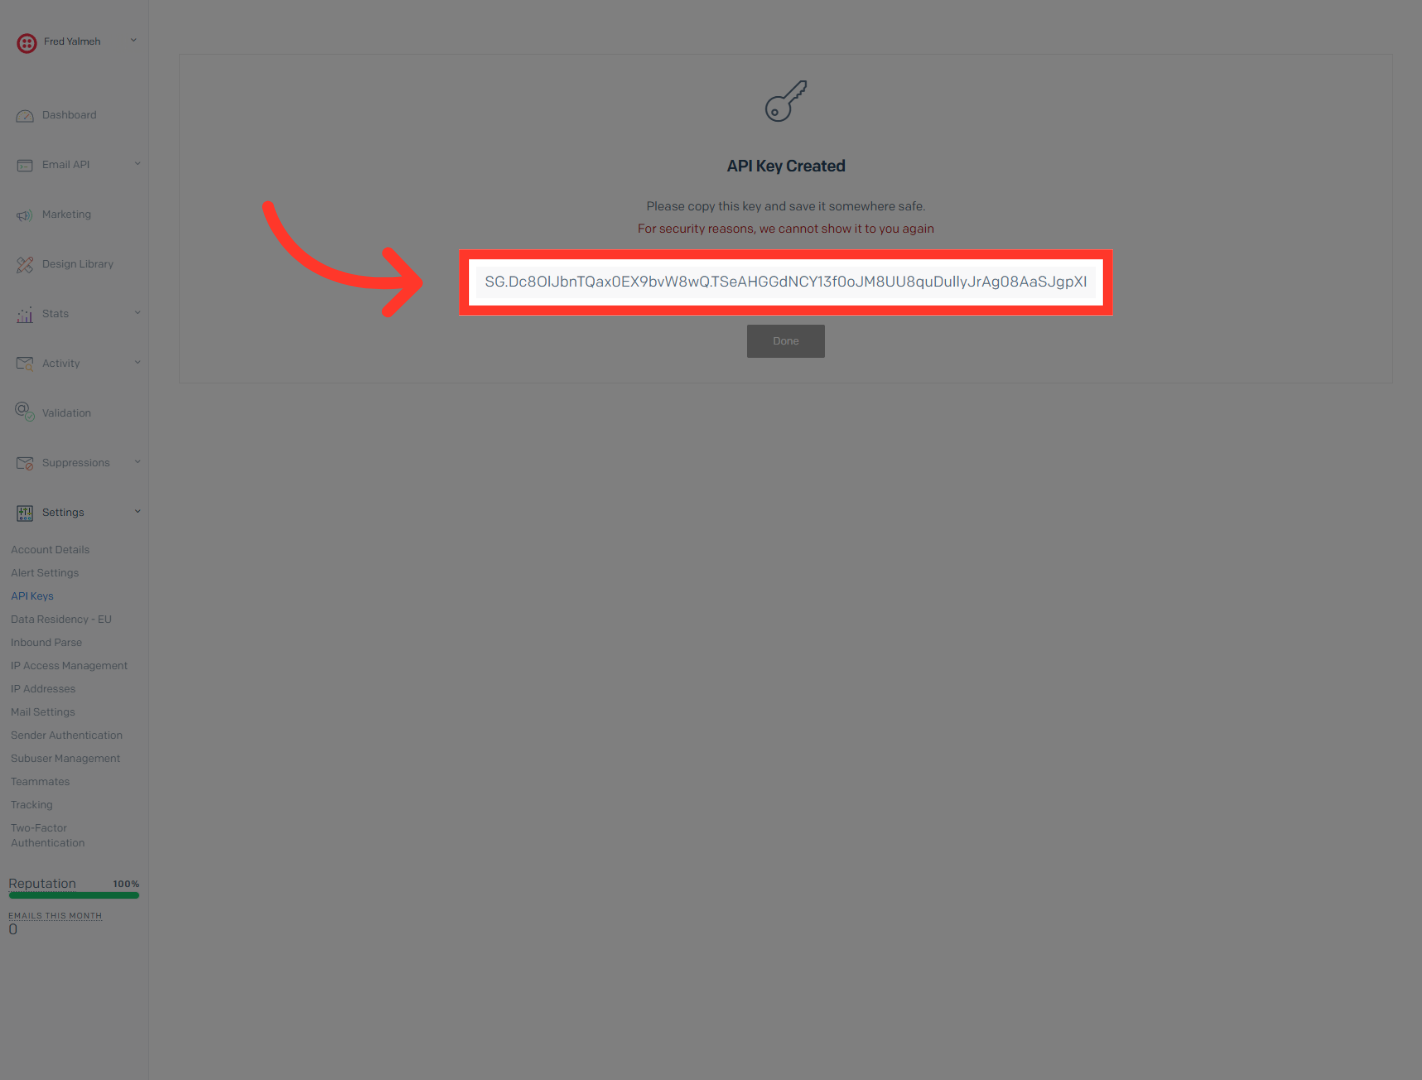
9. Copy API Key
“Click Create & View, then securely copy the API key.” “Return to Outranker and paste it into your SMTP username field.”
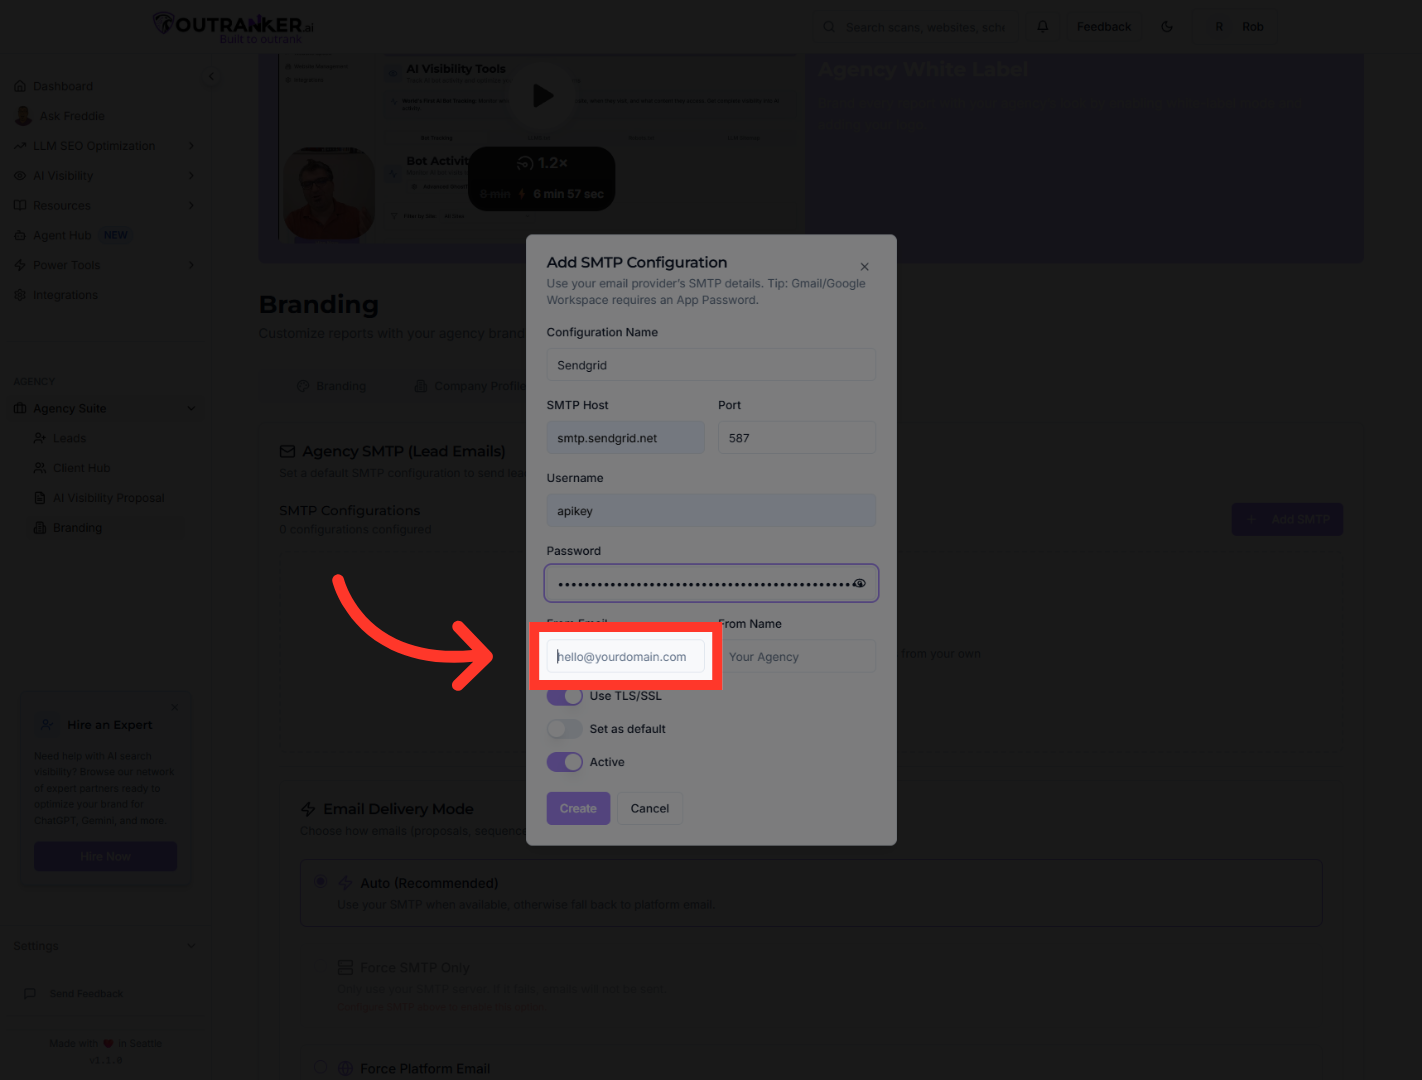
10. Select From Email Field
Click the From Email field to specify the email address that will appear as the sender.
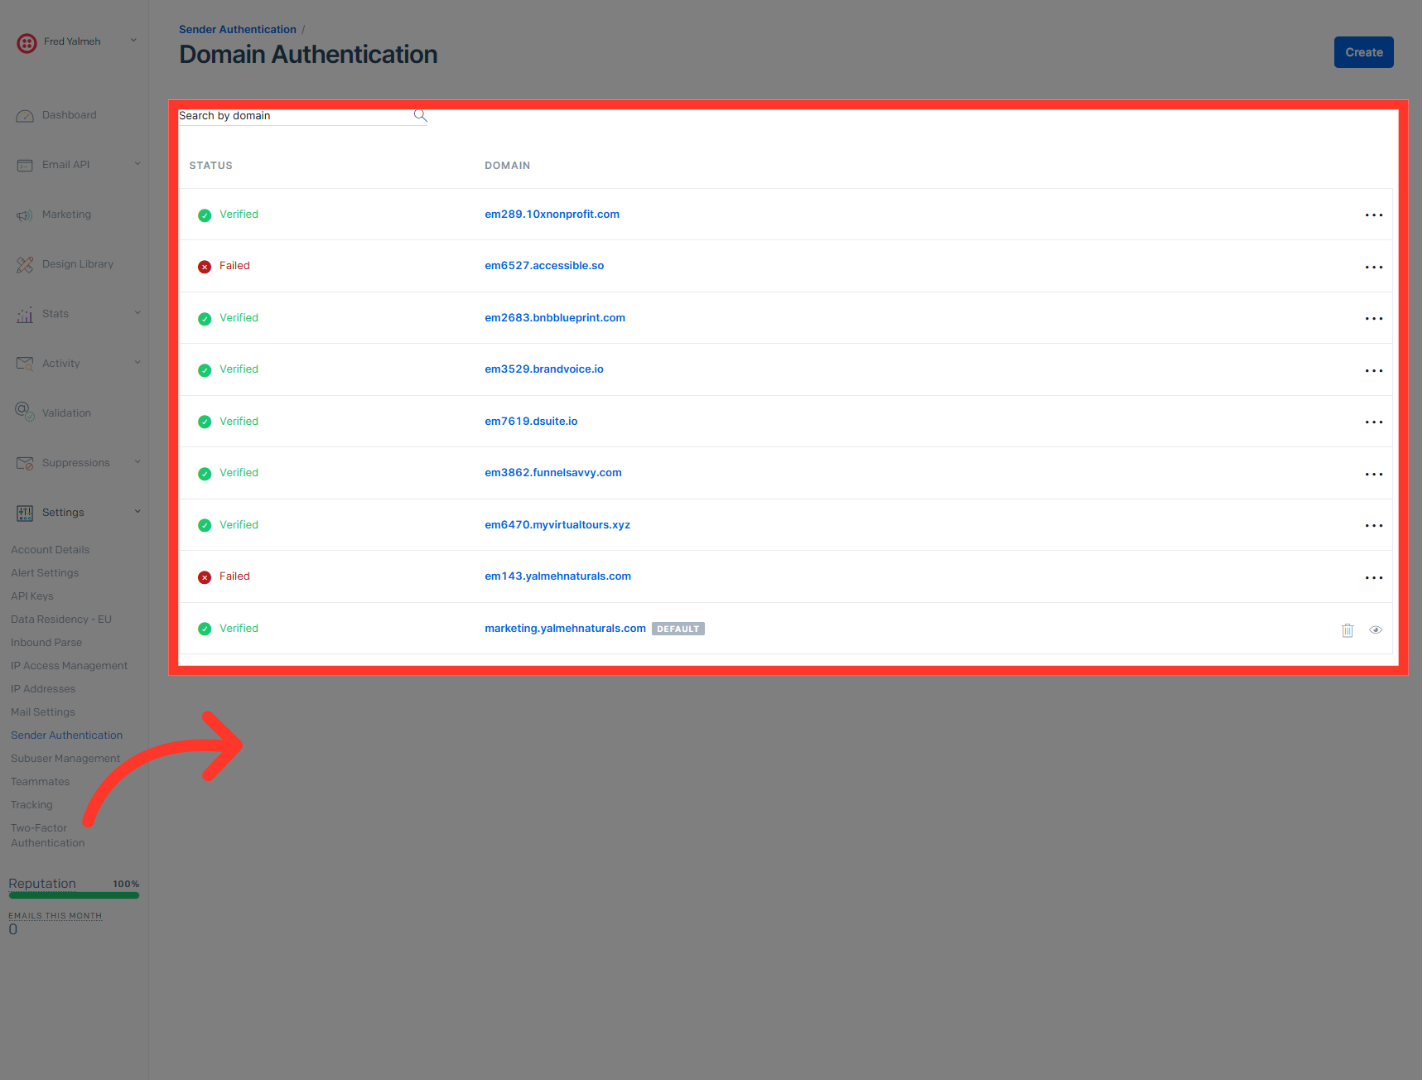
11. Select Verified Email
“Next, verify your sender email in SendGrid under Sender Authentication.” “Make sure your domain or sender email shows as verified.” “Then return to Outranker and enter your verified From Email address.” “Add your From Name — this is what recipients will see.”
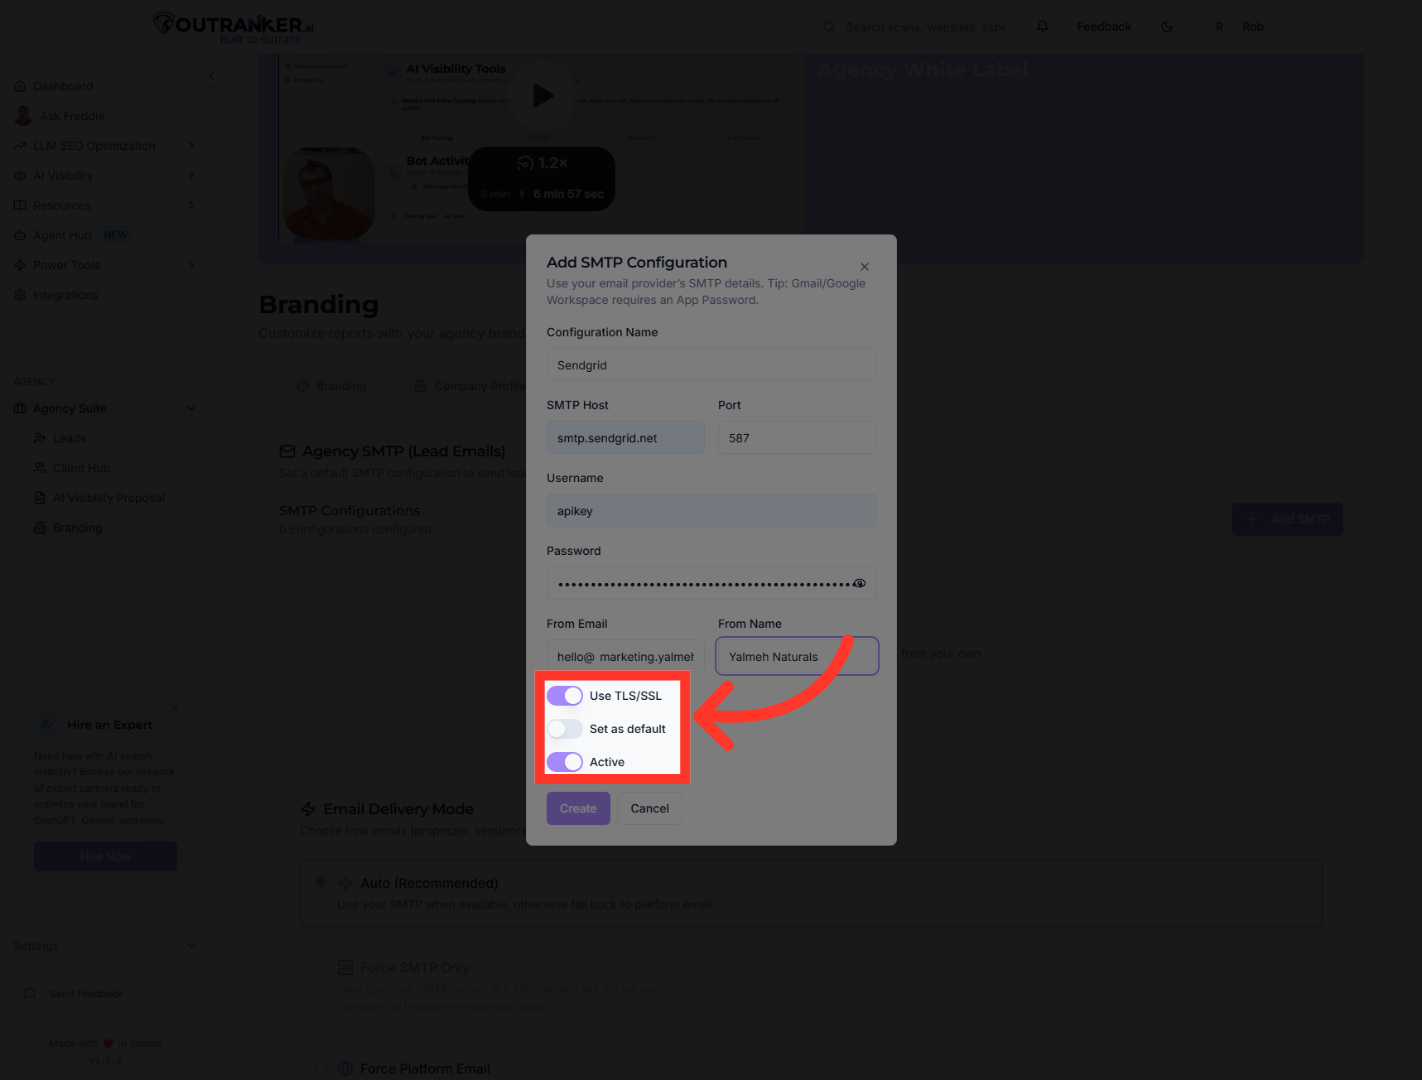
12. Set Default Email Configuration
“Set this configuration as your default SMTP.” “You can also enable fallback — which uses the platform’s email service if your SMTP is temporarily unavailable.”
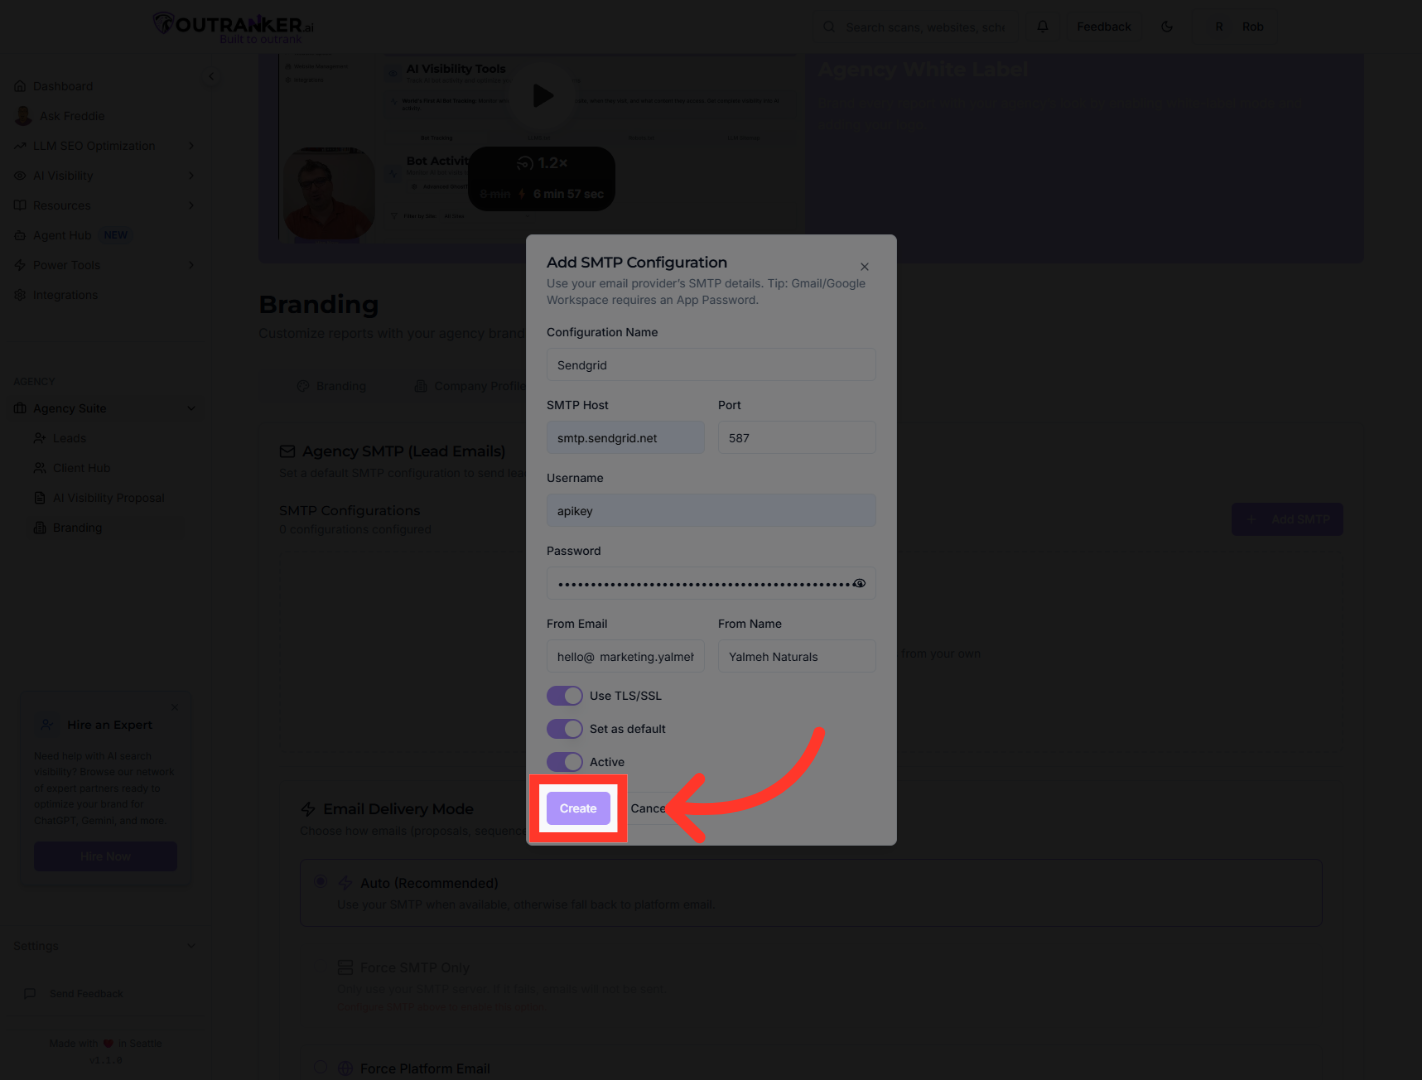
13. Create SMTP Configuration
Click Create to save your new SMTP settings and apply them to your brand.
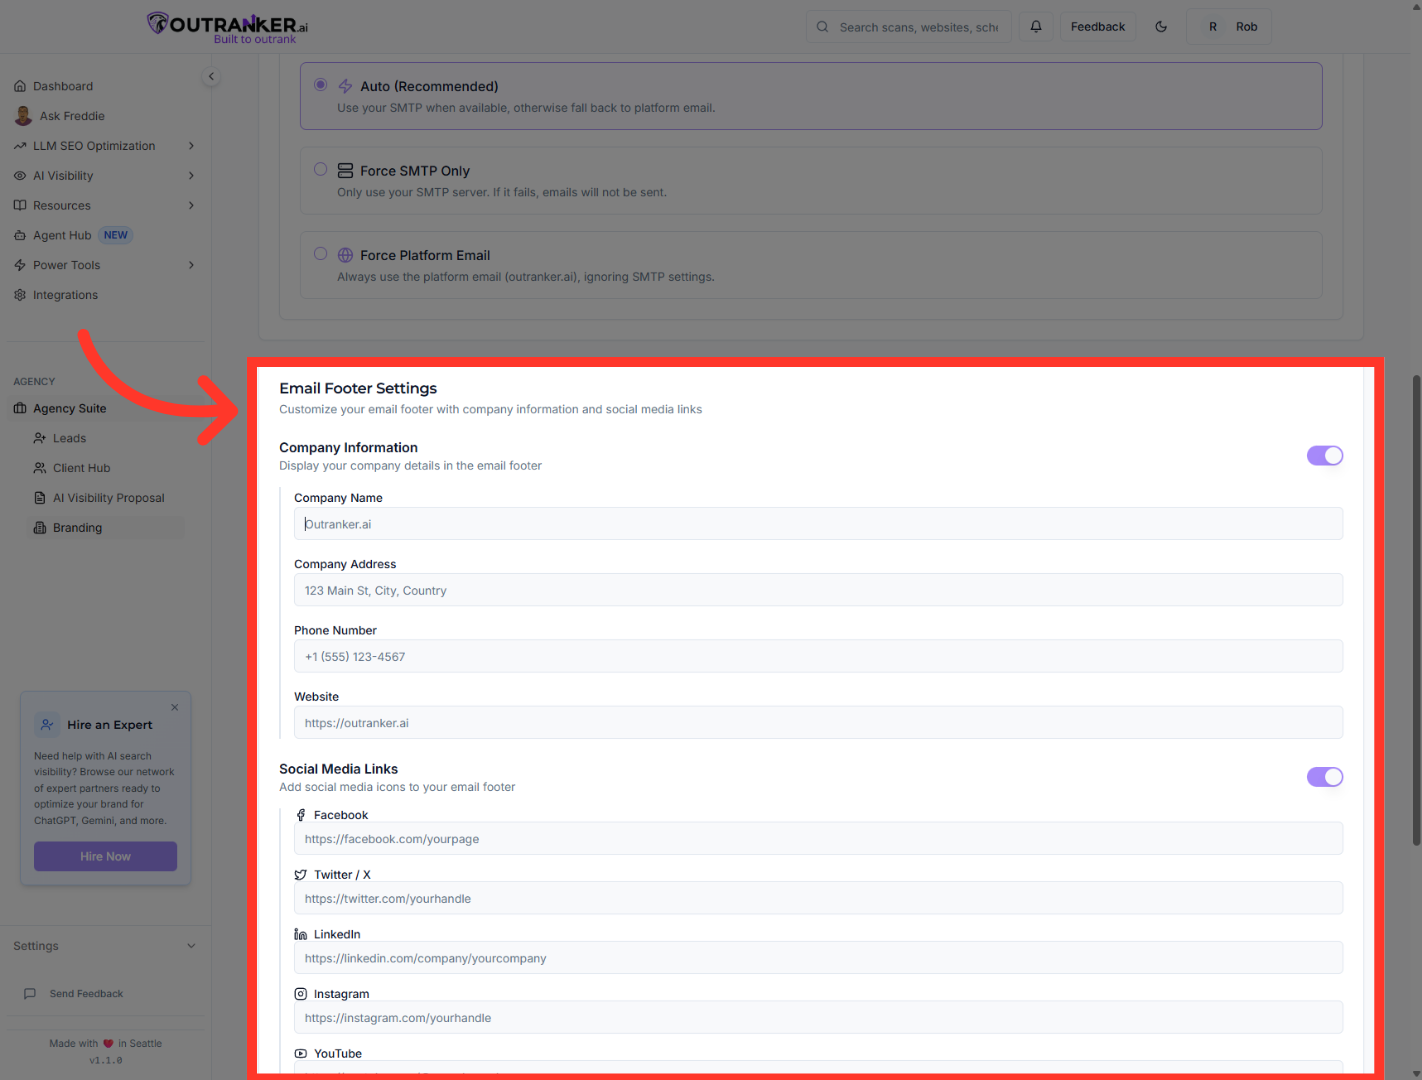
14. Select Company Name Field
“Now scroll to the email footer settings.” “Enter your Company Name.” “Add your business address and phone number.” “Include your website URL.” “You can also enable social media icons — Facebook, Twitter/X, LinkedIn, Instagram, or YouTube.” “Finally, add custom footer text if you’d like a personalized message or compliance note.”
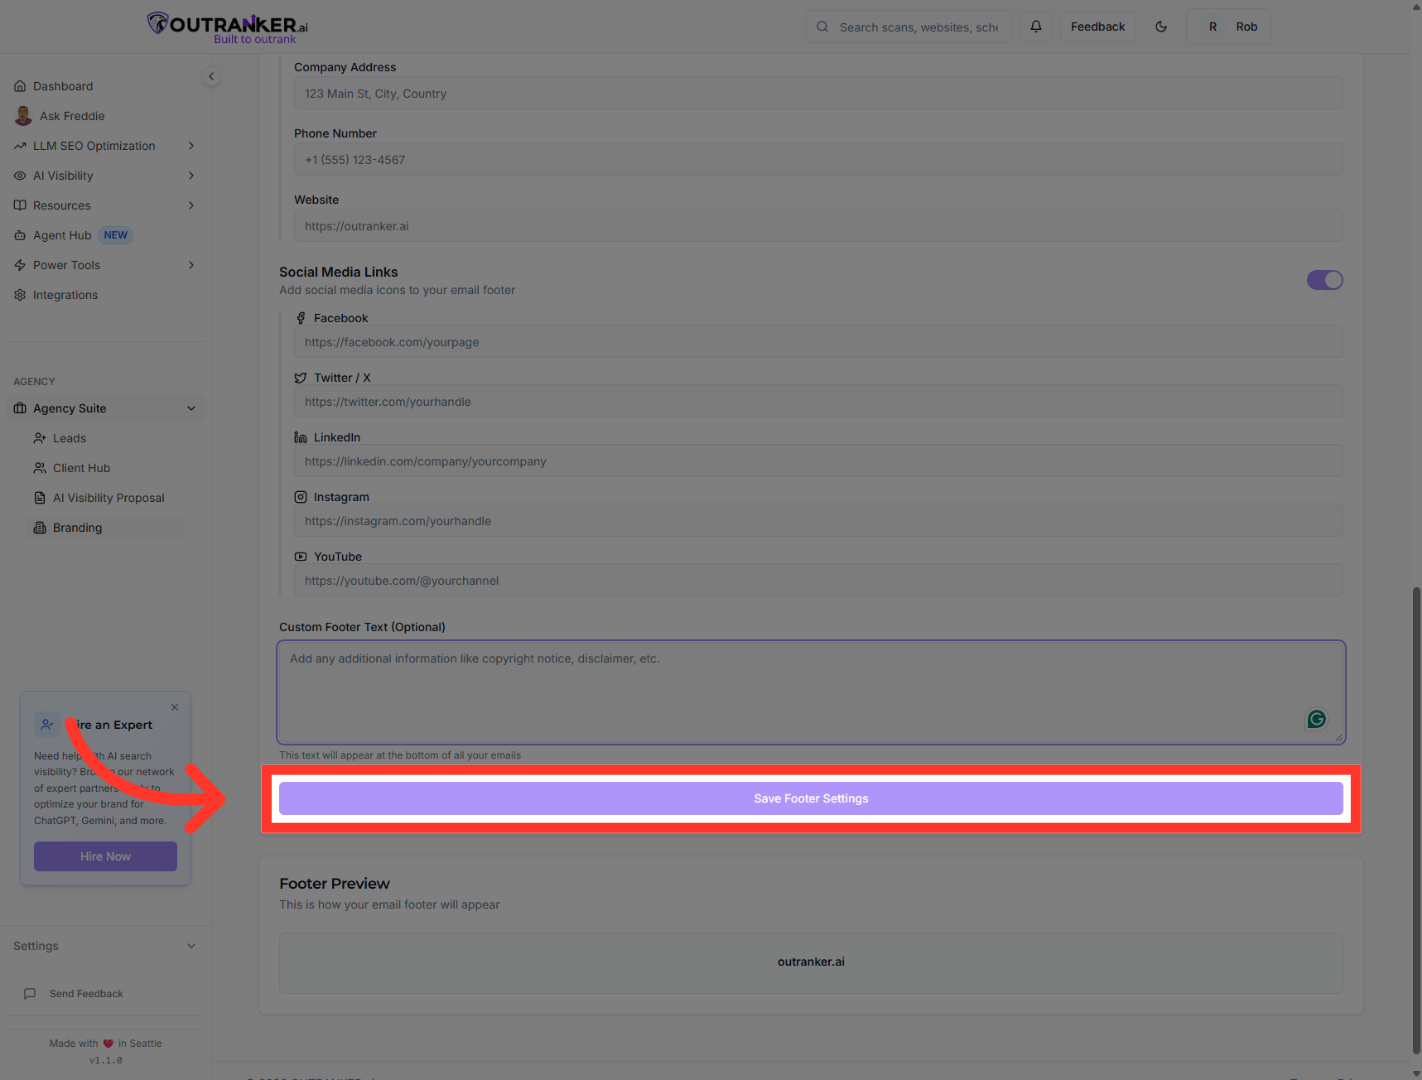
15. Save Footer Settings
“Click Save Footer Settings to apply everything.”
“You’ve now configured a personalized SMTP inside the Agency Suite.” “Your emails will send from your own domain, with improved deliverability and fully branded footers.” “This ensures every client interaction looks professional and builds trust.” “Next, we’ll show you how to test your email delivery and optimize open rates.”
